Centuries-Sewing

Tag: 15th Century

  • Book Series Review: Historical Clothing From the Inside Out

    Book Series Review: Historical Clothing From the Inside Out

    Disclaimer: I was sent a free copy of these books for review purposes. However, all thoughts, opinions, and criticisms are my own.

    The late 15th century is not my area of expertise even after making a few kirtles that I consider “in the style of”.

    So when I was asked to review a new series of books on the late 15th century I was very very eager. I love sinking my teeth into new research and learning techniques, especially for an era I have only passing knowledge in.

    The Books

    The two books in this series (one for men and one for women) are slim volumes each coming in at only 48 pages each, but the pages are well used.

    The introduction explains the scope of the handbook, its focus on Scandinavian source material with some allowances being made for northern German influence.

    This made me very happy. There is often a strong temptation to cherry pick from several different sources across an era due to lack of extant garments or access to new information.

    The next few pages cover the historical context of the period which I will be reading more up on just from the short introduction. I had not run across the Kalmar Union before this and lost a few hours reading various Wikipedia articles.

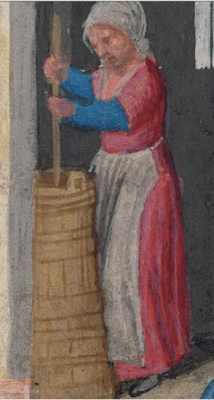
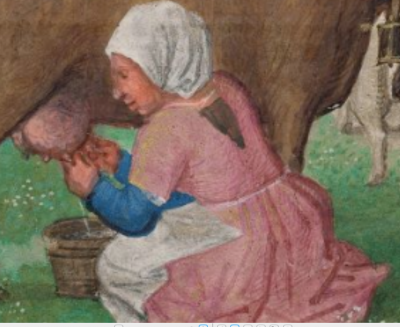
    There is a nice collection of images giving an overview of the general aesthetic of the era along with an explanation of the fashionable silhouette. The rest of this section also covers dyes, with a very nice natural dye color chart, fabrics, some hand sewing techniques, and where to use which type of stitch.

    At this point the books diverge and we get into the contents of the wardrobe.
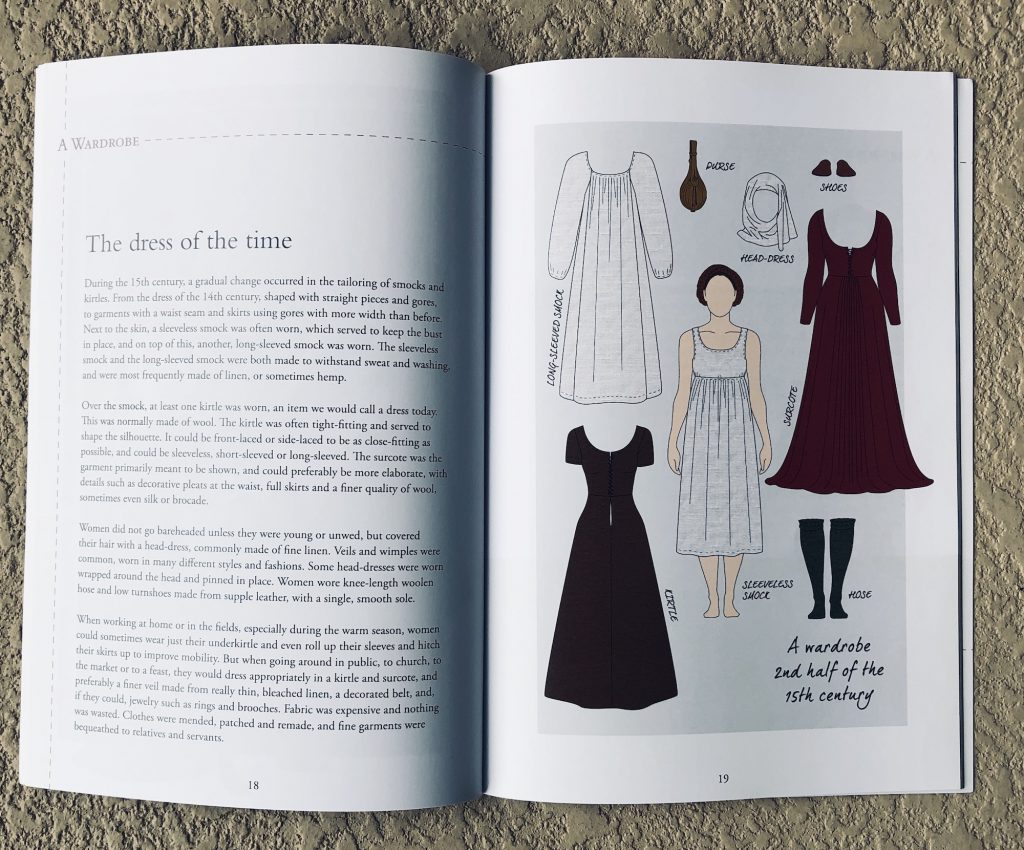
    Women’s Clothing

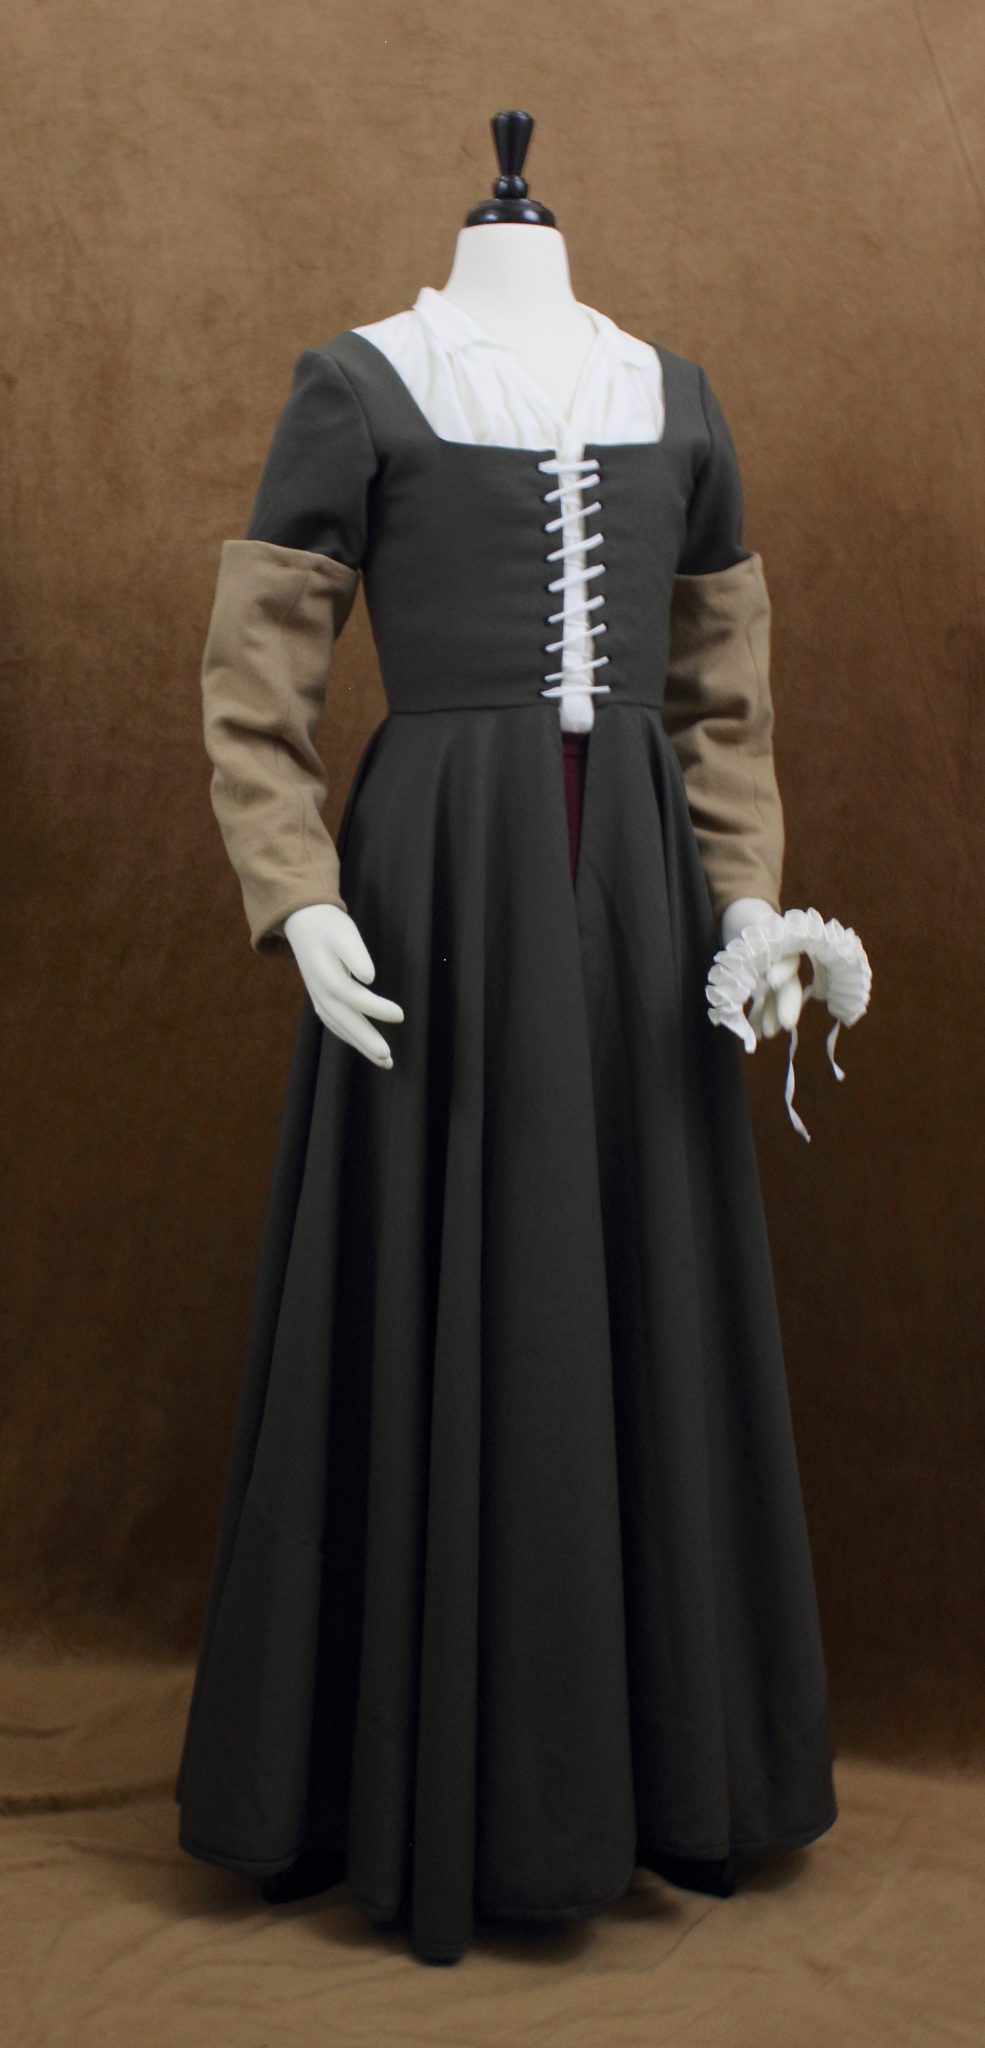
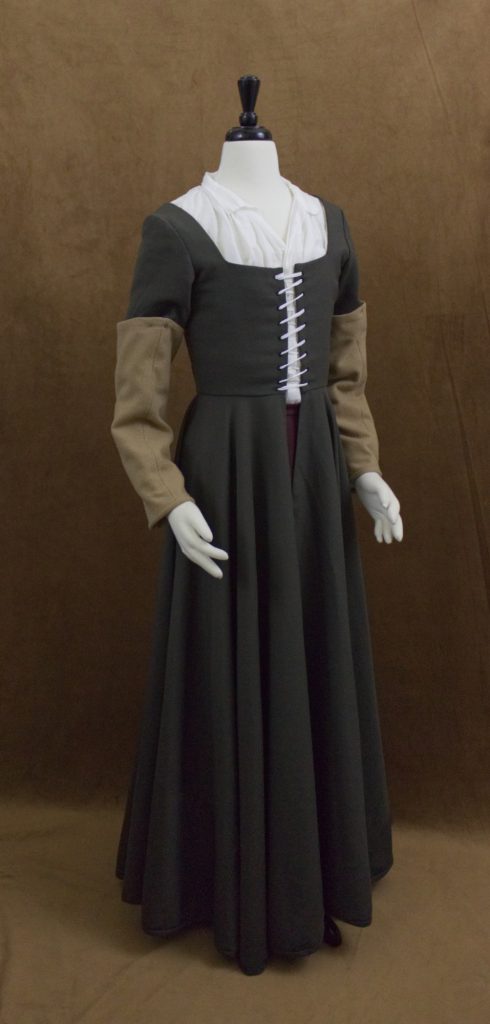
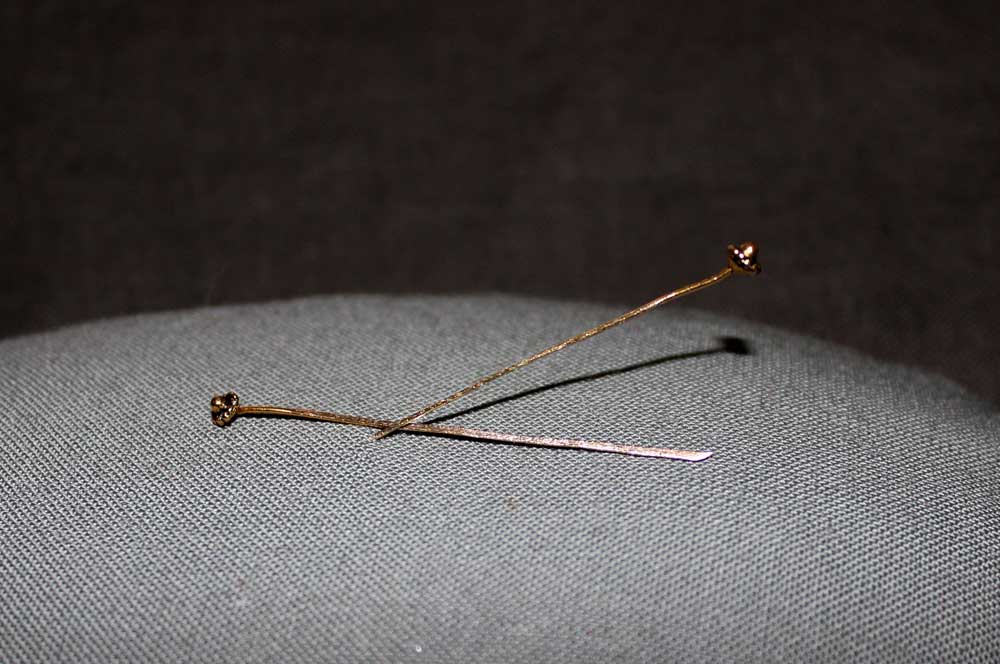
    This section covers smocks (including the sleeveless smock), kirtles, surcoats, hose, headdresses, shoes, hairstyles, and dress accessories.
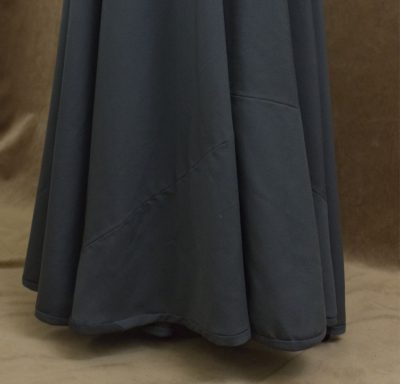
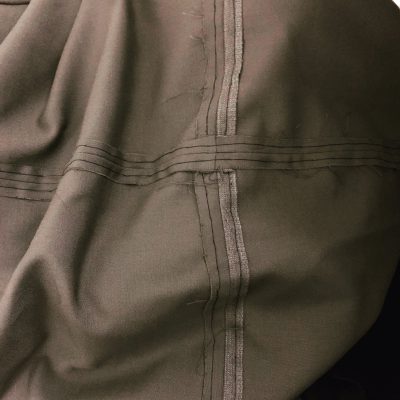
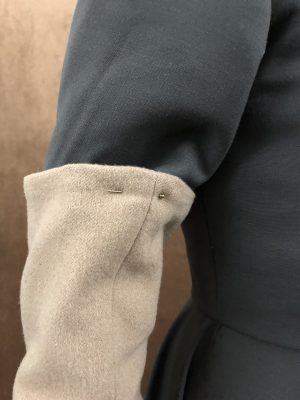
    Each layer of clothing is accompanied by clear illustrations and period images. The text addresses the fit, function and offers construction suggestions. There are also cropped images of the recreated clothing to highlight different details like lacing, sleeve gussets, and pinned on sleeves.

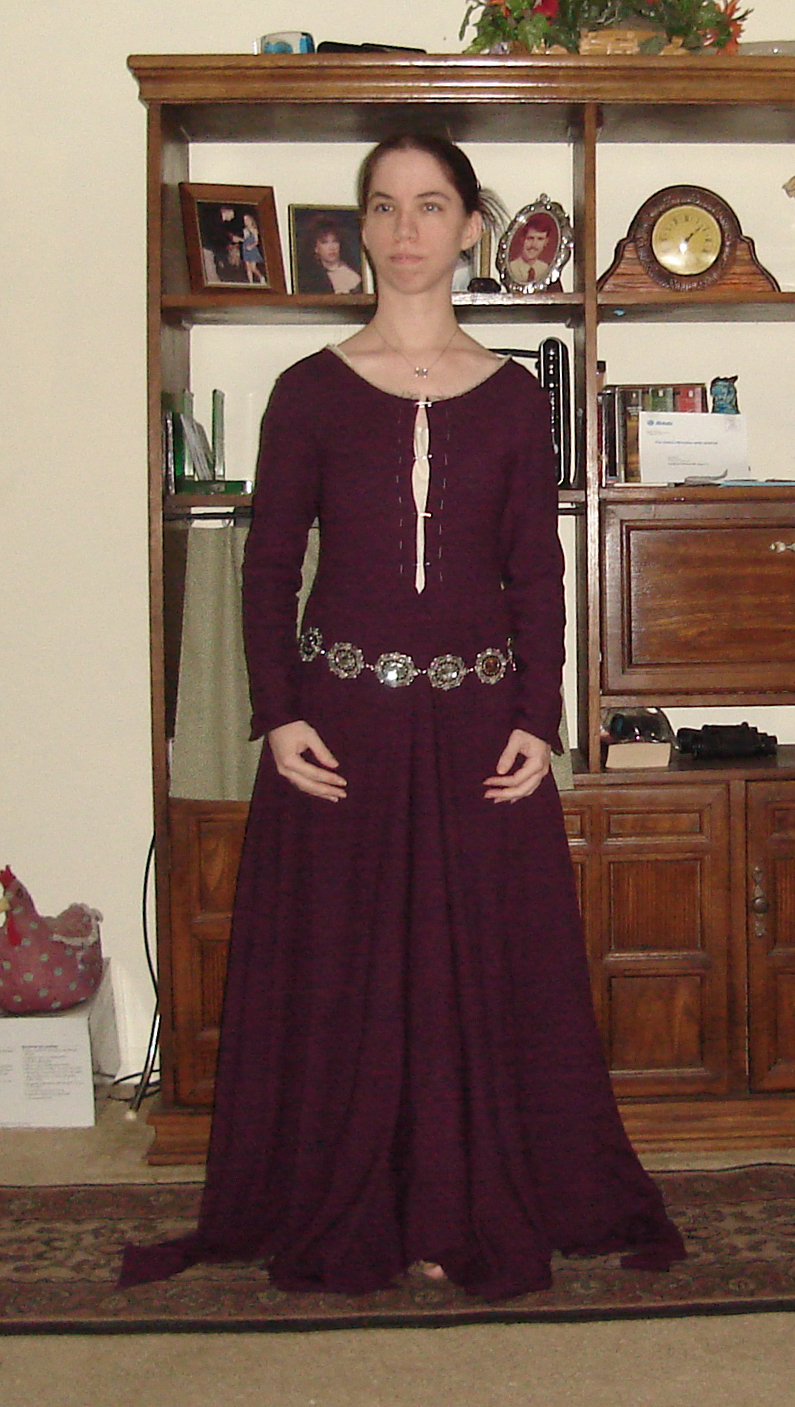
    One thing that is missing are any full body photos of the recreated garment being worn. I think being able to see the way a recreated garment falls compared to the manuscript would be a useful visual aid for anyone setting out to make a kirtle or gown.

    There are no patterns in the book, only shaded diagrams to suggest the shape of the pattern pieces. This would be enough of a guide for someone already skilled in draping or flat patterning use as a base.
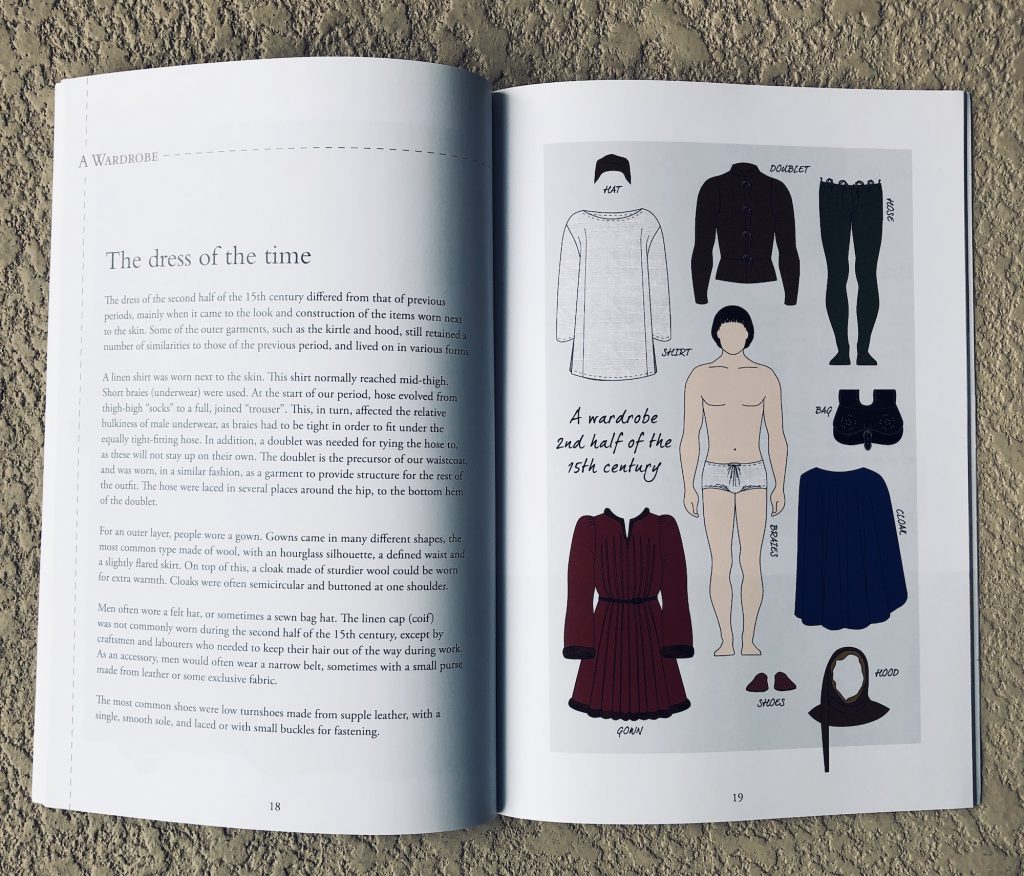

    Men’s Clothing

    The wardrobe in the men’s book starts out braies, noting that the fit of them plays an important role in the fit of the hose. From there we are on to shirts and doublet and hose. Men’s gowns shows the largest section of styles showing a few different necklines and pleating option depending on your materials and station.

    Looking at the lush pleats I can’t help but wonder if this is the 15th century equivalent of throwing on a stylish coat that pulls your look together.

    From gowns we move on to cloaks, hoods and headware with instructions on how to wear your hood in the trendy chaperon style. Shoes, belts, and purses are covered, jewelry and one page is devoted to men’s hairstyles.

    What I’d like to see more of

    I’d like to see the hand sewing section expanded on just all little, the basic stitches are shown but there is no mention of how to sew eyelets or lacing rings.

    While I approve of the tight scope of the book I think it could be expanded upon. If I was an absolute novice to historical dress this book would be useful, but I’d have no context for the styles. Why did men wear tight hose and doublet and then cover it up with large flowing gowns? What did they wear before that came into fashion?

    I’d love to see more photographs of the recreated garments being worn, used, and how the wearers feel about them. Do pin on sleeves stay in place when cooking over a fire? Does wearing a veil change the way you walk? Does it make someone feel closed in?

    The index includes a number of books and websites for further study but I do not see any mention of wills or inventories. I do not know if the habit of passing down clothing was being done yet as it was in the 16th century.

    Are these Books for You?

    I would recommend these books if you are a reenactor who is changing eras and needs a solid quick overview of the late 15th century. These books would also be useful to writers of historical fiction, filmmakers and others in creative fields that overlap with fashion history.

    From a sewing perspective I would recommend these to a beginner only if they had a friend or mentor who knows how to pattern or drape. The handbooks are just that, handbooks of the era and do not go stitch by stitch into recreating the garments. Anyone looking to use these books to recreate a full wardrobe needs to have a solid understanding of how wools and linens behave, how to pattern them, and fit them to shape the body.

    Where to Buy

    On Amazon:
    Historical Clothing From the Inside Out: Men’s Clothing of the Late 15th Century by Anna Malmborg (Author), Willhelm Schütz (Author)

    Historical Clothing From the Inside Out: Women’s Clothing of the Late 15th Century by Anna Malmborg (Author), Wilhelm Schütz (Author)

    Through the publisher Chronocopia Publishing

  • A 16th Century Kirtle in Olive Wool with Caramel Oversleeves

    A 16th Century Kirtle in Olive Wool with Caramel Oversleeves

    I started this kirtle in 2014/2015 cutting it from the leftover yardage of the olive fitted gown and an old bodice block I drafted on newspaper. This kirtle differs from ones I’ve made before in that it has a very full skirt (possibly too full) and half sleeves.

    Images from the Da Costa Book of Hours at the Morgan Library and Museum served as my main inspiration for the half sleeves. I did not try for the deep V back neckline, I have sloped shoulders and have had issues with the straps pulling if I go too low in the back.

    The whole project lived in a large shoe box through two moves, getting taken out from time to time, worked on and then returned to the box.

    This year I was determined to finish it. If only to make sure I wouldn’t misplace the half sleeves again.

    I already sewed the skirt together, so that left me with the bodice to wrangle.

    Building the Bodice

    • Pad stitch interlinings by hand
    • Flatline to bodice
    • Cut bodice linings
    • Baste bodice and try it on
    • Adjust the bodice to fit and piece shoulder seams
    • Sew the bodice
    • Hand sew in the bodice lining
    • Hand sew the eyelets in black silk twist
    • Sew shoulder straps
    • Test fit sleeves and cut the lining
    • Sew sleeves
    • Set the sleeves
    • Bind the armscye

    To piece the shoulder straps I made small lined rectangles and whip stitched them in by hand. I’ve done this a few times before, but I’m not fond of how bulky the area becomes with all the seam allowances building up in that small area.

    shoulder strap piecing

    The sleeve head is looking a little sad in the photos because I have mannequin arms stuffed and pinned onto a dressform they did not come with.

    Once the bodice was together I attached the skirt by hand and folded over the bodice lining to hide the join. When I got ready to level out the skirt I realized in my excitement to get every bit of skirt out of the fabric I had I went a little overboard. I was looking at a 6 yard hem to level and bind.

    Speaking of binding, I was down to a handful of scraps.

    This became frankenbinding. Some strips were on the straight, some on the bias, the widths varied and once I had all the binding sewn on I was still 6 inches short. So I pulled some slightly darker wool from the stash and used that.

    skirt seaming

    Once the hem was bound, pressed, steamed and clapped into submission I faced the cold hard reality that leaving my skirt unlined was a mistake. The wool I used for the kirtle is tropical suiting weight, this makes it very breathable and easy to wear but it does like to fray when cut along the straight. Now it was not fraying like some brocades do when you look at them, but it was enough that clipping the threads that worked their way lose would be bothersome.

    Skirt seams starting to fray

    So I hand sewed the seam allowances down in a bastardized stitch that is a mix of the prick stitch, the running stitch and the back stitch in black silk thread.

    Reenforced bodice corner

    The final finishing was reinforcing the stress points along the kirtle with a very fine whip stitch at the corners of the bodice front and back and at the front skirt seam opening.

    The Half Sleeves

    Sleeve fabric choices
    Sleeve fabric choices

    The caramel wool over sleeves are a mixture of machine and hand sewing. I used my green half sleeves as a pattern and made them a little longer and a little roomier. All in all it is just a two part tapered rectangle. I sewed the wool and the linen lining up on the machine. Pressed. Matched the seams at the top and sewed the tubes together and turned them out. To finish hem off I bound the bottom edges in stripes of the wool and finished them by hand. I decided on the bottom edge as that is where these will get the most wear and tear over time and the binding is easy to replace.

    The sleeve pin on to the upper sleeve with my handmade brass pins.

  • Dress pins made from jewelry findings

    I’m finishing up the bright red wool kirtle and this time around I need some dress pins to keep the sleeves on.

    I remembered Catrin’s pin making tutorial but knew I didn’t have the right gauge wire on hand, but I did have some decorative head pins left over from making the  green tudor gown.

    I followed the same process Catrin’s tutorial showed, save that I didn’t have to wire wrap to make the head of the pin, and I don’t have a jewelry anvil. I work-hardened the length of the pin by hammering it flat on my front porch, nipped the ends with wire cutters and sanded it down with a file.


    Dress pins made from jewelry findings


  • Early 14th that turned into 15th Century Kirtle

    Early 14th that turned into 15th Century Kirtle

    Family medical things have kept me from sewing but I’ve managed to work a little bit on this, here are some work in progress photos.

    It still needs some work. The shoulders need to come up about 1/2 an inch to an inch, armscye needs to get cut down, sleeves reset after that, eyelets, hem evened and bound, small wedge added to the side seams to give me enough room in the bust, neckline needs to be wider and come down more.