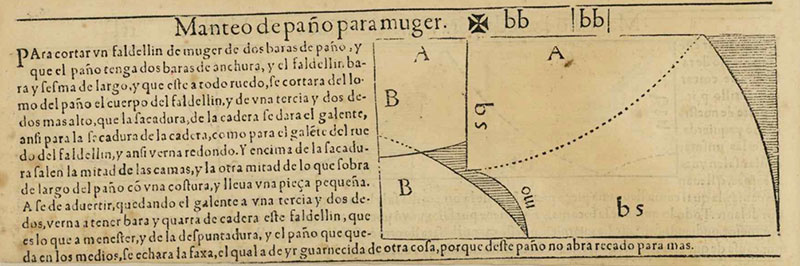
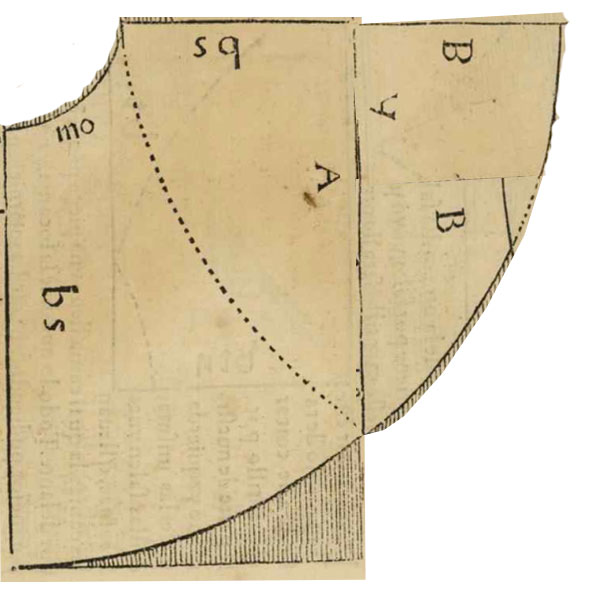
After way too long here is part two of the manteo or petticoat (part 1 written in 2014 can be found here), to recap here is the layout suggestion I ended up using from Alecga.
Since my fabric is 60 inches wide I did not need to piece the “B” section and was able to cut it as one curved shape.
I’m in need of a new underskirt or petticoat for my 16th century clothing. I’ve been using the same cotton broadcloth one I made back in 2005, for years now. It is serviceable, but it adds a lot of bulk at the waist and it isn’t very authentic in construction or materials.
So it is time to for a new one.
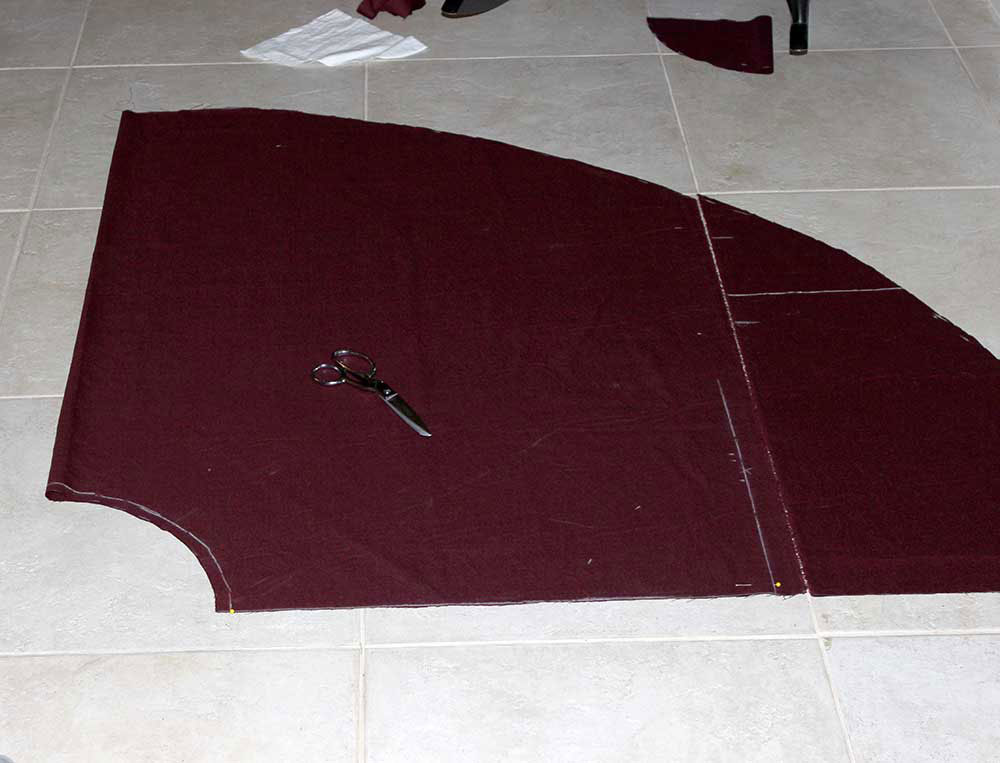
I have 3.5 yards of a lovely wine colored, lightweight worsted wool donated to me by Noel. (Thank you Noel! <3 )
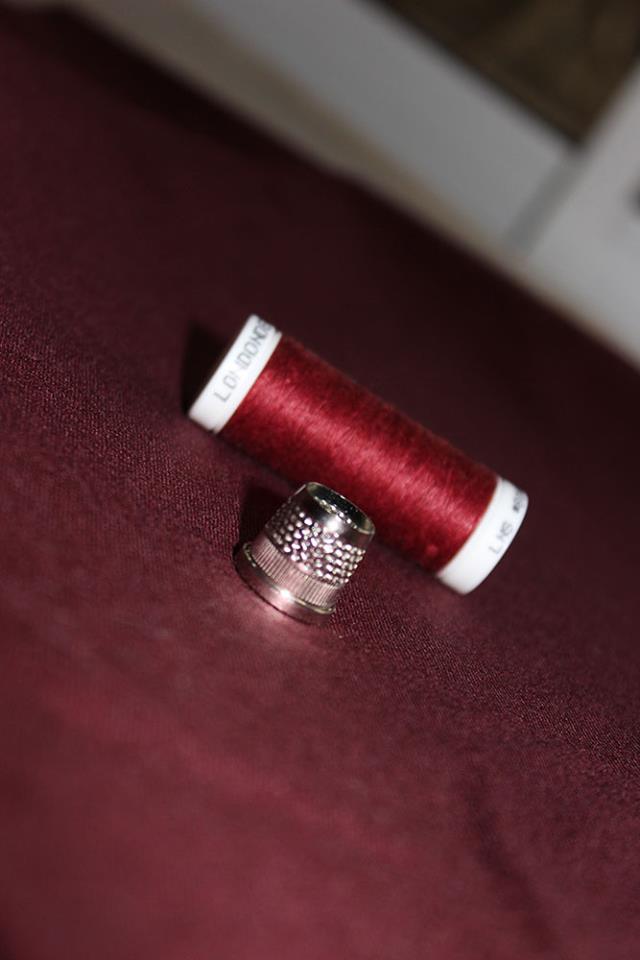
I’ll be drafting the pattern on the fabric and hand sewing the whole thing with linen thread.
I’m working from the Spanish version of Alcega’s Book. The english translation is out-of-print and painfully expensive. I’m not a native nor fluent spanish speaker so google and a few other resources will be heavily used.
I’m using the translated chart of symbols from the tailors book into modern inches from the Curious Frau’s site.
And keeping in mind the information Mathew Gnagy of the Modern Maker has posted about his study of the patterns on his blog and on the Elizabethan Costume Facebook group.
Manteo: s, m : a church man’s cloke; a woman’s under petticoat.
Language is a fluid thing, always changing. The above definition is from 1728 far later than the 16th century. However even later dictionaries simply list it as a cloak or mantle. Context is key, when it is listed as Manteo de Muger, chances are it is a skirt.
I hate making Tudor/Elizabethan smocks and shirts. They are boring, all the rectangles and squares don’t provide much of a technical challenge, save for a bit of fussing when setting in a gusset if you do it by machine.
Patterns of Fashion 4 has shown me the charm of a well made smock when bedecked with lace, embroidery and silk buttonhole twist. Enough that I have plans of making at least one by hand. That will take several weeks, and in the mean time I have other projects I want to work on and the one low cut smock I have (Yes only one.) has started to tear.
It is made out of plain cotton muslin rather then linen, but the fabric is still serviceable and I don’t mind wearing it.
The tear happened right where there shoulder and chest area meet at a corner, when I made this I simply turned under the seam allowances and hemmed them down. I did sew over the corner area where the seam allowance was mitered to reinforcing things but that didn’t last.
So we are going to repair this tear and the small one that has started at the other corner, and then we are going to make sure it cannot tear again.
Note: I have not found any extant examples of this exact technique being used in the 16th century. Patterns of Fashion 4 mentions contemporary patches being but at the corner of one smock after embroidery was carried out. Other shirts have thread reinforcements at the end of seams. I wanted something smaller then a patch, due to the thin nature of the cotton and this is what I came up with.
First I fold the smock down, right sides together so the torn edges are flat against one another. Then I whip stitch over the edges, going just far enough in past the torn edges that the stitches do not pull out.
Do this as many times as needed until you have sewn up the tear, it will look almost like you have made a very small dart.
Whip stitching the tear together.The stitched tear from the wrong side.The stitched tear from the right side.
The tear is no more, but that is still a weak area of the neckline.
So cut two lengths of selvage (the woven edge of the cloth that does not fray), you just need them to be a few inches.
Fold the cut edges of the selvage down with your fingers and then fold the selvage in half. With the folded cut edge facing the inside of the smock, pin the middle of the selvage to the corner of the neckline where the tear was.
Now whip stitch along the outside edge of the smock, catching the folded selvage edge and the neckline together with small stitches.
I’m sewing at about 30 stitches an inch which is finer then usual for me.
Two strips of selvage.Pinning the selvage into placeSewing in the selvage with a whip stitch.
Go along the edge of the smock till you reach the end of the selvage, turn the end under and stitch it down against the neckline hem.
Keep going along the inner edge until you get to the corner where the tear was, clip the selvage a tiny bit and then sew over the notch. You do not want to clip it to the neckline, that negates reinforcing the edge.
A small clip will ease the tension along the selvage without having to make a dart in it.
A tiny clip at the corner.The finished inside.
Finish sewing along the inner edge of the smock, tie off and clip your thread and you are done.