

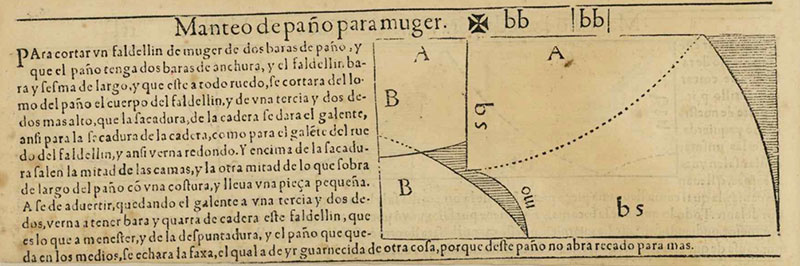
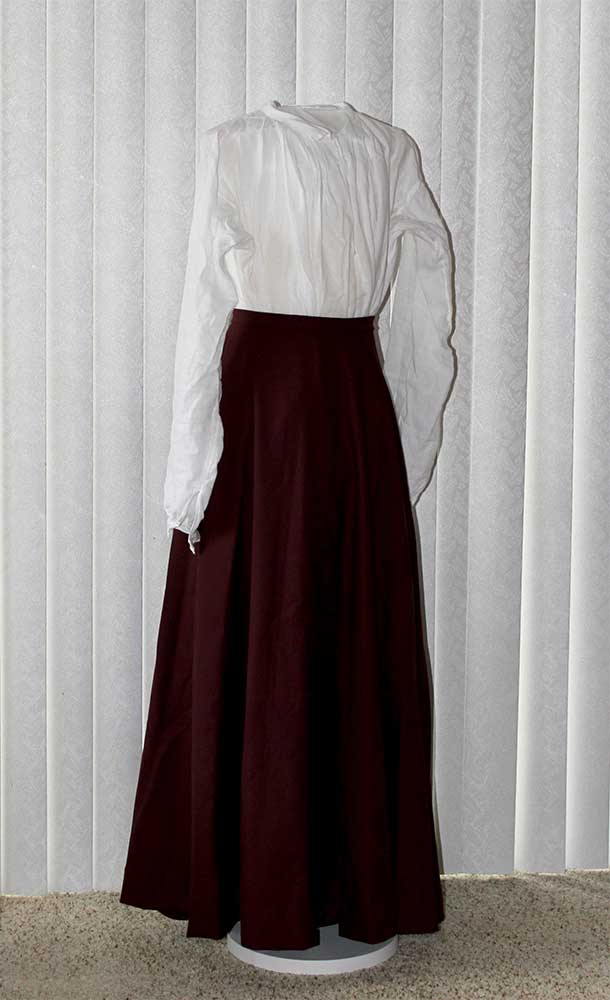
After way too long here is part two of the manteo or petticoat (part 1 written in 2014 can be found here), to recap here is the layout suggestion I ended up using from Alecga.
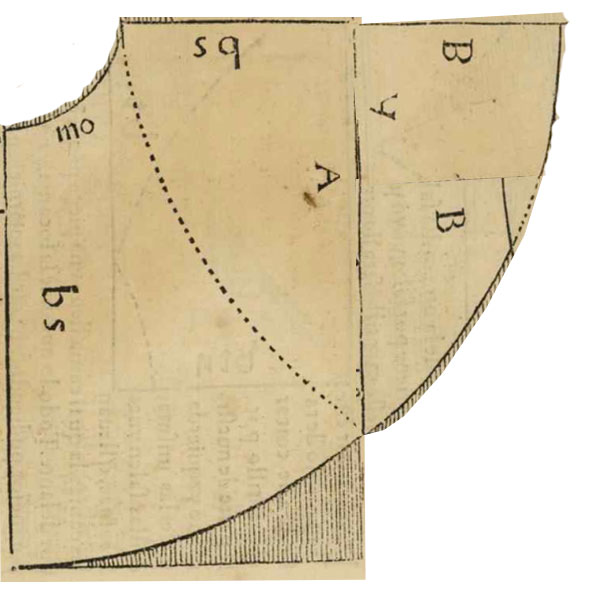
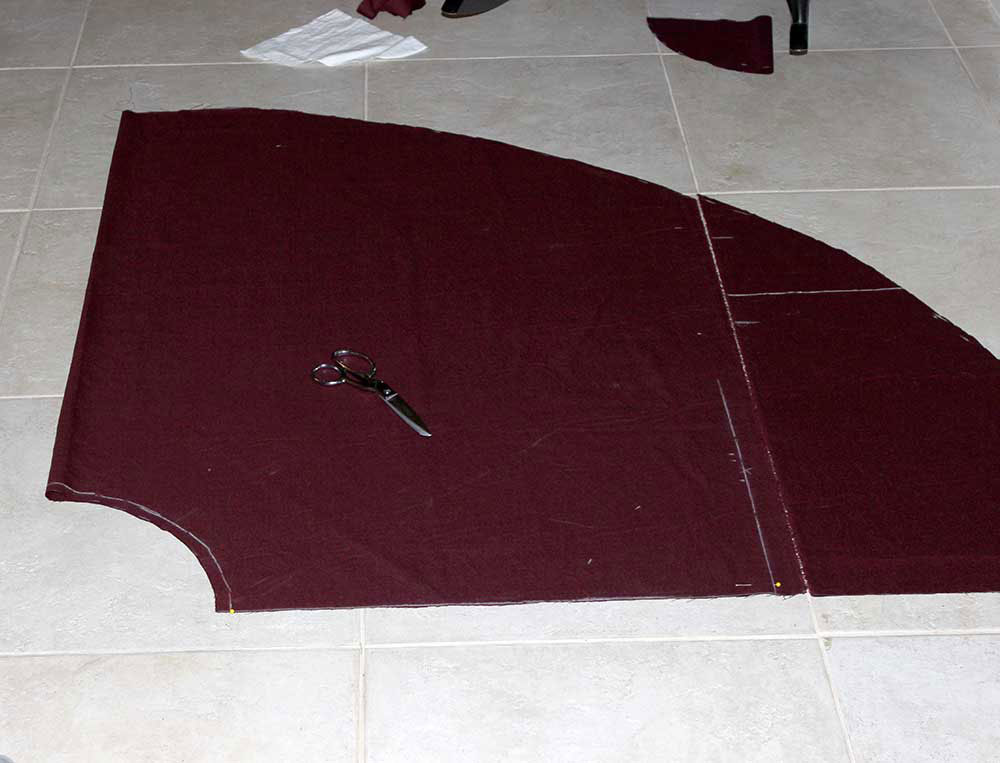
Since my fabric is 60 inches wide I did not need to piece the “B” section and was able to cut it as one curved shape.
Measurements
I changed the measurements to fit my own size.
- “bs” I cut along the fold at 36 inches long.
- The length of the waist “mo” is 13 inches (which since it is cut on the fold is about 26 + seam allowances)
- “bs” + the “B” piece should add enough length to the back to also equal 36.
I cut the waistband from scraps it is 3 inches wide total, the seam allowances on it are 1/2 an inch to give the band more structure, and 1 inch on the ends to give the eyelets extra reinforcement.
The hem facing is cut on the straight in 3 inch strips, the seam allowance along the bottom and top is 1/2 an inch. I steamed and eased these to fit.
Construction
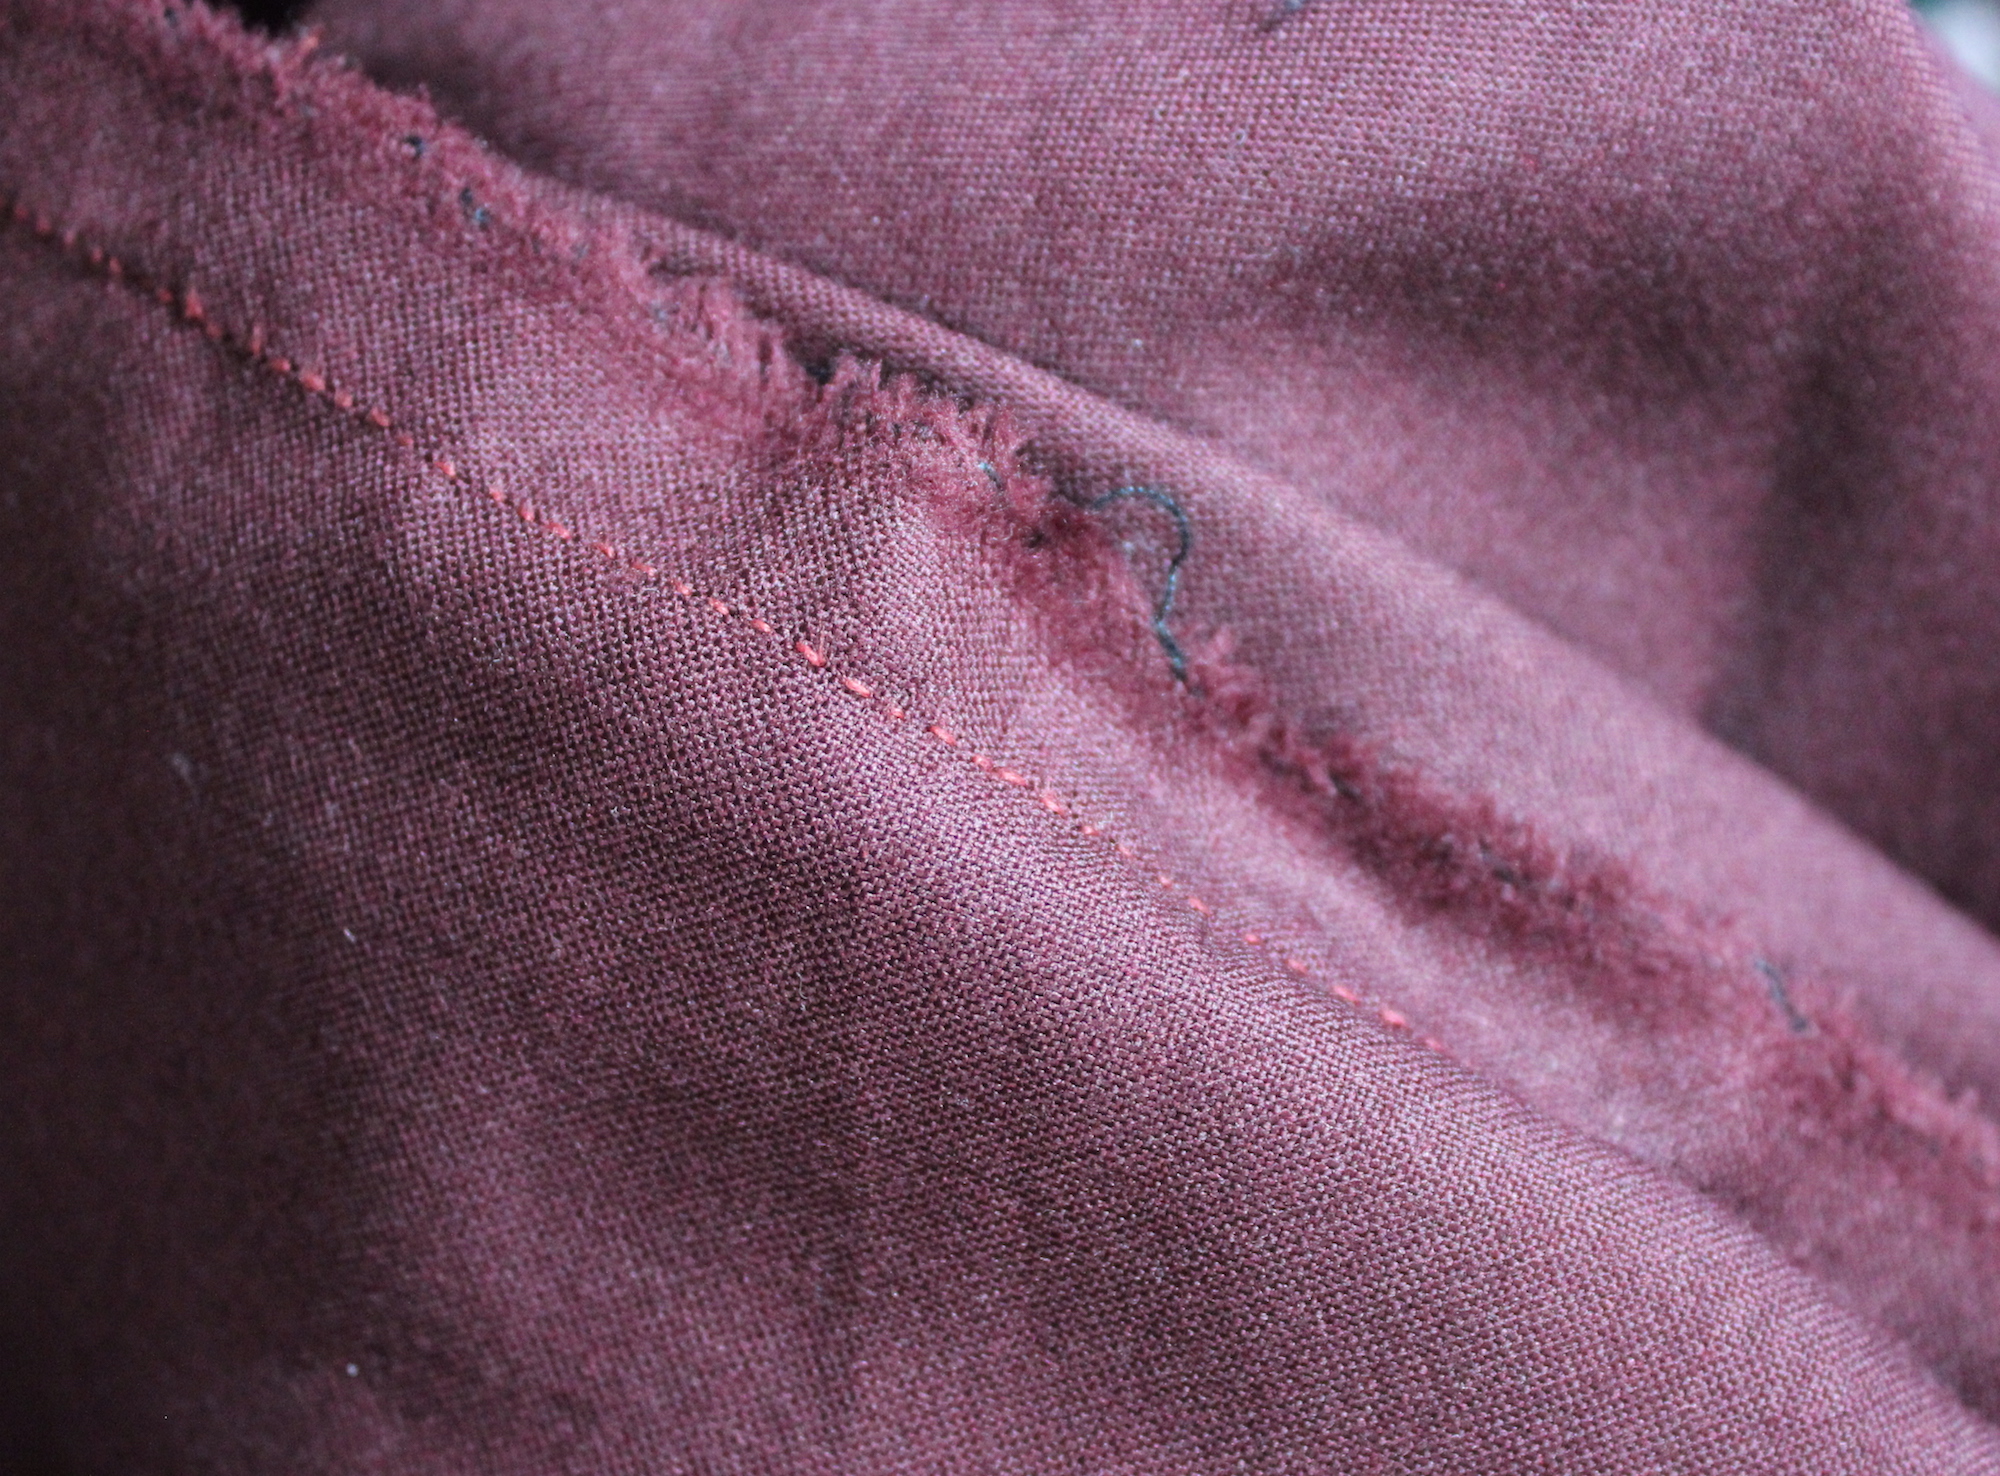
I sewed section “B” to “A” with a spaced backstitch which I’ve found gives a good combination of strength and speed. Of the handful of extant garments there are not many skirts and of those studied (to the best of my knowledge) the stitch used isn’t always mentioned. So this is my personal preference.

I was able to cut pieces “B” with the selvage along the longer edge I did not need to worry about fraying and pressed them open.
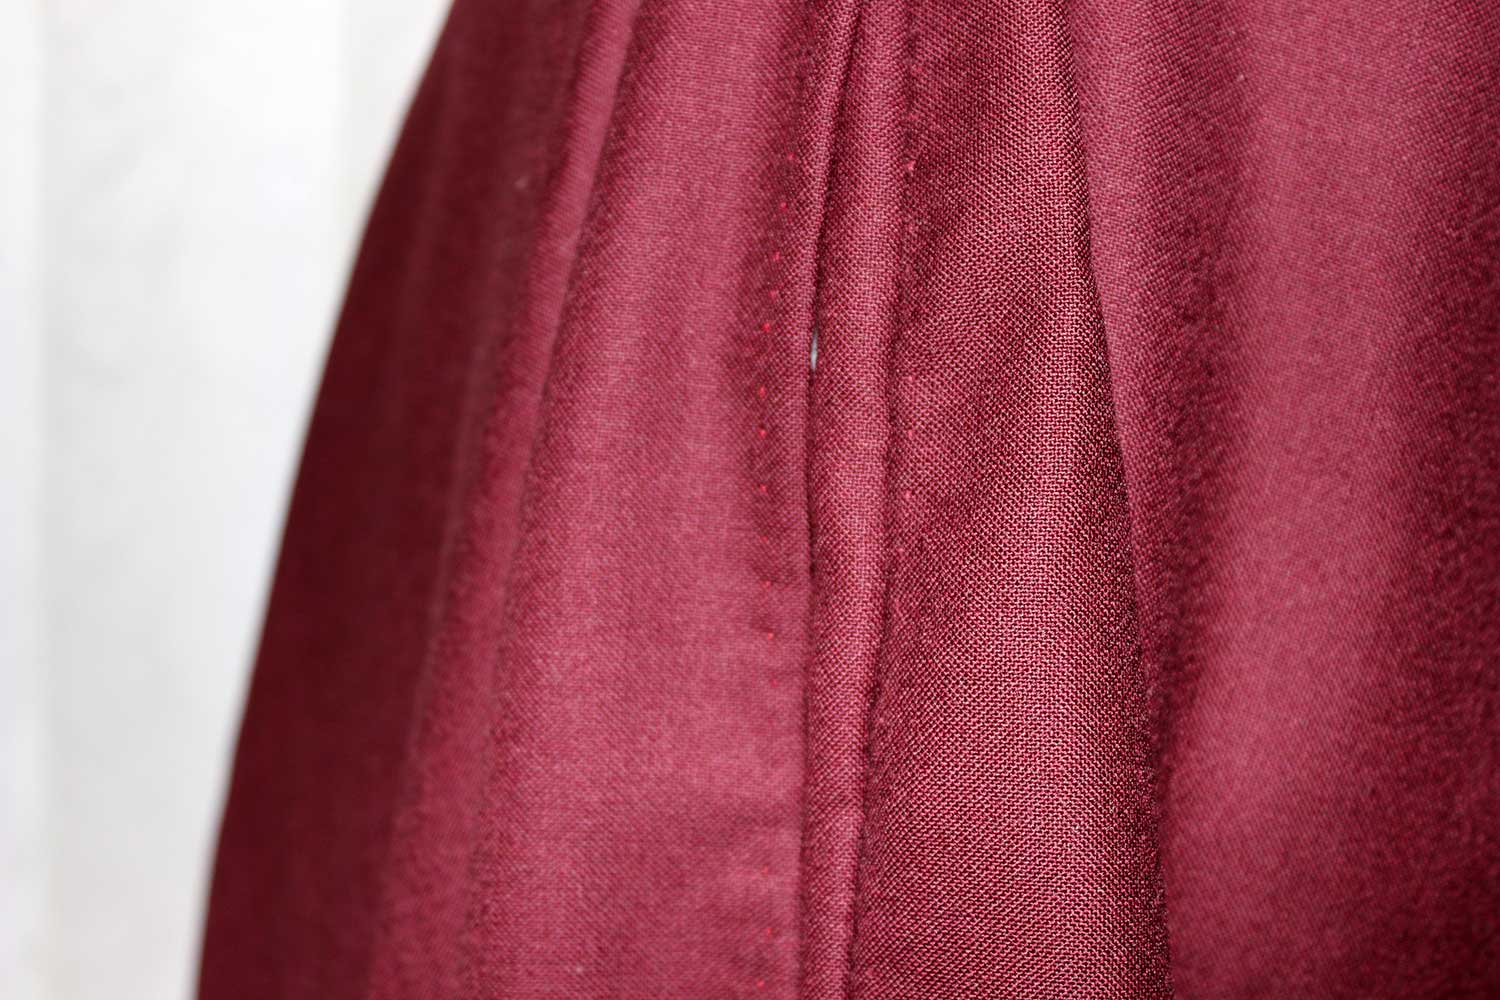
The main back seam I sewed with the same spaced backstitch, then I pressed both edges to one side and whipstitched them down. I had planned on flat felling the outer seam allowance over the inner, but the end result was bulky and I quickly unpicked it.
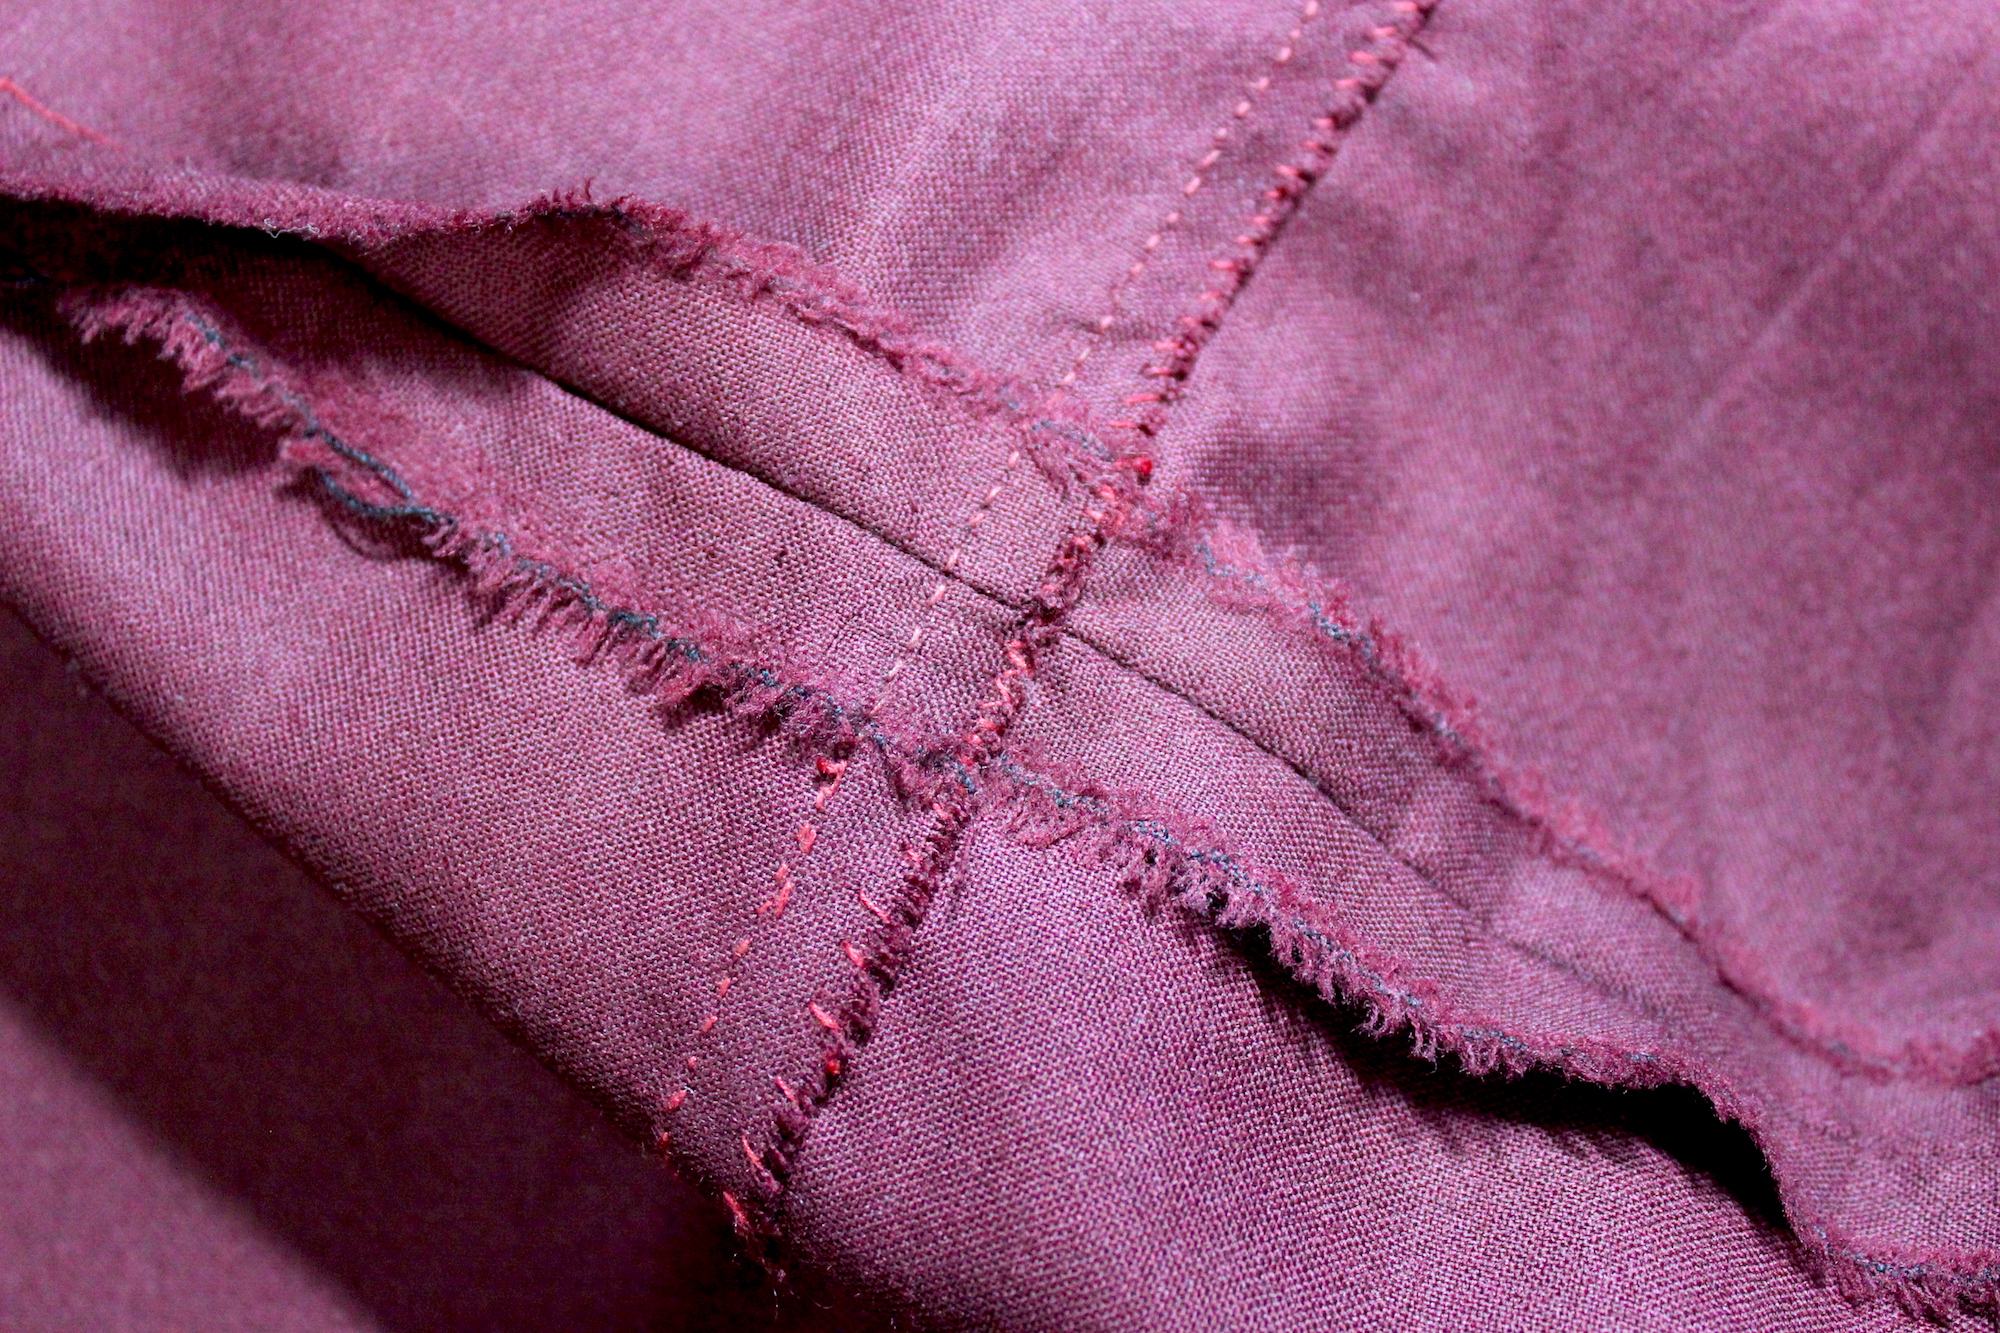
I sewed up the main back seam until I was 8 inches away. To finished the opening I cut a narrow strip of wool and bound one edge of the skirt. This also acts as a narrow placket and facing. The other side of the skirt I folded over and hemmed.

The waistband I folded the edges in 1/2 an inch along the long sides and 1 inch along the short sides and pressed them in place. Then I folded it over and pressed it again. This gave me crisp edges to use as a guide, I spaced back stitched the waistband to the skirt then whip stitched it along the sides and back across the skirt to enclose all the raw edges. During the sewing, the skirt waist stretched a little so I put in two very shallow pleats along the back.
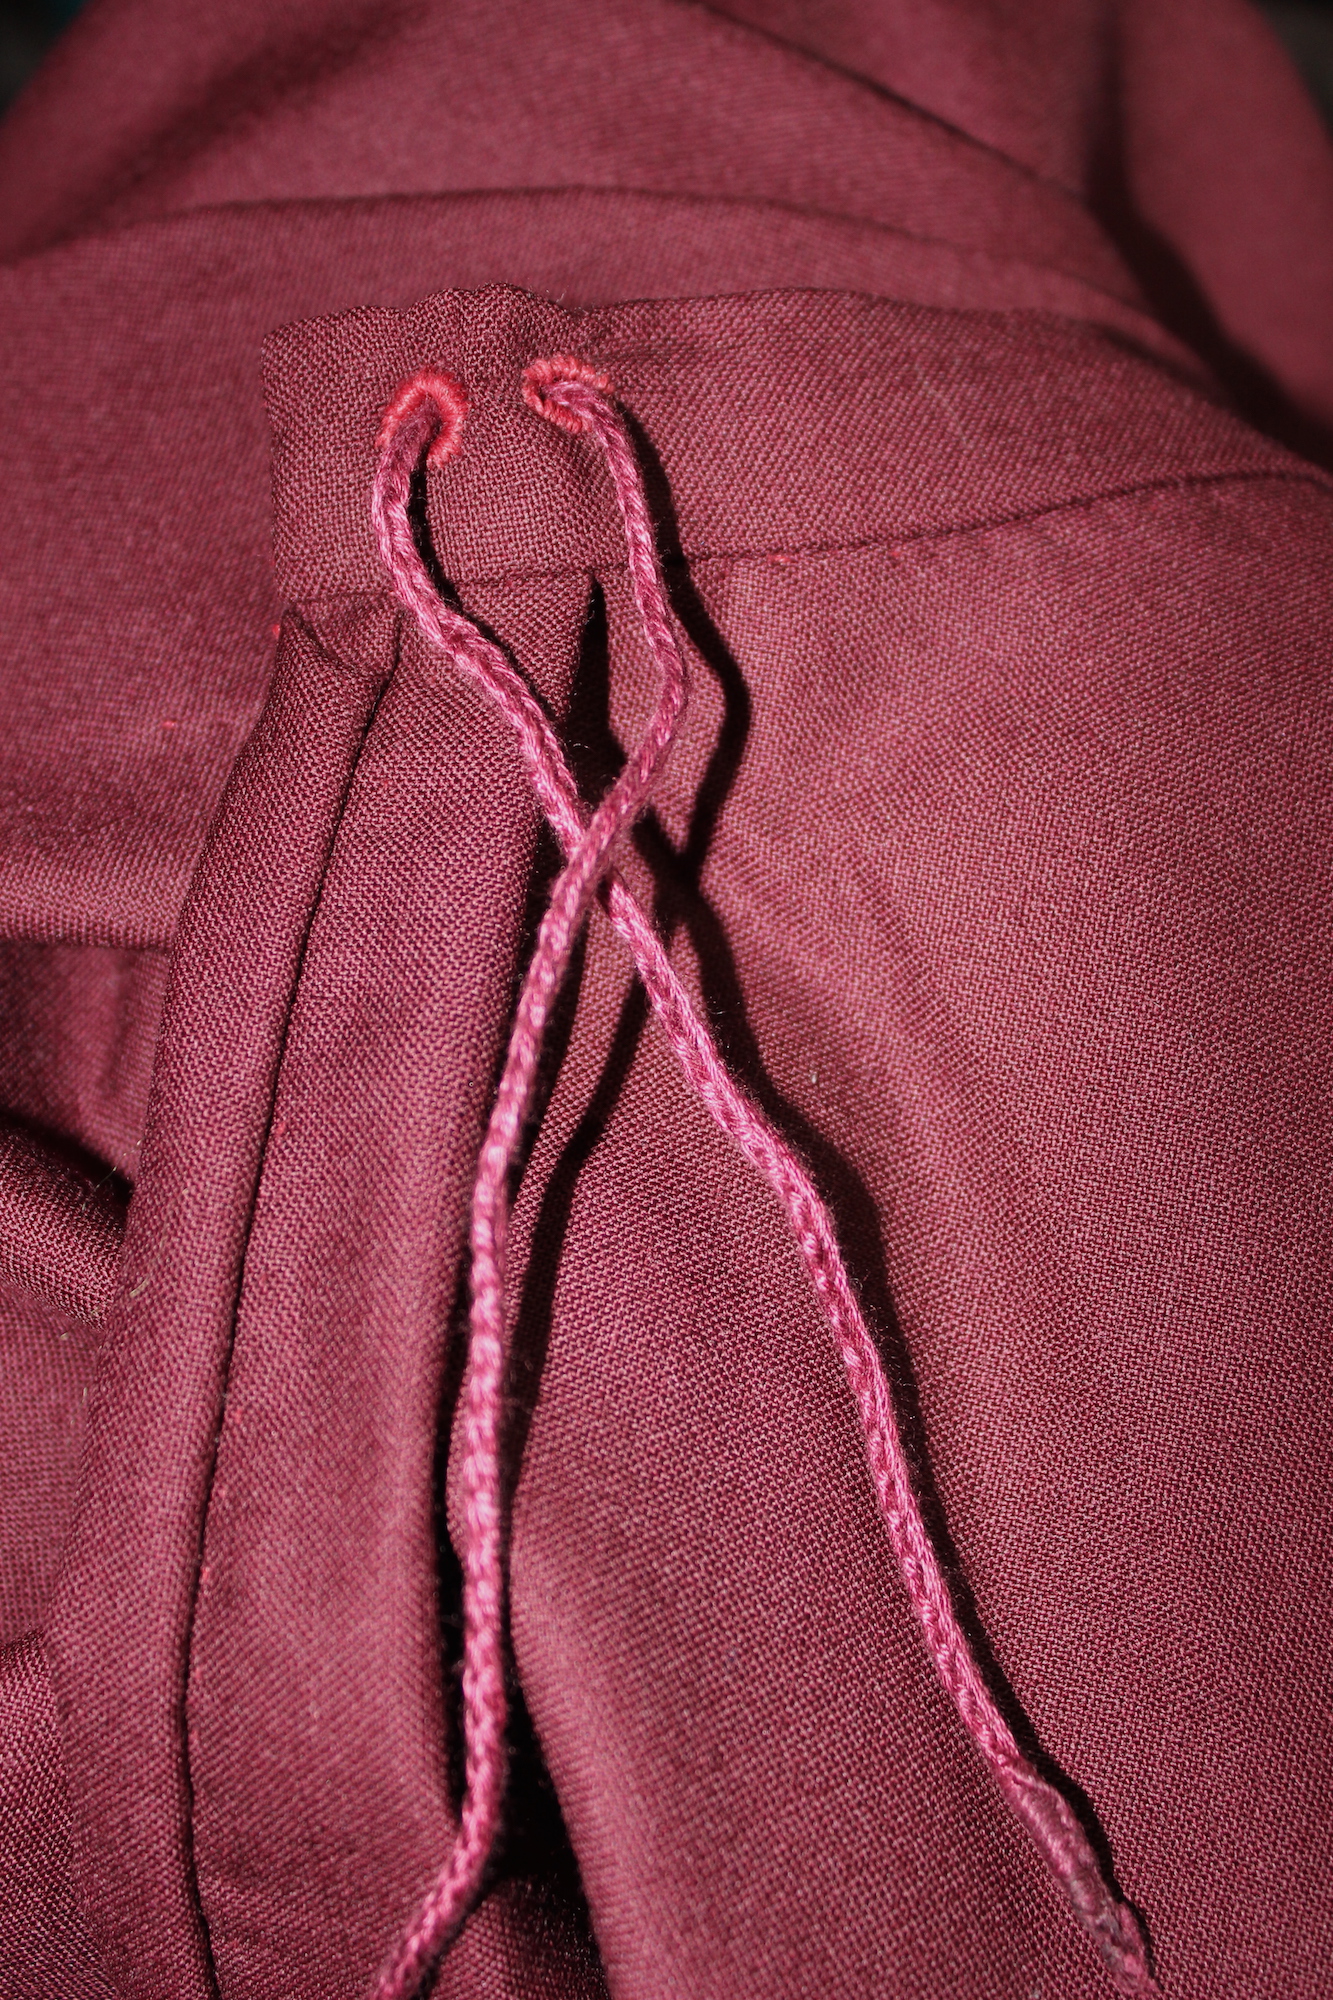
To finish off the waistband I sewed 4 eyelets, this gives me some adjustability without long ties that get tangled or cut into my waist.

The skirt hem facing was sewn once again with the spaced backstitch before being pressed up, the raw edge being pressed under and being whipstitched down. Making the facing extra wide gave the skirt a nice weight, I wouldn’t go larger than 3 inches wide when using straight of the grain pieces because of easing issues. For extra stiffness at the hem, wool could also be put between the layers.
Leave a Reply