Centuries-Sewing

Tag: patterning

  • 16th Century Chocolate Saxon Gown Project: The Bodice

    16th Century Chocolate Saxon Gown Project: The Bodice

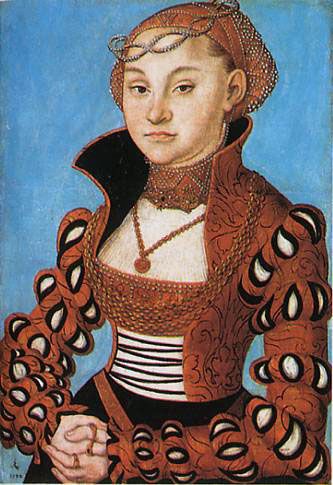
    I have always liked Saxon Gowns, they have a different look from the French and English gowns of the early 16th century, they have interesting construction puzzles, and an excuse to use several yards of velvet and fancy fabric is always a good thing.

    saxon gown fabrics, brown velveteen and jaquard

    After going back and forth with a friend on just how these gowns were put together, looking at lots and lots of paintings, and seeing what other costumers have done I decided to make one for myself.


    I picked up some brown velveteen for cheap along with some jacquard in a similar color and started plotting.

    I started a pinterest board for Cranach styled gowns to get an overview of what style elements I wanted to incorporate.

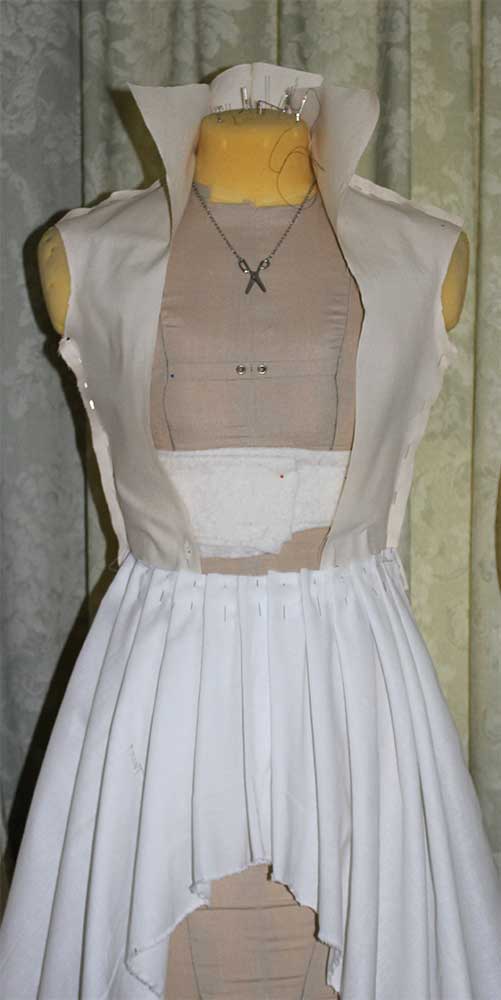
    I have always been fond of the tall collared styled gowns and I haven’t seen many of them recreated so that is what I set my sights on.

    Cranach the Elder 1528, portrait of a young woman holding grapes and apples.

    Cranach-1534-portraitofanoblewoman


    I dug out my tall collared doublet pattern to use as a base for the bodice, this version of the patterns has a few issues so it would need a bit of adjustment to get things right.

    fitted gown back collar wrinkles
    One of the issues with my doublet pattern, too tall in the collar and the base of the neck is too wide.
    Doublet pattern base
    Doublet pattern base

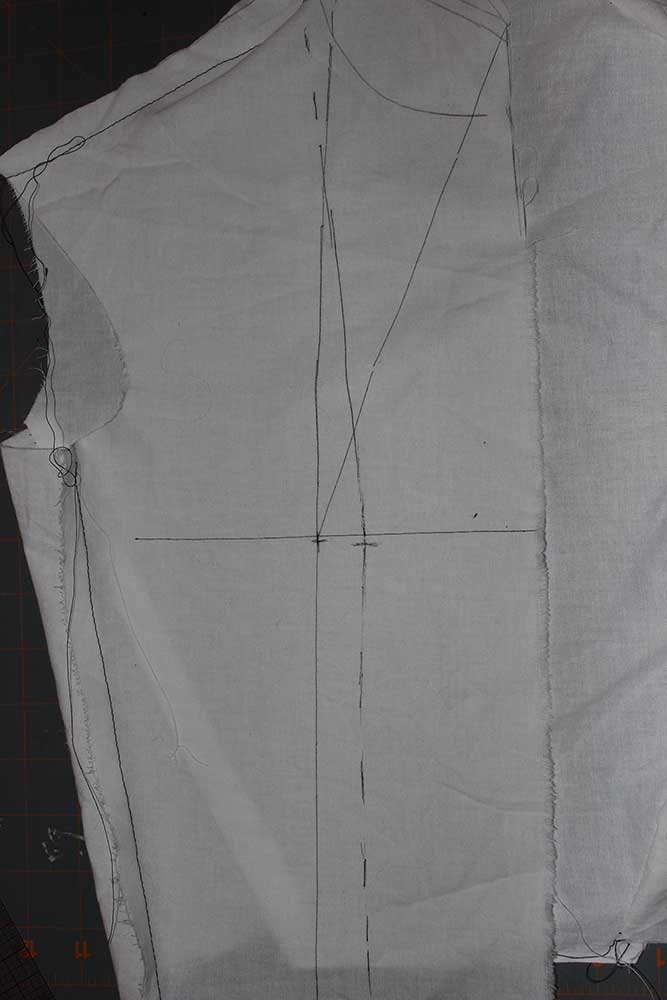
    I cut out a mock-up in muslin adjusted the collar and the back of the neck.

    That basted in place I put it on my dress form and marked where the bust point fell on the form.

    But when I tried the mock-up on, where I marked the bust point on the form, is not where my bust point is. This is important as I’m using the bust point as a marker for where the edge of the gowns fall.


    So I marked on the mock-up where my bust point hit. This also gives me the basis for how wise the front gap will be in the finished gown. Once that was marked I trued up my edges and starting at the bust point flared the front out to form the collar, and I am left with a pretty good base for the gown bodice. The only thing left to adjust is the back collar.

    Bust point to flared collar
    Flaring the collar out, starting at the bust point
    Saxon Gown bodice mock up1
    Saxon Gown bodice mock-up


  • Kirtle Sew-Along: Measurements and Adjustments

    Kirtle Sew-Along: Measurements and Adjustments

    Pattern Adjustments and Mock-ups

    To me this is the annoying and tedious part of sewing, but once it is done we will have a bodice pattern that fits and we can use for various projects. If you already have a block pattern by all means use it. I’m starting from the beginning because this is stuff I wish I knew when I was starting out.

    Materials:

    Pencil
    A small scrap of cardboard
    Tape
    Measuring tape
    A long Ruler
    Paper to trace your pattern on
    Muslin or calico for Mock-up(s)
    Scissors
    Narrow Elastic or Ribbon
    Tracing Wheel (optional)
    A pin

    Measurements:

    To start we need a few measurements, so take a second to change into a fitted knit top and if you wear extra support under your garb put that on too. I’m wearing modern jeans to show where where your waist is not.

    Natural  waist: ________ Take string or narrow elastic and tie it snug around your waist, wiggle around from side to side till it settles.  Make sure it isn’t twisted like mine is. This trick for finding the waist doesn’t always work, so a second way of finding it is to look at where your elbow falls, that will roughly tell you where your true waist is. (Thank you Elizabethan Costume facebook group for teaching me that proportional trick.)

    (more…)

  • A Kirtle Sew Along: Introduction and Materials

    A Kirtle Sew Along: Introduction and Materials

    A Kirtle Sew Along
    Awesome Banner to use if you are playing along! Just have it link to: https://centuries-sewing.com/category/kirtle-sew-along/

    So I posted about this on Facebook and on the Renn. costume forum but forgot to post about it here. Opps.

    I’ve made a lot of kirtles, in various ways, with various materials and stiffening. I’ve also answered a lot of questions about kirtles, and while I will be the first to tell you I’m not the end all be all fount of kirtle information, I have learned a great deal about them.

    I’ve decided to host a kirtle sew along, and go step by step on how I make a basic 16th century kirtle. This will help people just starting out, middle of the road sewers and maybe the experts will pick up a few tricks. I’m going to be posting in a mixture of photos, written instructions and if the weather cooperates, video.

    I’m not going to hand sew this one, I tend to use the sewing machine where it will not show and hand finish the parts that will.

    Kirtle Sew Along Materials
    Wool! Twill! Calico! Linen!

    General Materials needed:

    I’m giving a rough idea in the amounts listed if you are taller than average or plan to heavily preshrink your fabrics add more yardage.


    4 to 5 yards of wool

    4 to 5 yards linen for lining or just 2 yards of linen if only lining the bodice and sleeves

    1 to 2 yards of twill/drill/canvas for interlining

     2 to 4 yards muslin/calico for flatlining and mock ups

    Matching embrodiery thread for eyelets

    A roll of paper for patterning, or newspaper can work in a pinch..

    Tracing wheel

    Awl

    Chalk

    Hand sewing needles, pins and so forth.

    Lacing strips for fitting.

    Pattern:

    simplicity pattern 3723
    Simplicity pattern 3723

    After much debate, I decided to use a store bought pattern as a base.  Not everyone has a fitted bodice block, nor does everyone have access to a printer to print one out, or a dress form for draping.

    Simplicity 3723 and 2354 is a basic costume pattern in a good range of sizes, the “Pilgrim” dress  has waist darts and bust darts but no other fancy shaping so it is ideal for adapting. And in the U.S. with Halloween coming up they usually put the patterns on sale.


    I’ll cover rotating out the darts, adapting the pattern to a curved front bodice, trouble shoot any fitting issues as best I can and any other things that might come up.

    I haven’t worked with commercial patterns for a long time so this will be a refresher course for me.

    We will be ignoring the pattern instructions, if you have a similar pattern in your stash, feel free to use it instead.