Centuries-Sewing

Author: Centuries Sewing

  • Return to Middle Earth: An Elven Gown of Twilight Velvet

    Return to Middle Earth: An Elven Gown of Twilight Velvet

    An Elven Gown Long in the Making

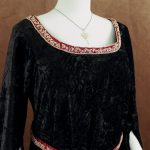
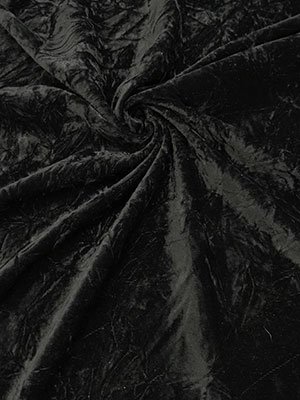
    Continuing my habit of making surprise costumes for friends, I bought the fabric for this elven gown a month after I got married in 2014. It was listed as “Twilight Navy Crinkle Velvet” a name that can’t get more elven. I bought seven yards of it at a very reasonable price. I am not a  huge fan of the crinkled/panne velvet look, but the fabric was a step up from the usual offerings at the local fabric store and had a good drape.

    Velvet from Fabricmart

    Fabrics

    I also bought enough lightweight black polyester faille to line it with, before coming to my sense and realizing the extra layer would add too much weight and make the gown much too warm.

    So I had my fabrics, I had my unsuspecting friend’s measurements, and I knew I was going to make her an elven gown. But what should it look like? What sleeves should I make, should it have extra fluff on the sleeves? What trim? Buttons, no buttons? Should it have a train?

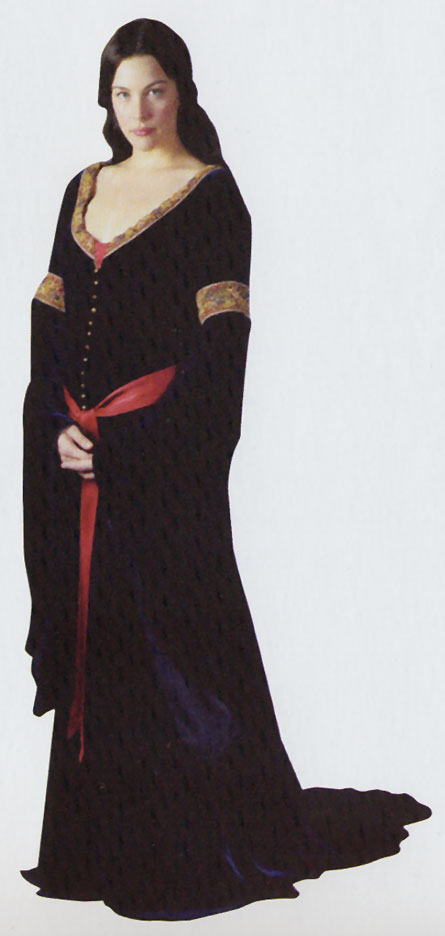
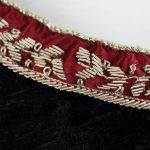
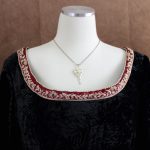
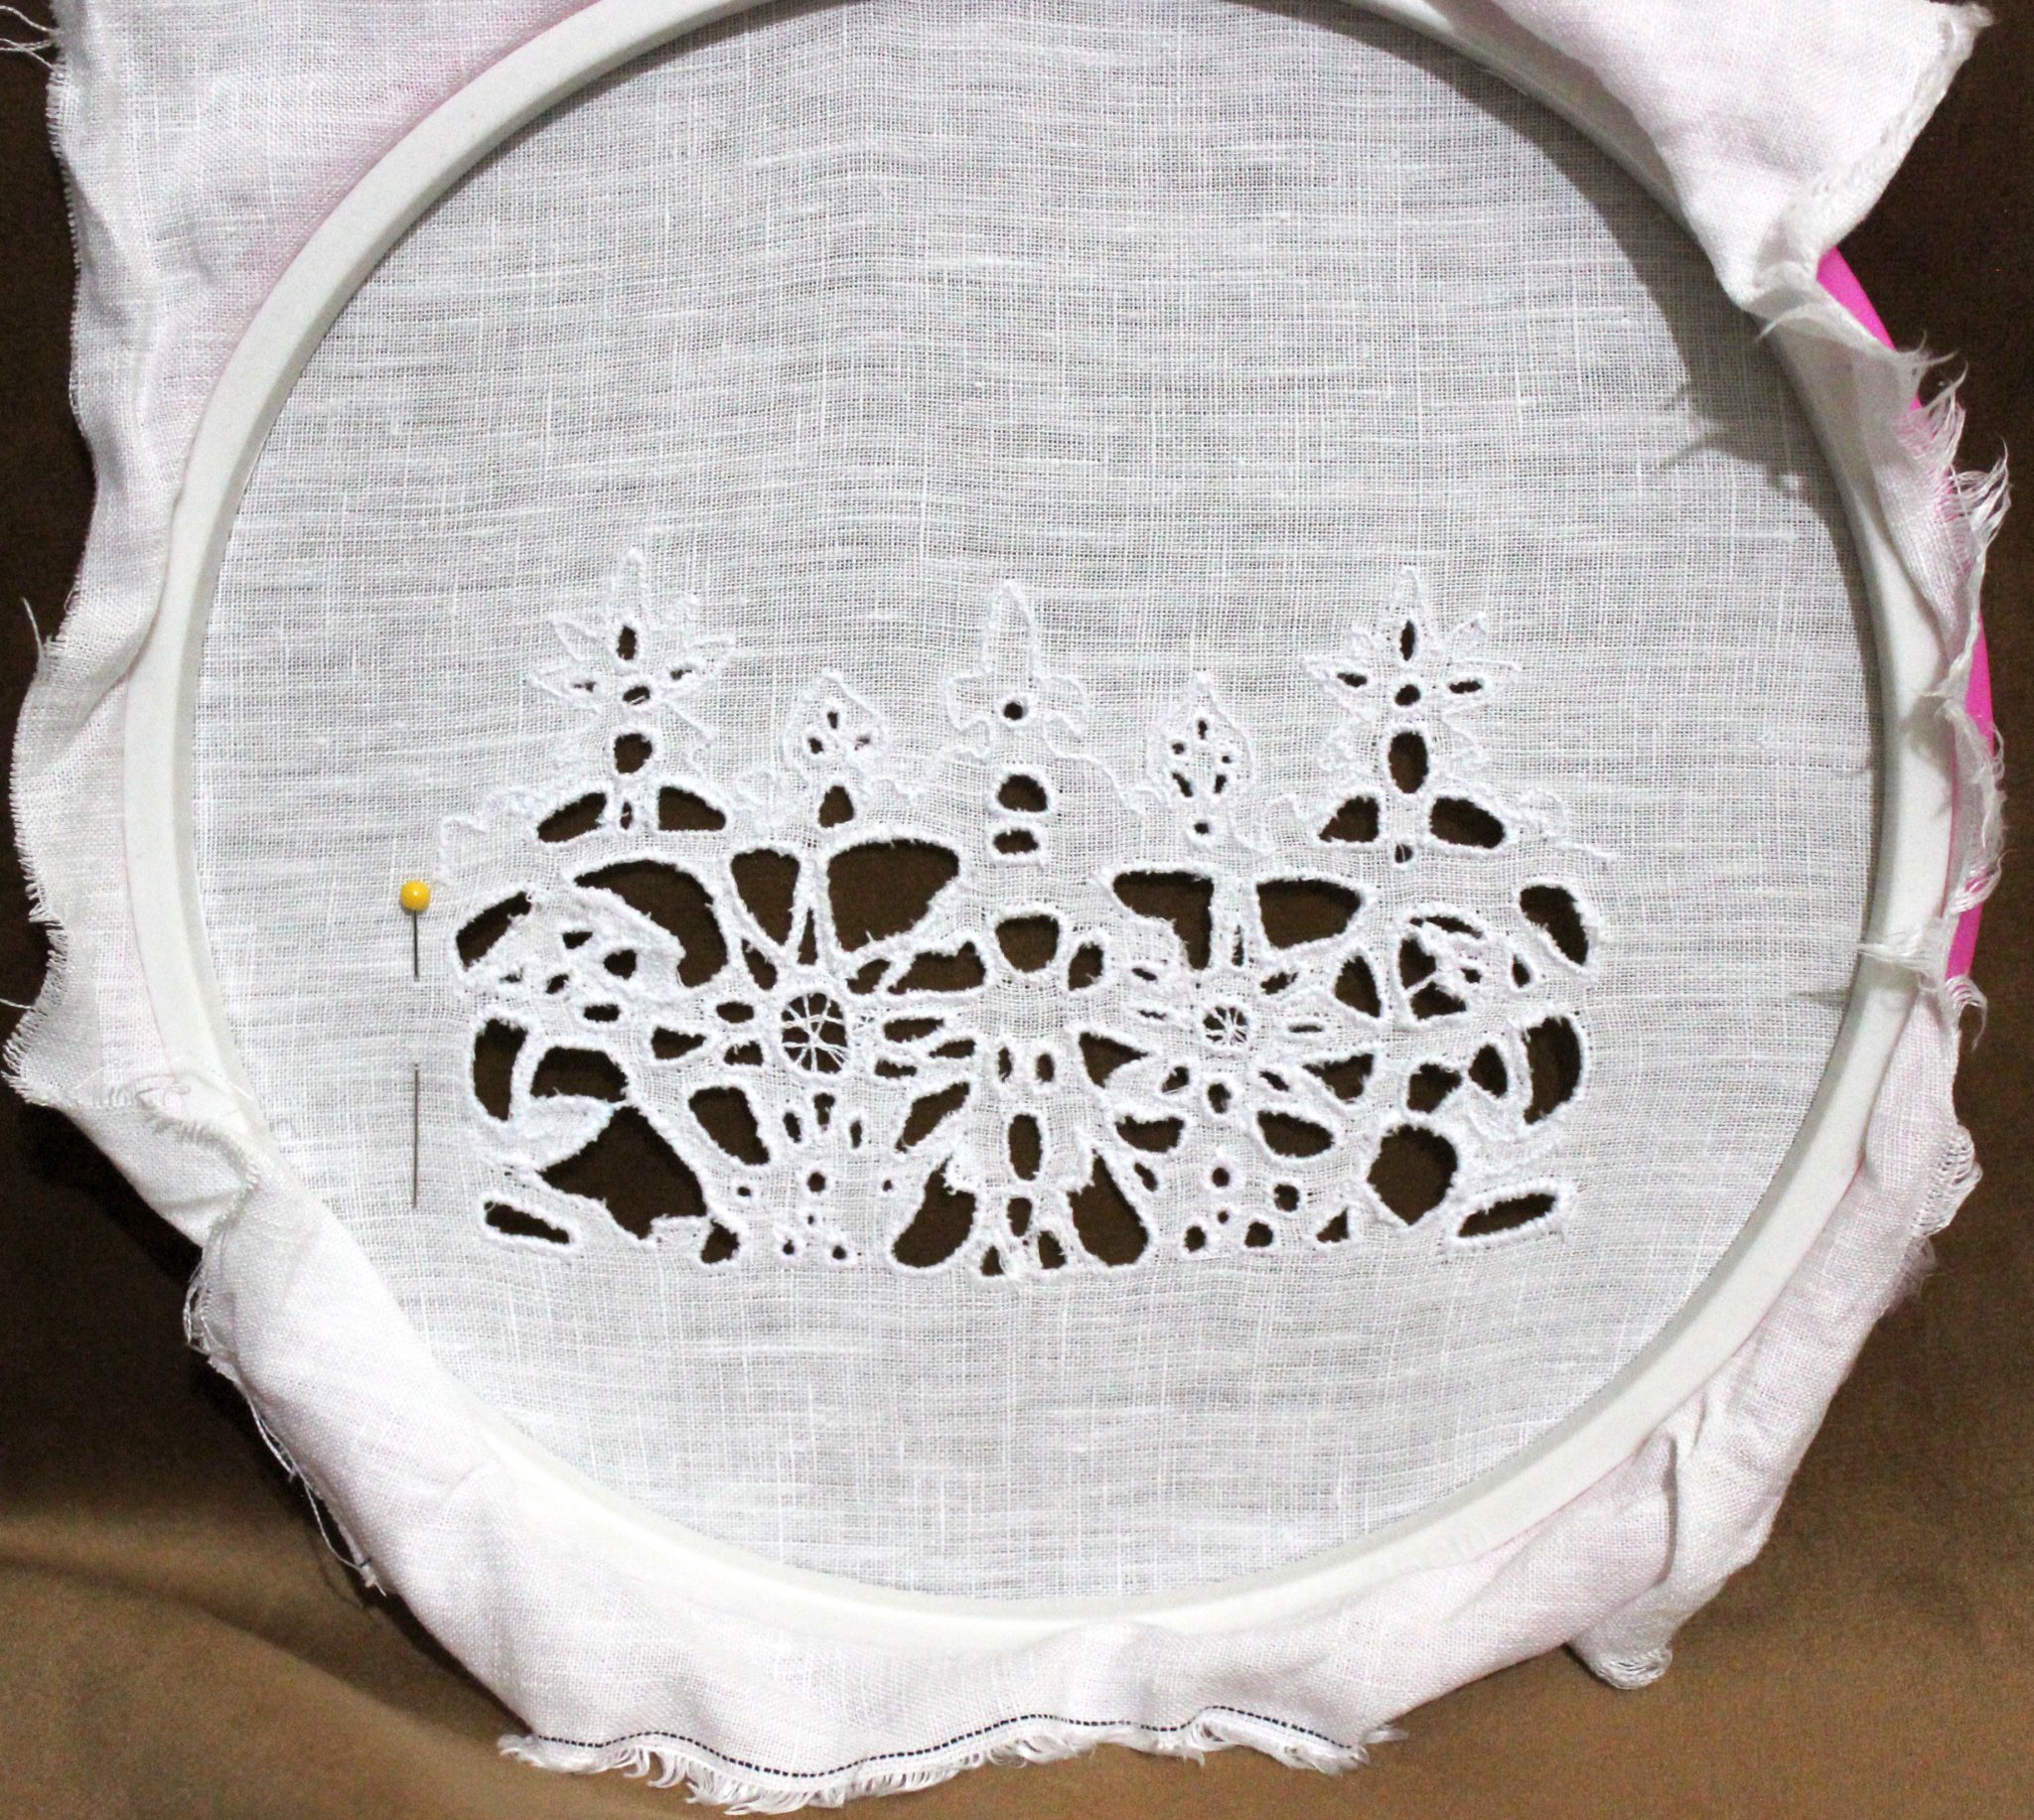
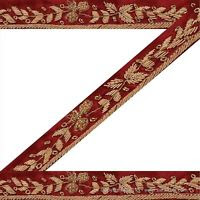
    Arwen’s Mourning Gown won out in the end as my inspiration piece, which meant I needed some trim! The original trim looks like zardozi cutwork mounted onto silk and then embroidered and beaded over. Maggie over at Costumer’s Guide has a great write up from when she made her trim.

    I was not wanting to make my own trim for this project so I headed to eBay and wasted lots of time looking at the pretties  hunted for the perfect sari trim.

    Gold zardozi work on red silk satin ground

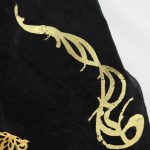
    And it seems I forgot to take a better photo of it!

    One of my favorite eBay sellers had the right type of trim at the right price. I ordered 3 yards and in the meantime got to work on the gown.

    Mock up from kirtle

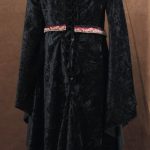
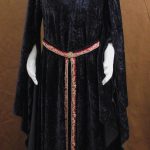
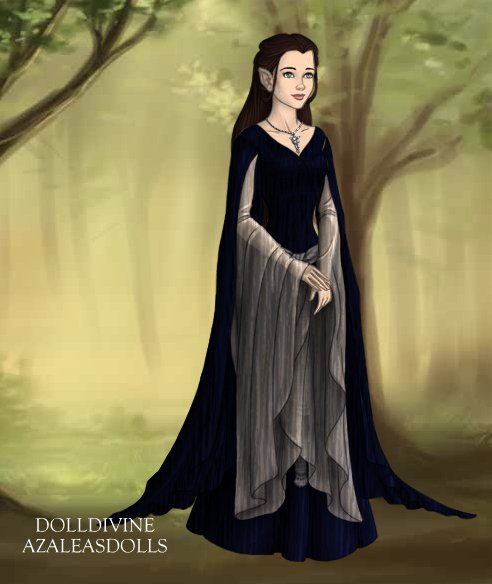
    I used the mockup from her kirtle as a base and made some adjustments. I scooped out the neckline, slashed over the hip to give the skirt a nice drape and chalked it onto the velvet.

    To keep myself from mixing up the velvet sections I marked an arrow on the back of each section to indicate the nap direction and then I cut several gores to widen the skirt. Then perhaps under the influence of velvet fluff, I cut a gored train to extend into the back of the skirt seam.

    Cut, pin, sew with a walking foot, overlock and wrestle the velvet into position. I adjusted the design a little as I went. The  neckline shifted a little, I cut off the train (bad idea if this was going to be worn outside). I entertained and abandoned the idea of sheer inner sleeves.

    Task List for the Elven Gown
    *Some* of my sewing task list for this project


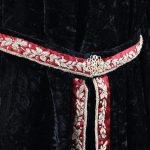
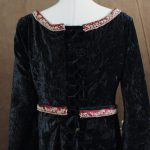
    The trim arrived from India! It was beautiful, the purl was a soft gold…it was sewn onto a ground of crimson silk satin.

    Crap.

    Silk satin is temperamental likes to wiggle and show every little flaw, and I needed to convince it to go from a straight band into a semi-curved shape of a neckline and I needed to piece it, since the trim was not all one length.

    I tried tiny tiny rows of gathering.

    I tried steaming.

    I tried basting it on by hand and easing it a little at a time.

    In the end, I sewed the trim on (by hand!) and took it off at least 3 times until I gave in and let the silk satin win. It was on the neckline and it wasn’t going to come off again. I finished the neckline edge off with a soft gold cord, realized I was nitpicking way too much and called it good.

    Gold bullion trim close up

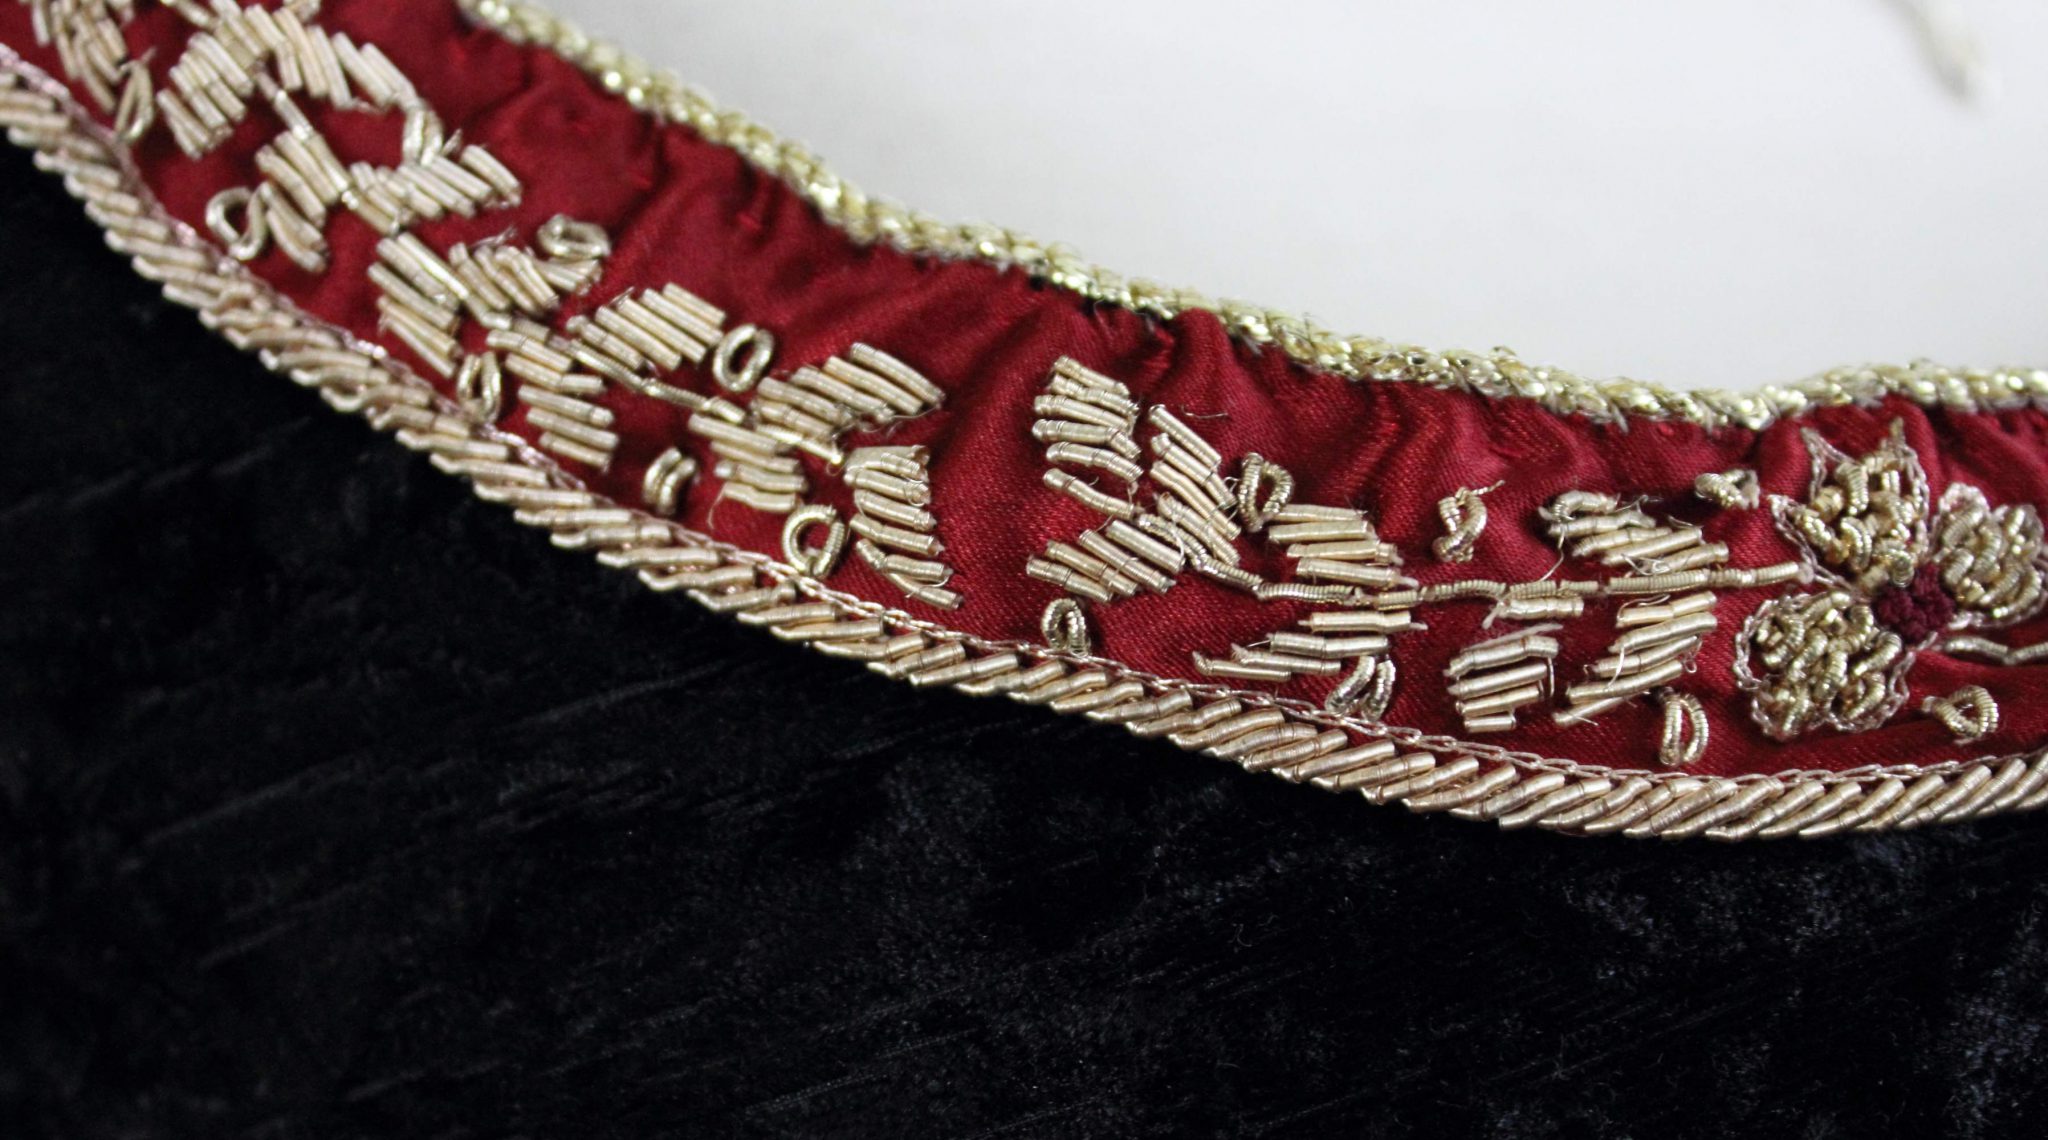
    If I was faced with this situation again I would unpick the purl embroidery, dart the trim to fit the neckline, and sew the purl back on. I did not do this because I had a limited amount of trim and purl to work with.

    The Beltred and gold bullion and filigree belt

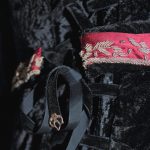
    Traumatized by the trim I approached the belt with a little more planning. The metal embroidery and goldwork gave the trim some weight. The belt needed to not stretch out but it also needed to lay correctly when on and not get in the way or catch on things.

    I turned to Starlightmasque’s Galadriel gown for ideas. I used lightweight buckram from Joanns, folded in half and then covered it in tubes of velvet. That was pressed and then basted and I hand sewed the trim down. I adjusted the front curve of the belt while it was on the dress form and covered the seam with a brass filigree stamping.

    Threads were clipped. I finished sewing on what was close to 30 tiny loops made from velvet ribbon, the facings were tacked down, plackets in place. It was ready to go West.

    Galadriel going into the West


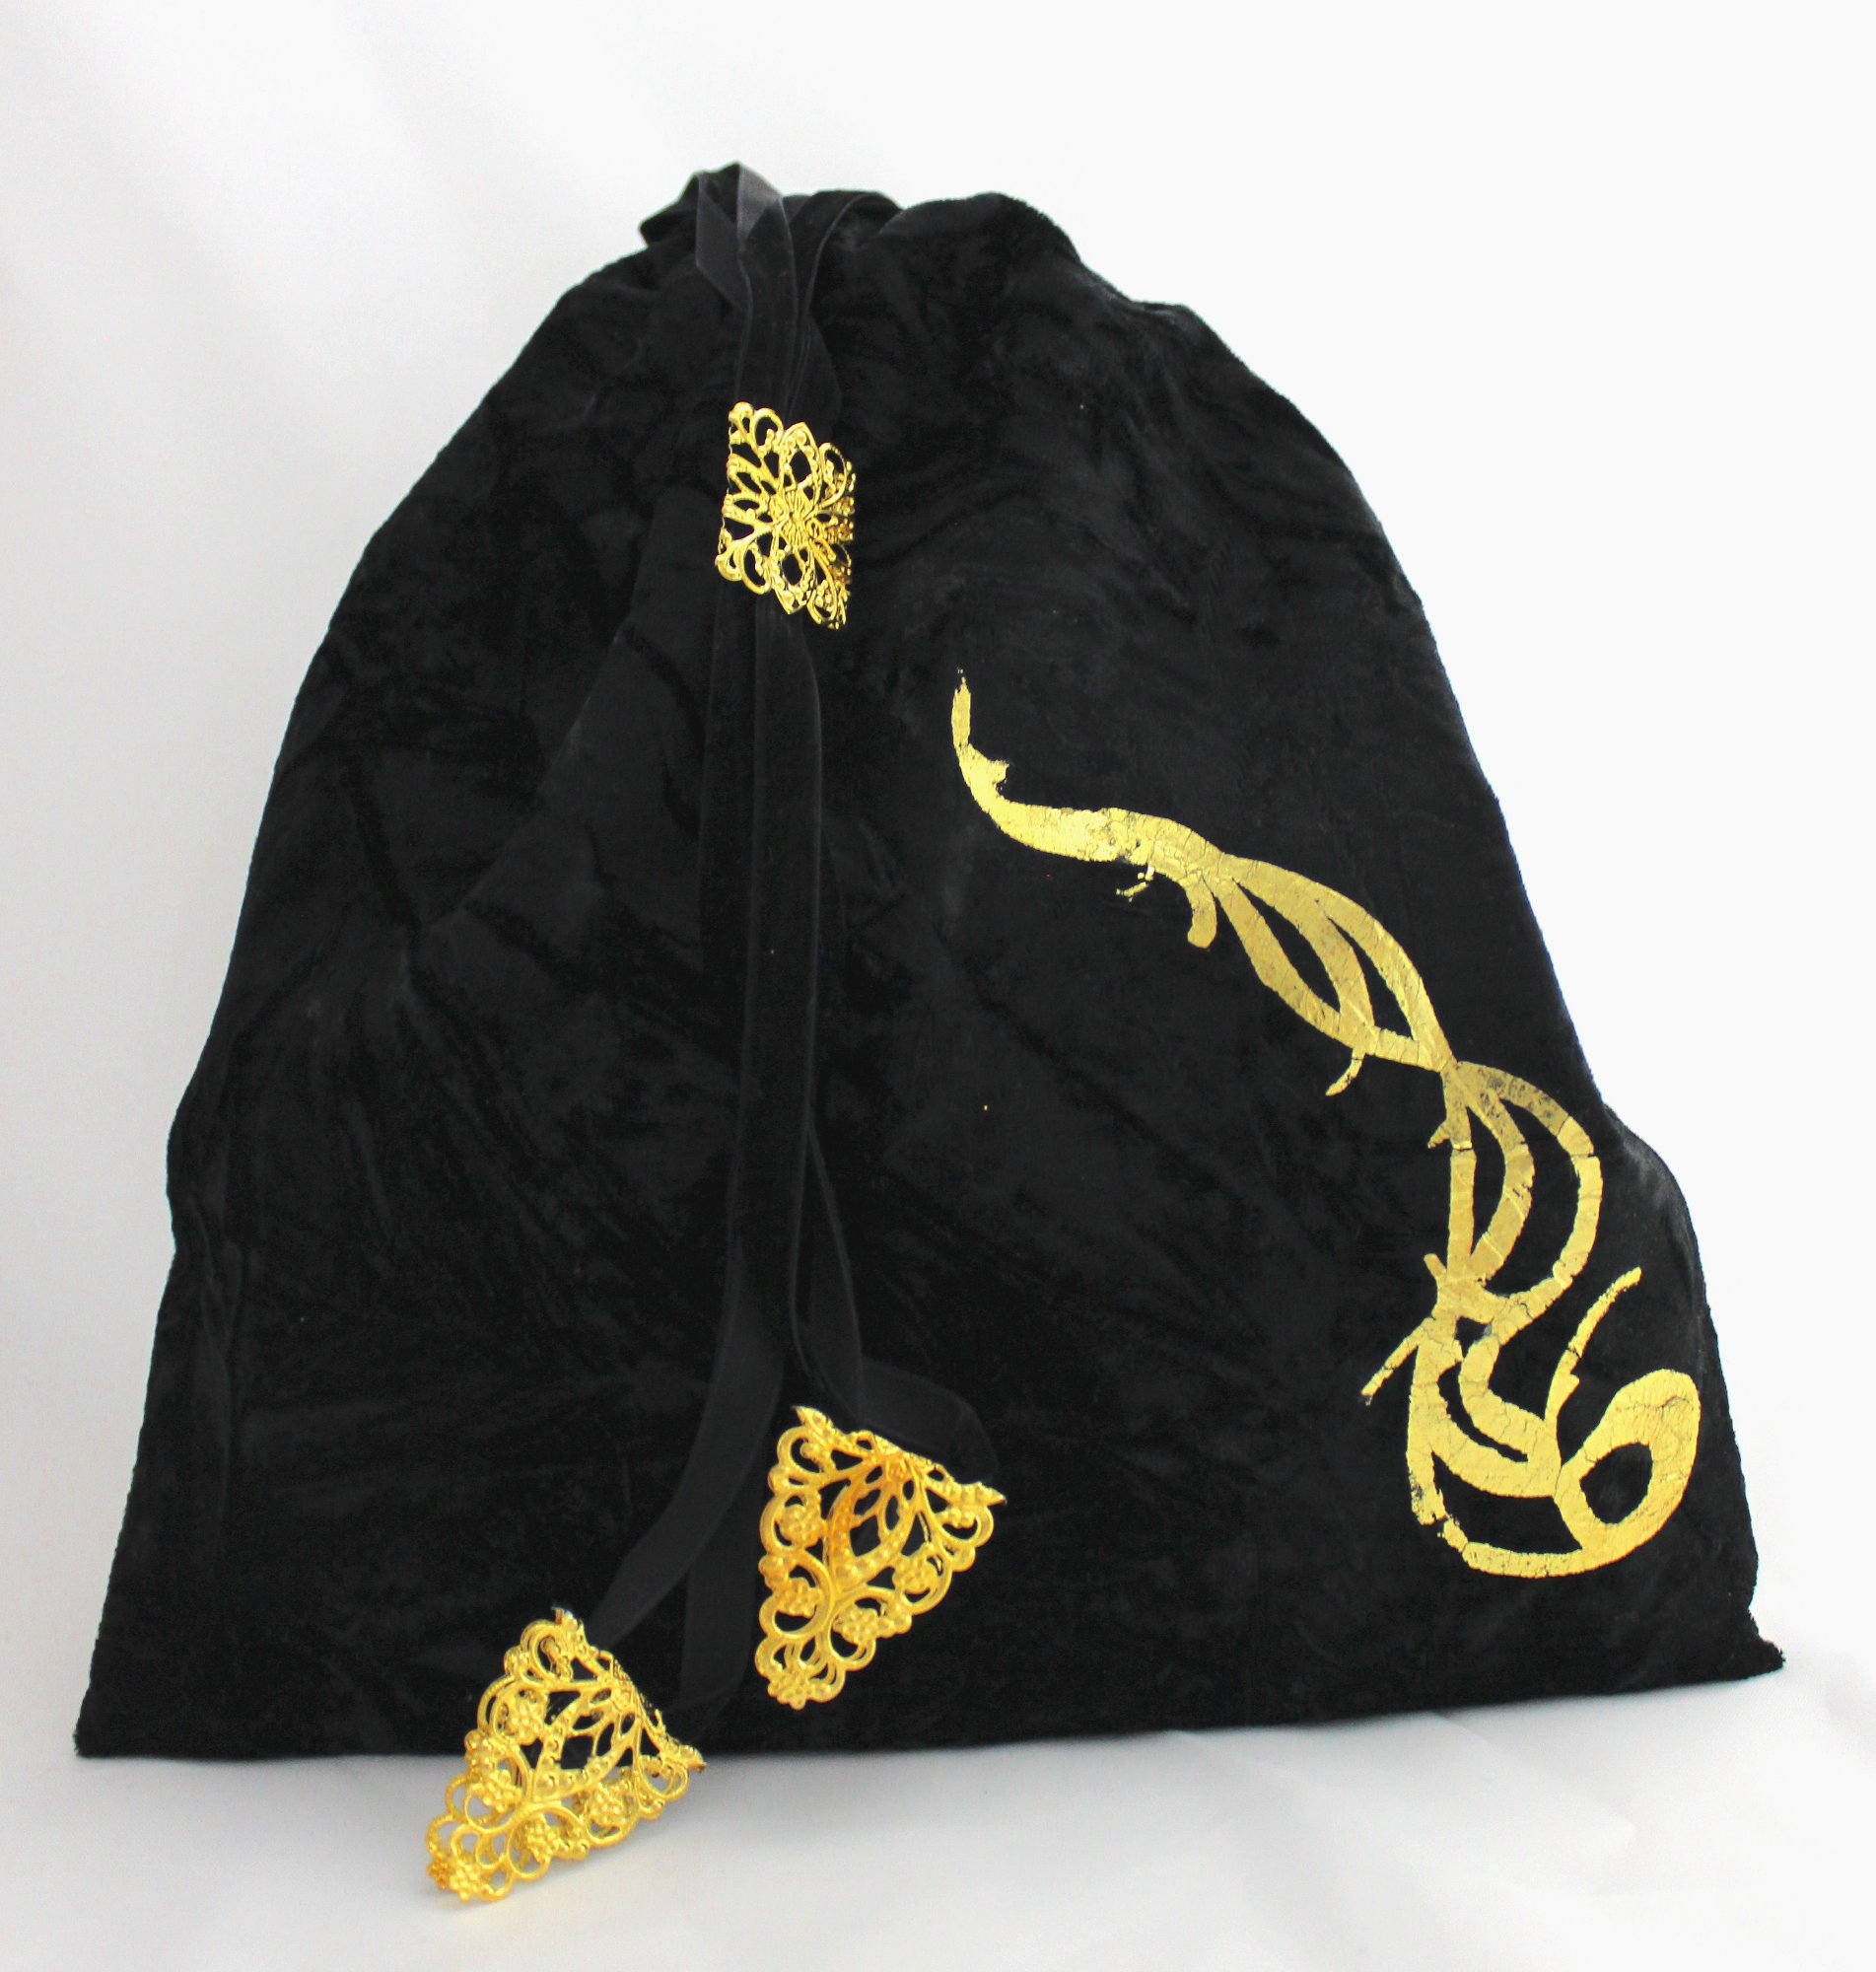
    But I needed something to put the belt in, the dress did not have pockets. My friend would need a place to put her phone and other accoutrements.

    Around 11 pm I thought, I’ll make her a bag from some of the scrap velvet and ribbon. It went together fast but it looked rather plain. Maybe I could gold leaf/foil velvet? I had some leftover supplies from another project. I did some tests on scrap fabric.

    The glue in the kit was not working, it didn’t have enough sticking power or it just sunk down into the nap.

    It is now around 1am.

    Can I gold leaf/foil velvet with double-sided fusible webbing? Yes. Some careful cutting and distressing later I had a very cute elven inspired bag. Never mind it was around 2am.

    Elven purse in velvet and gold

    Elven Gown Photos

  • Book Review: The American Duchess Guide to 18th Century Dressmaking

    Book Review: The American Duchess Guide to 18th Century Dressmaking

    Disclaimer: I was sent a free copy of this book for review purposes. However all thoughts, opinions, and criticisms are my own.

    A long time ago…

    Back when the internet was young, there was only a handful of books and websites to turn to if you had an interest in sewing 18th century clothing. Janet Arnold and Norah Waugh were hard to come by. I waited weeks for a costume book to arrive by an interlibrary loan only to be intimidated when I finally had it in hand.

    They were not beginner friendly books — and I was very much a beginner.

    Lauren Stowell and Abby Cox’s book would have helped me make sense of the diagrams and grids much sooner.

    The Book

    The book is robust, clocking in at 240 pages but also lean, there is no filler or fluff. It is laid out in a logical order starting with how to use the lining patterns and a list of the steps to fit your mockup. That is quickly followed by easy to understand diagrams of all the hand sewing stitches you will need, along with some extra information on where they were used and why.

    From there it jumps right into the 1740’s starting with petticoats and building up to the gown.  The photos which are well lit (even when working on pure white or black fabric) speak for themselves:


    Materials and Construction

    The section for each gown starts with a short paragraph on the style of gown, under that is a highlighted list of materials. Fabric amount, fabric type and fabric thread and weight. What follows are instructions for the pieces of each gown, be it petticoat or stomacher, hoops or rump (The book does not cover stays –which could be a seven-volume book, nor does it cover shifts. ) before getting to the gown itself.

    This is a wise choice, giving the sewer a chance to build up their hand sewing practice a little at a time as there may be new techniques and stitch choices.

    My favorite part, which sends my textile geek heart aflutter is the suggestion of how many stitches per inch to aim for. Thank you for including that, it is something I’ve long wished for in Arnold’s books.

    The instructions themselves are clear. I have yet to work through the book making a gown but in my reading, I was able to follow most of what was going on. Sometimes no matter how good the photos and detailed the text you just need to have the fabric in front of you.

    The patterns are on a gridded background with a scale block included, so you can size the image up using photoshop or a copier with ease.

    Frills and Furbelows also known as do you want to be a cupcake?

    The 4 gowns aside the book also covers the most important aspect of 18th century costume: Trim and accessories. Within each gown “decade” There are instructions and more lovely photos on what type of cap, hat, apron, mitt, purse, bow or trim to make to complete your outfit. It offers a plethora of items that you can use to dress things up or down and includes sewing with lace and fine organza fabrics. I do not doubt the skills shown in these sections are transferable to other areas of costuming as well.

    There are also detailed sections on getting dressed. Step by step, layer by layer of stays petticoats hoops and more. I’ve made costumes for friends and often have gotten texts asking “How do I put this on again?” The visual reference is a great guide to someone new to the 18th century.

    Finally, near the end of the book there is a section on troubleshooting. It is made up of illustrations highlighting fitting issues and an explanation on how to fix them. Throughout the book I keep looking for this section and was happy to see it, but there is a part of me that wants to put it in the front where it is easier to find.

    I do wish the book went into more depth on appropriate colors and fabric patterns. I understand this is a wide pool that shifted and changed throughout the era. But having a page or two of fabric examples would help train the eye.

    Is this book for you?

    I would set this book at a skill level of intermediate to advanced. A beginner could use this book with some extra guidance from an experienced sewing buddy, some may find the hand sewing focus intimidating.

    I have poked my toes into the 18th century dress making a few times, once as a beginner sewer and a few times later which resulted in a pile of unfinished projects. The 18th century is not my usual area, but this book makes me want to turn the pile of striped silk I’ve been hoarding into something fabulous.

    Buy The American Duchess Guide to 18th Century Dressmaking: How to Hand Sew Georgian Gowns and Wear Them With Style by Lauren Stowell and Abby Cox from Amazon.


  • House Stark Sigil Embroidery

    House Stark Sigil Embroidery


    “Bear Island knows no king but the King in the North, whose name is Stark.”


  • 17th Century Stomacher Slips Free Motion Embroidery

    17th Century Stomacher Slips Free Motion Embroidery

    I started these as learning samples in free motion embroidery. The small motifs are from a 17th-century stomacher at the V&A museum. The original was done in silk and silver gilt on linen with spangles. My samples are in polyester thread on cotton muslin with silver bullion wire and fine silver cord for some of the details.

    I have some silk thread on order so I can experiment further with the embroidery.

  • Lannister Embroidery Hear me Roar

    Lannister Embroidery Hear me Roar

    The sigil of House Lannister done in yellow, scarlet and gold metallic threads with gold bullion/french wire for the the mane and silver for the claws. Free motion embroidery and hand couch work.

  • Targaryen Embroidery

    Targaryen Embroidery

    A series of photos showing the process of free motion embroidery on House Targaryen’s sigil. Polyester threads on cotton muslin background, with silver bullion accents on the claws and eyes.

  • My First Cut Work Lace Project with Free Motion Embroidery

    My First Cut Work Lace Project with Free Motion Embroidery

    I’ve fallen in love with free motion embroidery. it doesn’t require a fancy machine, digitizing software, or hunting down designs that might not be quite right. I’ve been working on several different projects trying to push the bounds of what I can do.


  • 16th Century Shoe Hack: Painting Shoes

    16th Century Shoe Hack: Painting Shoes

    A month ago a Facebook post on Elizabethan Costume showed me some inexpensive* shoes (non-affiliated link)  that looked very similar to cutwork shoes found in period.

    The price was right, but they came in only one color: white.

    White cutwork style shoes before painting

    I ordered 2 pairs, not seeing the FB thread till much later about sizing up (and again if you are a half size). It took about 2 weeks for them to get to me but they were true to size for me with a few exceptions.

    I have wide feet, high arches, and a rectangular toe box shape. This makes shopping for shoes online hit or miss. Often the toe box is not wide enough and there is not enough width across the ball of my foot.

    When I tried the shoes on they highlighted these issues, but since they are faux leather I knew I could you a hair dryer to stretch them out. I put on thick socks, wrapped my foot in a face cloth, and then managed to get the shoes on.

    Then I took the hairdryer and slowly heated the areas that were too tight or rubbing. While doing this I wiggled my toes and shifted my feet around in the shoe to speed things along while being very careful not to burn myself.

    Once the material was warmed and my toe wiggling done, I switched the temperature to cool to help set it.

    Painting the Shoes

    Before I broke out the paintbrushes I prepped the shoes for painting. I used rubbing alcohol all over the surface of the shoe to remove any factory finishing or random grease or oils.

    While they dried I got all my supplies and materials together:

    Acrylic paint and textile medium

    Materials

    • Acrylic paints, textile medium, and matte varnish
    • Soft paint brushes
    • Disposable gloves
    • Paper towels
    • Cardboard to paint the shoes on
    • Plastic bags
    • Paper plate to use as a pallet and something to use as a mixing tool

    I stuffed the shoes with the plastic bags so they would keep their shape while painting and to keep the paint off the inside.

    The textile medium calls for 2 parts paint to one part medium. I kept to this ratio, adding a small amount of water to thin the paint out.

    For an oxblood color I added only a few drops of black to the Quinacridone red-orange to deepen the shade. I had to remake the color several times as I painted and learned it is easy to go overboard on the black.

    I started painting the shoes in with thin layers to start with, wanting to “stain” the material to keep the white from showing through later. After the first three layers of paint (which unfortunately I don’t have photos of) I thinned the paint out less and concentrated on coverage.

    This is where the soft brush is very useful it will help keep brush strokes to a minimum, but be sure to watch out for brush hairs getting stuck in the paint. There are a few in mine that I wasn’t able to remove in time.

    The last two layers of paint I thinned out again, working on shifting each shoe to a similar color. As I remixed the paint color several times there were some subtle variations in tone.

    My last pass on the shoes was around the edges and along the back of the strap. This was to keep any of the white material from being glaringly obvious.

    Painted shoes in an oxblood color

    I let the shoes dry for a few days just to make sure the paint was set. The acrylic and the textile medium dried to a glossy shine and also left the shoes slightly tacky (enough that they tried to stick to each other). As I was not able to heat set the shoes as the textile medium suggested I decided to seal them instead with a matte varnish.

    I gave them several thin coats which worked well to seal them (no more tackyness yay!) but done very little to knock back the gloss. Once I wear them the gloss may on longer be an issue, but it is something to keep in mind when working with textile medium.

    All I have left is some final clean up. I need to clean out the cutwork sections that filled up with paint and take some steel wool to the buckles.

    Other Painting Options

    For anyone who wants to paint their shoes with less fuss I have heard very good things about Angelus Leather Paints for shoes but have not tried them.

    *These shoes were very inexpensive, there was some loose thread that needed to be clipped and a few specks of glue to remove. They are not perfectly period shoes but would pass the 10-foot rule. For indoor events a few times a year I think they will hold up fine. For outdoor use, I would add insoles and change out the buckles.