Centuries-Sewing

Category: Sewing

  • How to Repair Lace Trim

    How to Repair Lace Trim

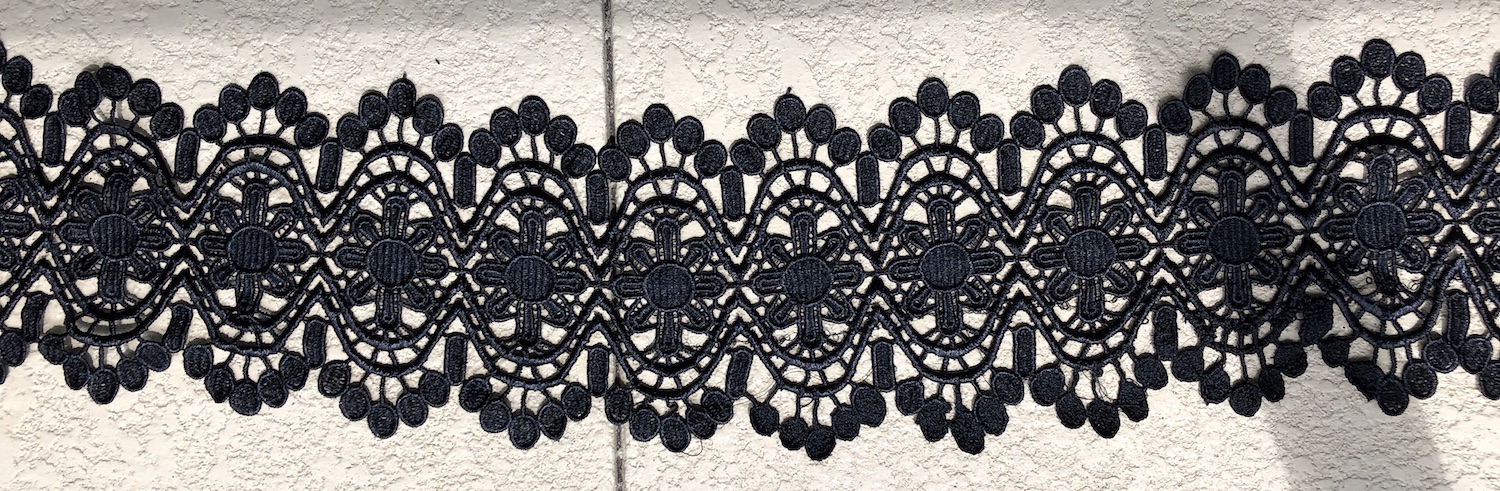
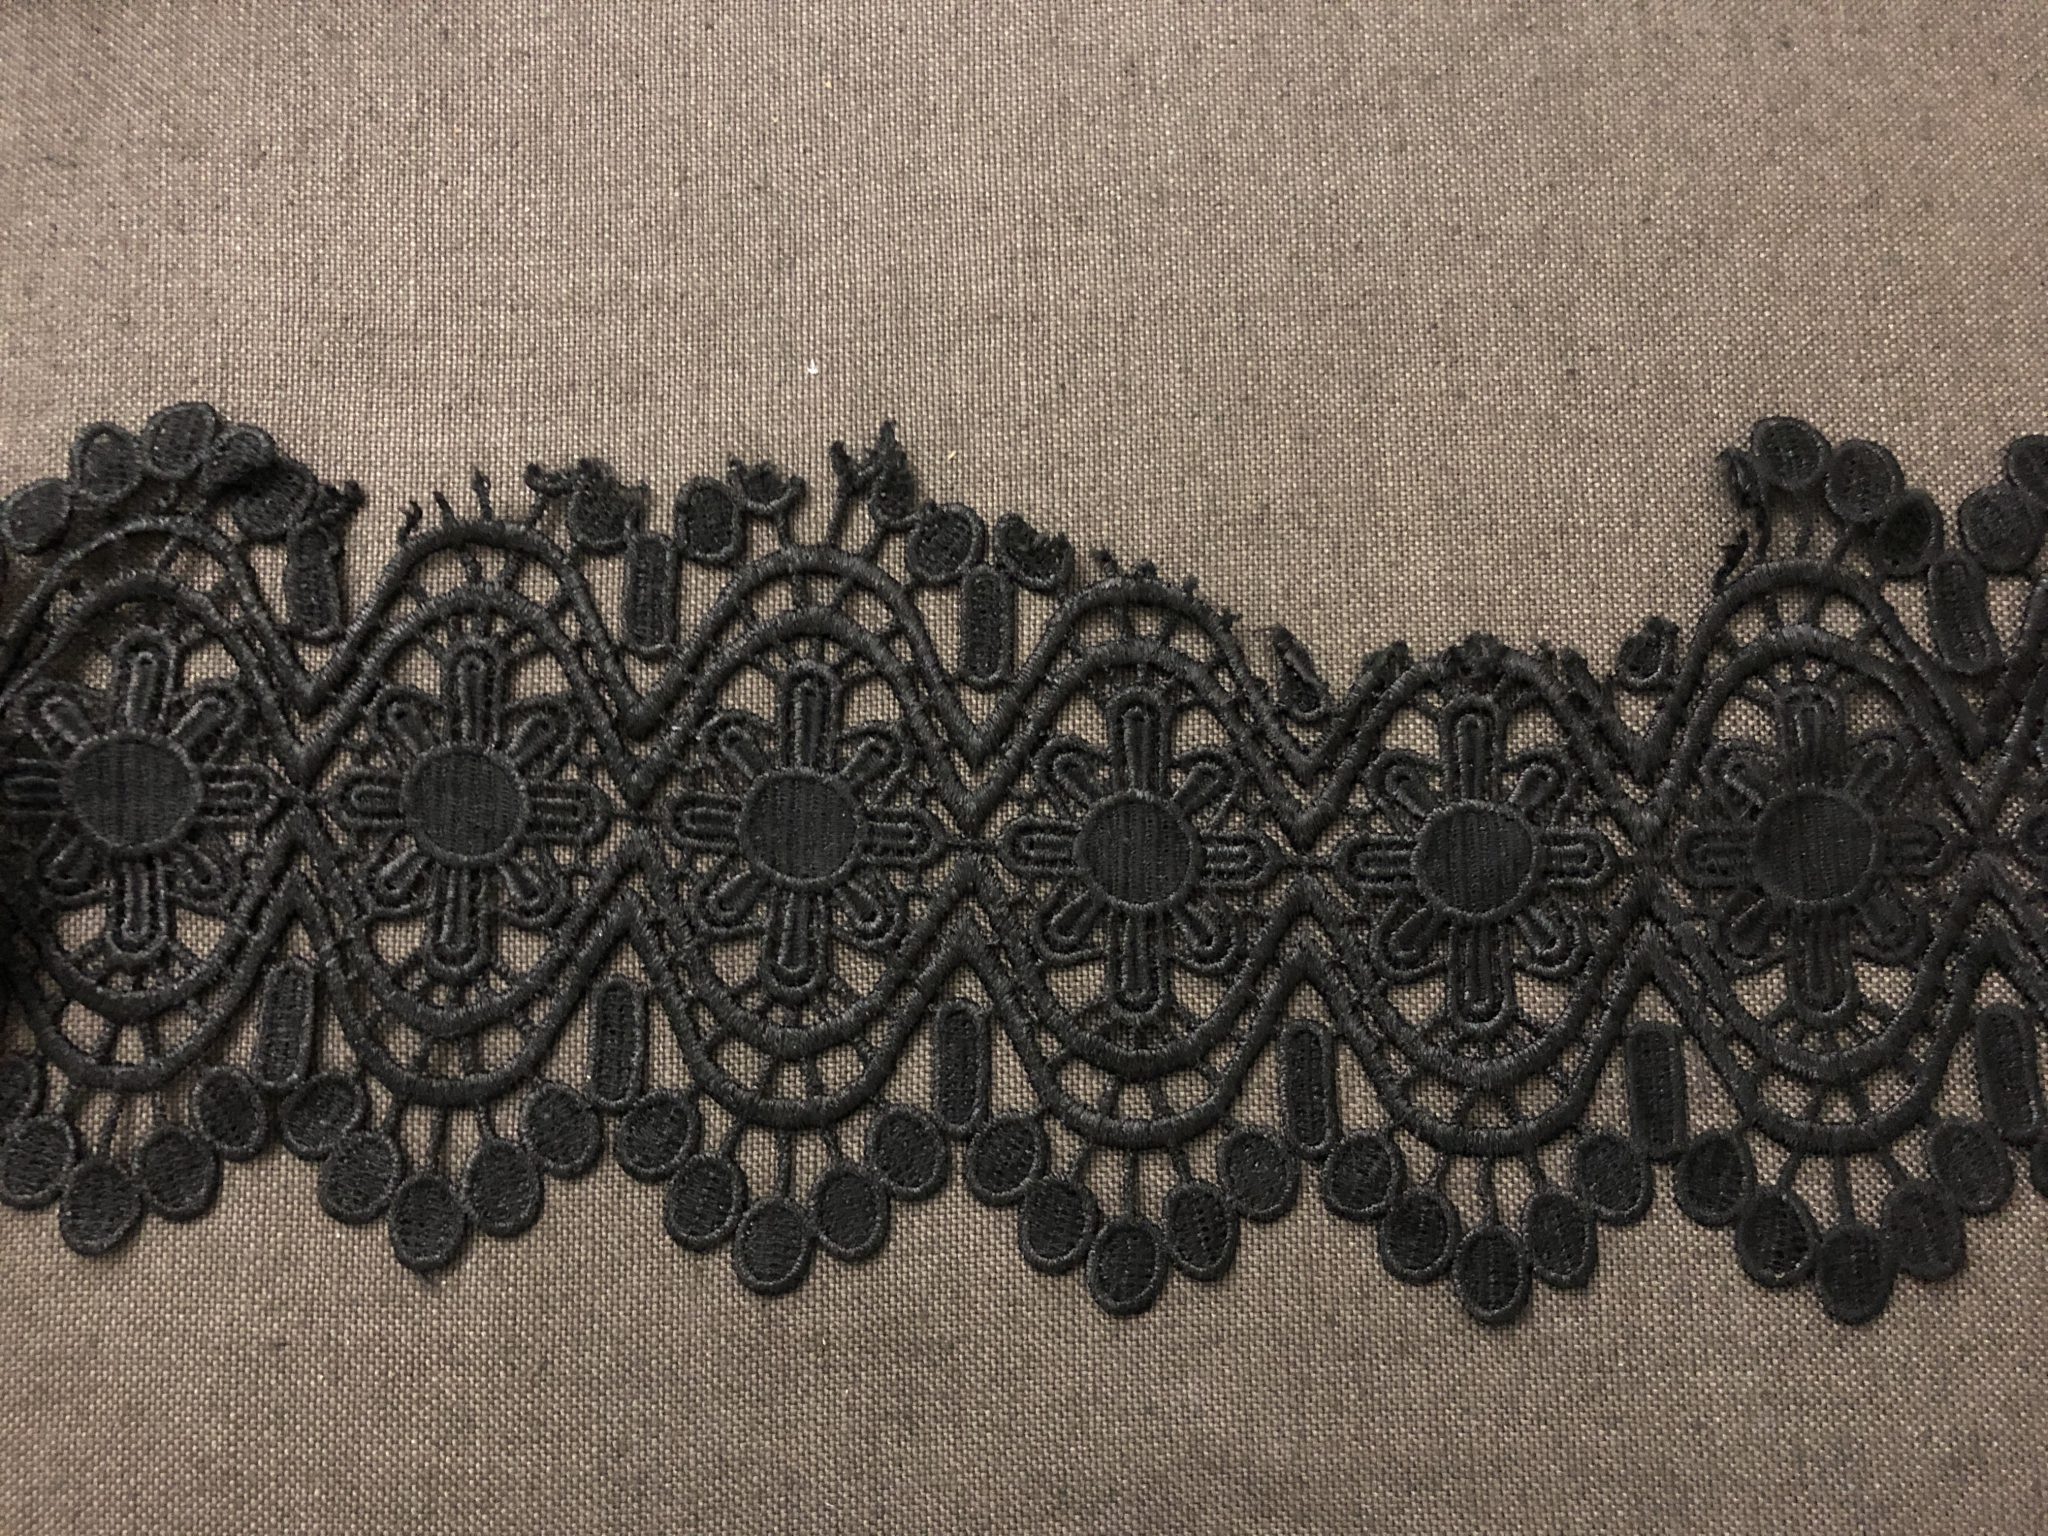
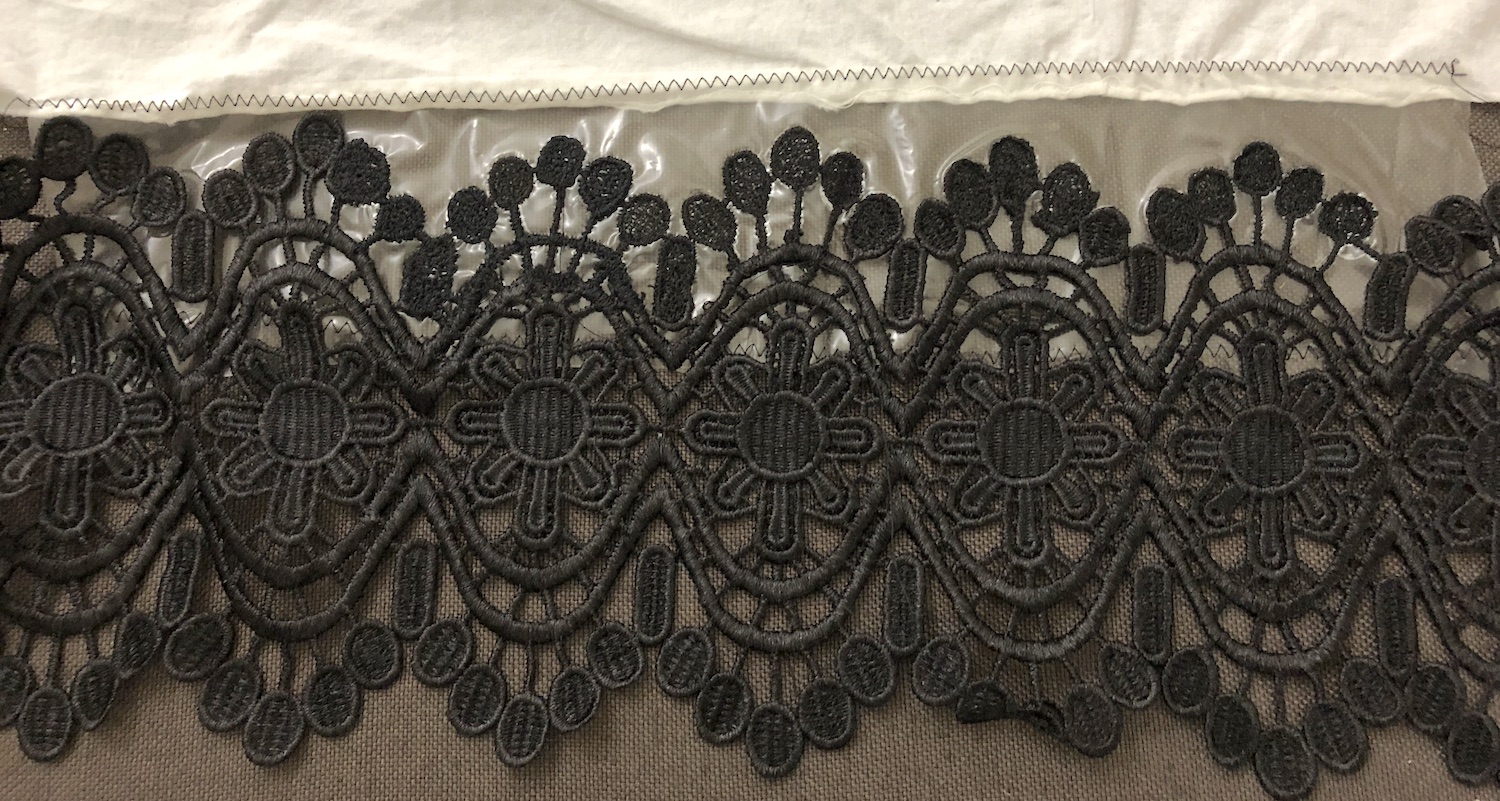
    Three weeks ago I purchased 4 yards of a wide black lace on Etsy. When it arrived I was happy with it, but on further inspection, I noticed it was torn badly over several of the motifs. I messaged the seller but never heard back. Now, I need every inch of the trim to go around the hem of a gown, getting more trim isn’t in my budget. The one I purchased was the right price and the right width.

    But I think I can rebuild it, with wash away stabilizer, some patience, and only a few broken needles.

    Section of torn black lace

    Materials:

    • Paper
    • Pencil
    • Thread
    • Embroidery or Top Stitch Needles (depending on the size of your thread)
    • Heavy Duty wash away stabilizer
    • Metallic Sharpie or Pen you can see easily


    First I made a rubbing of the lace. Just like a grade school nature project I put the paper on the lace and rubbed away with the pencil until I had the pattern of the lace showing through.

    Black lace and white paper rubbing

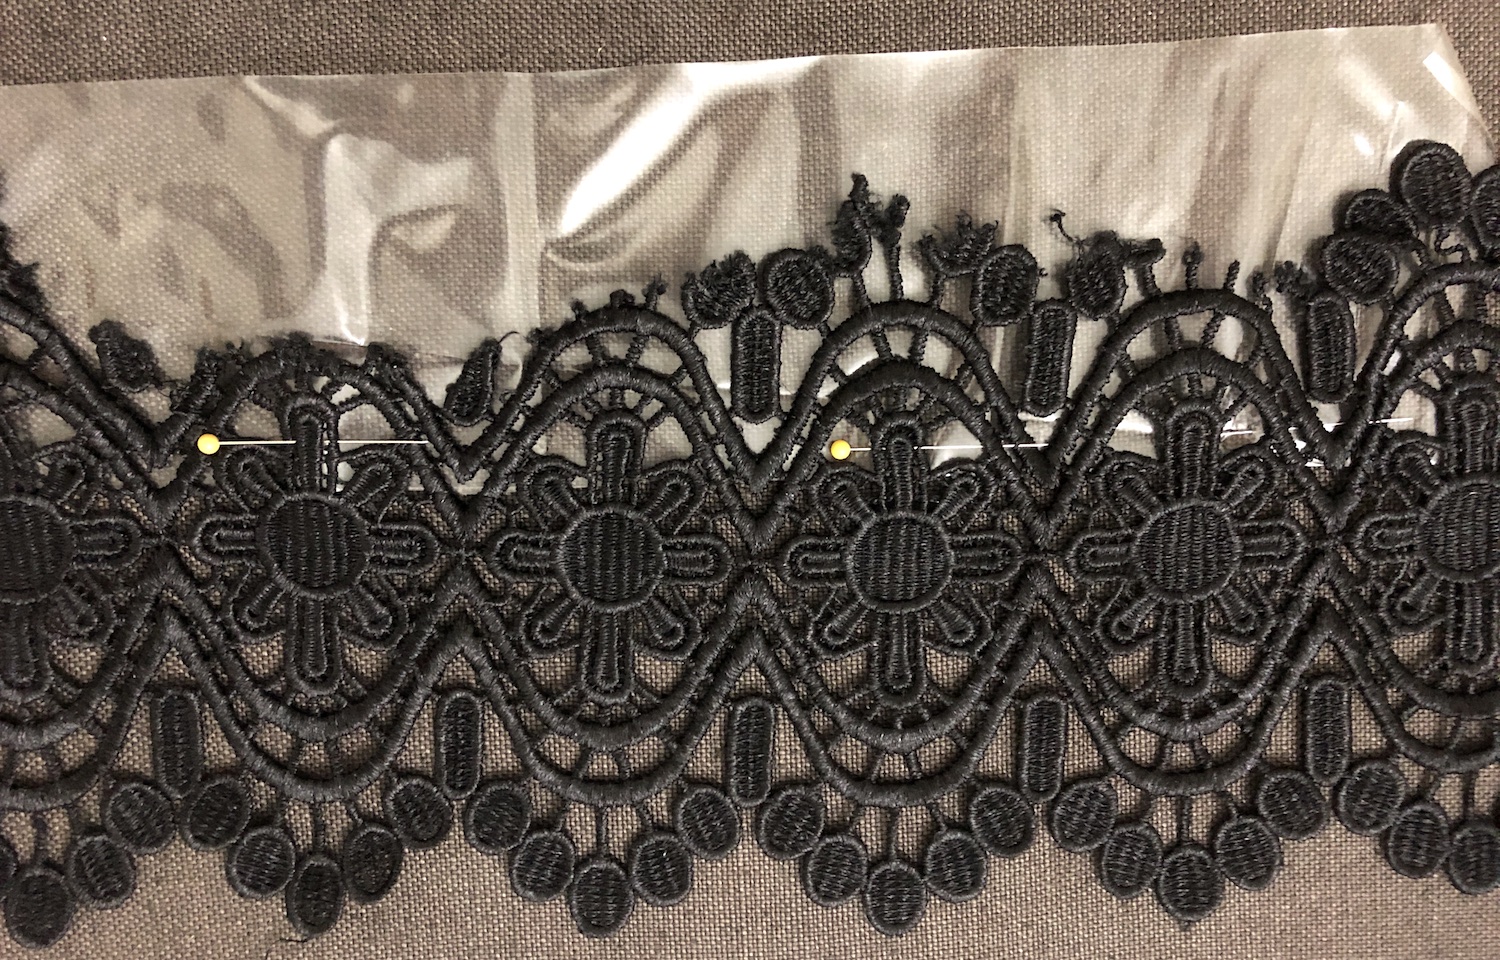
    Next, I cut 3-inch strips of the wash away stabilizer and pinned them to the lace. This was zig-zag stitched to the lace on the machine, along with a strip of muslin to make sure nothing would slip around in the embroidery hoop.

    Wash away stabilizer pinned in place to the black lace

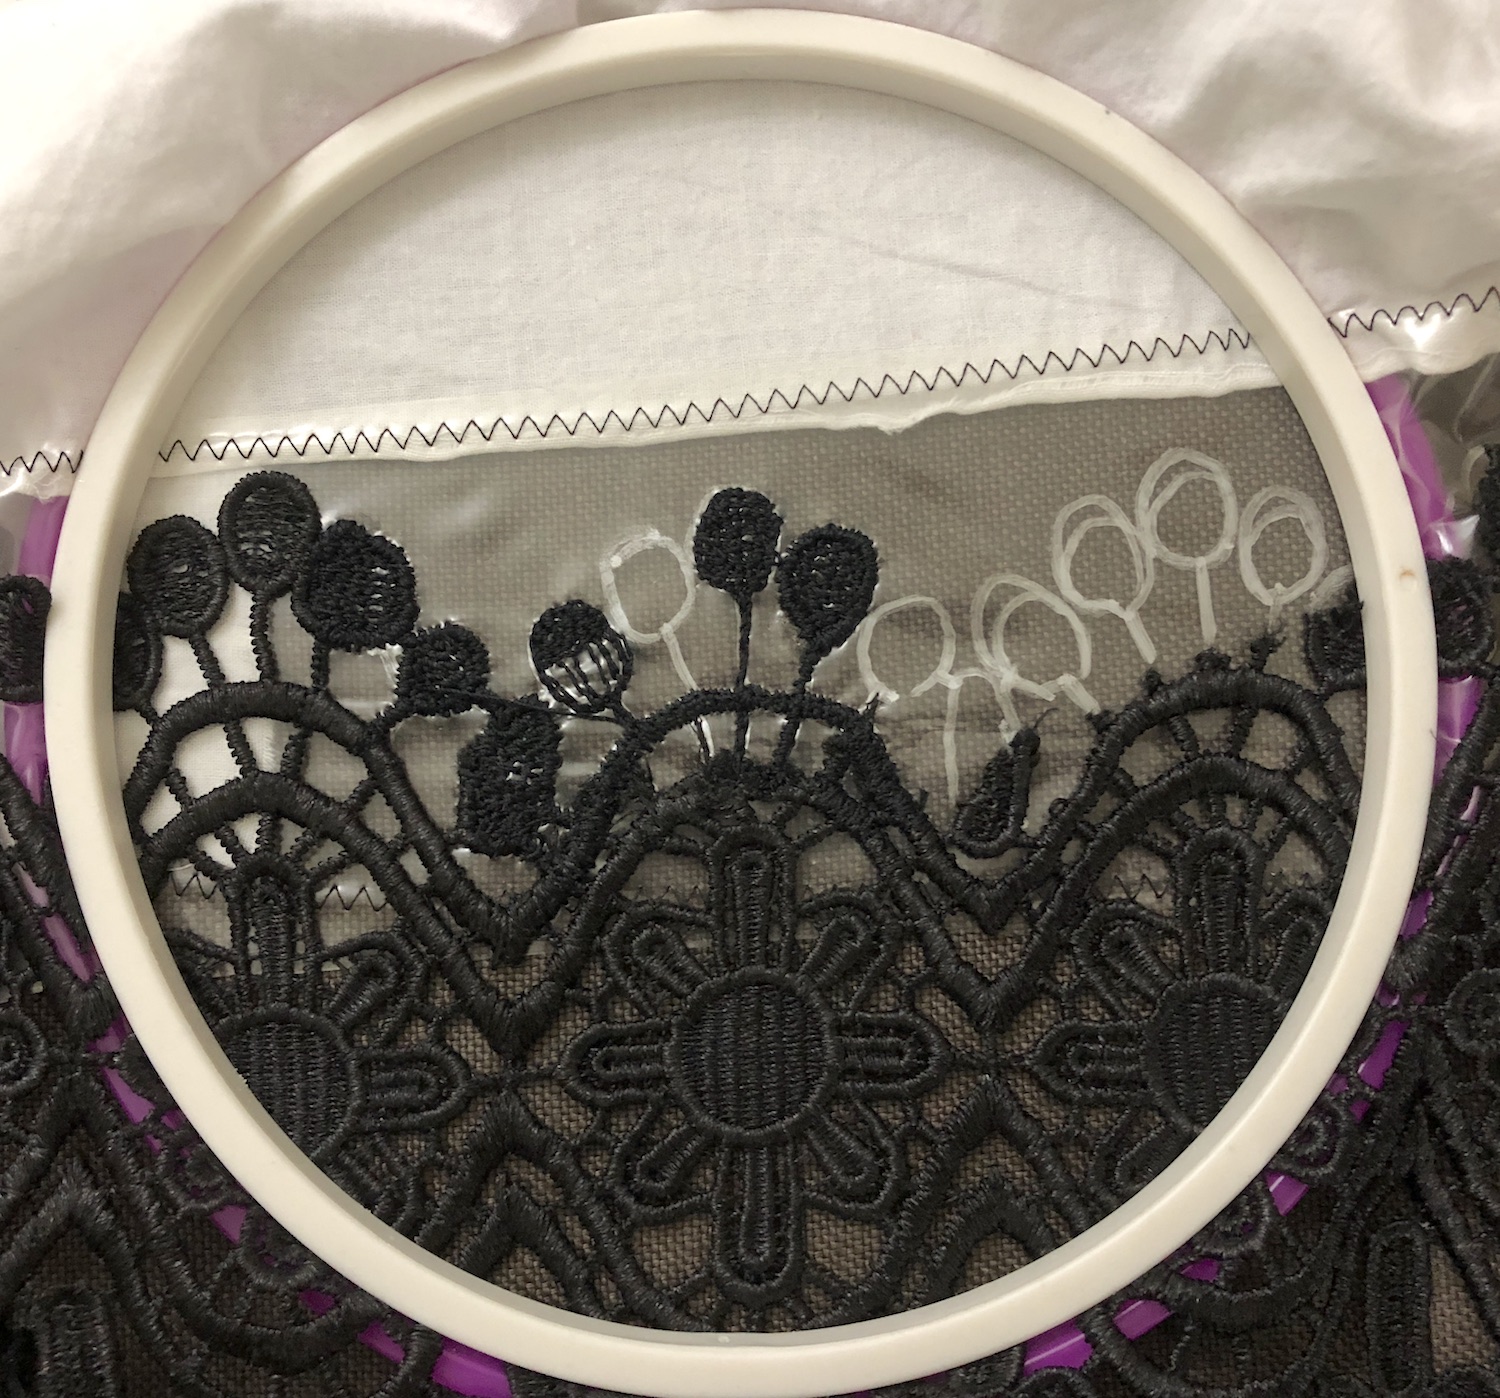
    Then I positioned the lace rubbing under each motif, lining the design up. On top of the stabilizer, I used the silver sharpie to draw in the missing elements along the edge of the lace.

    Black lace in hoop with stabilizer

    Now it was time to start rebuilding the lace. It took a few tries to find the right needle and thread combination.

    I started out with a rayon thread in the spool and a fine polyester in the bobbin. The needle shredded the top thread, so I switched to a topstitching needle and silk buttonhole twist for the top thread and a cotton thread in the bobbin. The silk twist kept getting pulled down into the bobbin casing.

    So finally I switched back to the rayon thread, kept the topstitch needle and the cotton thread in the bobbin and had no problem with it.

    First, take a few stitches into the lace itself and then start your outline, going around at least 4 times.


    I filled in each outline with a grid of threads going up and across several times to make a support lattice. Then I started filling in over the grid, keeping the stitches close until very little of the stabilizer can be seen.

    Once each “bubble” was filled I sew around the outside of it with a narrow small zig-zag stitch. This neatened the edge and locked the other stitches in place.

    Some of the black lace outlines filled in

    For the “stems” I ran three or four rows of stitching from the bubble to the lace, making sure to anchor it in place. I then went over the rows with the same zig-zag stitching. The process was the same for the rest of the lace, rebuilding or blending in new sections with existing ones and trimming off any parts that were too far gone.

    Section of black lace filled in

    My final step was to make sure each bubble was connected to its neighbor, is did this with a few stitches in each one and the same zig-zag stitching. I worked on the lace over the course of three days an hour or two at a time, until all the lace was rebuilt and looked like this:

    Repaired black lace with stabilizer

    Then it was time to trim away the excess stabilizer and see if all that time and effort held up.


    It did! Here is the final lace drying in the sunshine. Can you spot the repairs? A few bits are a little rough due to trying to blend the old lace with the new but from a foot away it will never show.

    Repaired black lace

  • How to Make a Velcro Corset Busk for Fittings and Mock-ups

    How to Make a Velcro Corset Busk for Fittings and Mock-ups

    Trying to fit a corset mock-up on your own body, by yourself, calls for patience and flexibility. I wanted something I could sew on quickly so I could check the general fit of a corset, without having to worry about busk length, zippers, or safety pins.

    The Velcro Corset Busk

    supplies

    Supplies

    • 2 lengths of flat steel boning
    • 2 sturdy strips of fabric, wide enough to fold in half. this will make your boning channels.
    • Velcro, either the sew on kind or the industrial strength adhesive kind
    • Sewing machine, pencil, scissors

    (more…)

  • Part 5 of the Elizabethan Kirtle Sew-Along Renaissance

    Four videos today, this weekend I’m going to shoot some more.

    Pressing and prep for the sleeve seam allowances


    Pressing the seam allowance with a seam roll when the sleeve is too narrow for the board.

    Sewing in the lining at the top of the sleeve.

    Hand sewing the bottom of the sleeve shut.


  • Part 4 of the Elizabethan Kirtle Sew-Along Renaissance


    Marking the eyelets out for spiral lacing

    Cutting out the sleeves (the wool is from my stash and the wrinkles would not steam out)

    First pass of sewing the sleeves together.


  • Part 3 of the Elizabethan Kirtle Sew-Along Renaissance


    Sewing in the lining around the top edge

    Clipping into corners and trimming

    Edge stitching the seam allowance to the lining along the top

  • Part 2 of the Elizabethan Kirtle Sew-Along Renaissance

    Pleating the skirt down with knife pleats and a box pleat in the back


    Basting the pleats in place

    Ironing the pleats down to keep things from moving around when I sew the skirt to the bodice

  • An Elizabethan Kirtle Sew-Along Renaissance

    Lucas DeHeere sketchbook #71 English women
    “Yeah, we look Awesome and Swag!”

    It has been 3 or 4 (mumble) years since I was going to do the kirtle sew-along. Life, family medical issues and changes got in the way.  My skill set has improved, how I break down projects has improved, but that does not mean I’m not still learning.

    So I set up the video camera, I balanced my tripod on the printer that-may-work-but-I-really-just-use-it-as-a-scanner, shoved my social anxiety into a box and hit record.

    I’m making kirtles. I’m making several kirtles that I plan to donate to Much Ado about Sebastopol. I don’t think I will get them all done in time for this years run, but there is always next year. If they get used, or auctioned off in a fundraiser, or end up in a school theater closet that is fine.

    I have several yards of wool, pattern blocks, and a chunk of time to make something out of it all.

    The playlist: https://www.youtube.com/watch?v=LTne9pSn75A&list=PL-5opaHvhlOkbr8K8buX1OpZm_4kHPPgU

    The first three videos:


  • Kirtle Sew-Along: Measurements and Adjustments

    Kirtle Sew-Along: Measurements and Adjustments

    Pattern Adjustments and Mock-ups

    To me this is the annoying and tedious part of sewing, but once it is done we will have a bodice pattern that fits and we can use for various projects. If you already have a block pattern by all means use it. I’m starting from the beginning because this is stuff I wish I knew when I was starting out.

    Materials:

    Pencil
    A small scrap of cardboard
    Tape
    Measuring tape
    A long Ruler
    Paper to trace your pattern on
    Muslin or calico for Mock-up(s)
    Scissors
    Narrow Elastic or Ribbon
    Tracing Wheel (optional)
    A pin

    Measurements:

    To start we need a few measurements, so take a second to change into a fitted knit top and if you wear extra support under your garb put that on too. I’m wearing modern jeans to show where where your waist is not.

    Natural  waist: ________ Take string or narrow elastic and tie it snug around your waist, wiggle around from side to side till it settles.  Make sure it isn’t twisted like mine is. This trick for finding the waist doesn’t always work, so a second way of finding it is to look at where your elbow falls, that will roughly tell you where your true waist is. (Thank you Elizabethan Costume facebook group for teaching me that proportional trick.)

    (more…)