If the embed doesn’t work, http://youtu.be/JdCsH4QUJBY
Category: Tutorials
-

Kirtle Sew-Along: Measurements and Adjustments
Pattern Adjustments and Mock-ups
To me this is the annoying and tedious part of sewing, but once it is done we will have a bodice pattern that fits and we can use for various projects. If you already have a block pattern by all means use it. I’m starting from the beginning because this is stuff I wish I knew when I was starting out.
Materials:
Pencil
A small scrap of cardboard
Tape
Measuring tape
A long Ruler
Paper to trace your pattern on
Muslin or calico for Mock-up(s)
Scissors
Narrow Elastic or Ribbon
Tracing Wheel (optional)
A pinMeasurements:
To start we need a few measurements, so take a second to change into a fitted knit top and if you wear extra support under your garb put that on too. I’m wearing modern jeans to show where where your waist is not.
Natural waist: ________ Take string or narrow elastic and tie it snug around your waist, wiggle around from side to side till it settles. Make sure it isn’t twisted like mine is. This trick for finding the waist doesn’t always work, so a second way of finding it is to look at where your elbow falls, that will roughly tell you where your true waist is. (Thank you Elizabethan Costume facebook group for teaching me that proportional trick.)
-

A Kirtle Sew Along: Introduction and Materials
Awesome Banner to use if you are playing along! Just have it link to: https://centuries-sewing.com/category/kirtle-sew-along/ So I posted about this on Facebook and on the Renn. costume forum but forgot to post about it here. Opps.
I’ve made a lot of kirtles, in various ways, with various materials and stiffening. I’ve also answered a lot of questions about kirtles, and while I will be the first to tell you I’m not the end all be all fount of kirtle information, I have learned a great deal about them.
I’ve decided to host a kirtle sew along, and go step by step on how I make a basic 16th century kirtle. This will help people just starting out, middle of the road sewers and maybe the experts will pick up a few tricks. I’m going to be posting in a mixture of photos, written instructions and if the weather cooperates, video.
I’m not going to hand sew this one, I tend to use the sewing machine where it will not show and hand finish the parts that will.
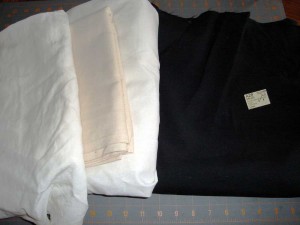
Wool! Twill! Calico! Linen! General Materials needed:
I’m giving a rough idea in the amounts listed if you are taller than average or plan to heavily preshrink your fabrics add more yardage.
4 to 5 yards of wool
4 to 5 yards linen for lining or just 2 yards of linen if only lining the bodice and sleeves
1 to 2 yards of twill/drill/canvas for interlining
2 to 4 yards muslin/calico for flatlining and mock ups
Matching embrodiery thread for eyelets
A roll of paper for patterning, or newspaper can work in a pinch..
Tracing wheel
Awl
Chalk
Hand sewing needles, pins and so forth.
Lacing strips for fitting.
Pattern:
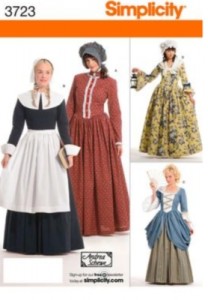
Simplicity pattern 3723 After much debate, I decided to use a store bought pattern as a base. Not everyone has a fitted bodice block, nor does everyone have access to a printer to print one out, or a dress form for draping.
Simplicity 3723 and 2354 is a basic costume pattern in a good range of sizes, the “Pilgrim” dress has waist darts and bust darts but no other fancy shaping so it is ideal for adapting. And in the U.S. with Halloween coming up they usually put the patterns on sale.
I’ll cover rotating out the darts, adapting the pattern to a curved front bodice, trouble shoot any fitting issues as best I can and any other things that might come up.
I haven’t worked with commercial patterns for a long time so this will be a refresher course for me.
We will be ignoring the pattern instructions, if you have a similar pattern in your stash, feel free to use it instead.
-
Scaling up Historical Patterns using Radial Projection
As requested, I finally got done editing and doing the voice over for the tutorial I shot back in September.
I hope everything makes sense and it isn’t too boring!
-

Spiral Lacing Template or Jig, perfect alignment every time.
As much as I love spiral lacing, and many kudos to Festive Attyre for introducing it to the costume world. (Or at least that is where I learned it from.)
But I hate marking eyelets. Something always goes a bit wibbly, and I am not going to pay 20 bucks for the little button hole marker no matter how neat it is.
As of late I’ve been using the back of another costume to mark my eyelets, but things went a bit off on that one too. So it carries over to all the things I mark.
I will suffer this no longer.
What you need:
- 2 narrow bits of cardstock or oaktag the same width (an inch or two is good) and height.
- A ruler
- A nice sharp pencil or fine tip pen
- An awl, compass point, or something you can poke small holes with
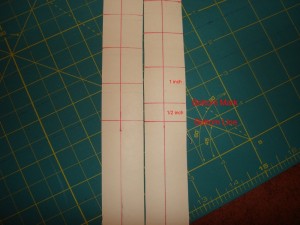
 Step 1: Take two strips of card and draw a line 1/2 an inch from the edge. If you tend to make your eyelets further in from the edge or have boning to put in, make the line the width of the boning plus a little extra.
 Pardon the iffy lighting on these, there was a huge thunderstorm going on while I was doing this.
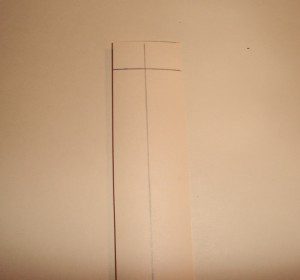 Step 2: Draw a line 1/2 an inch from the top on both card strips.
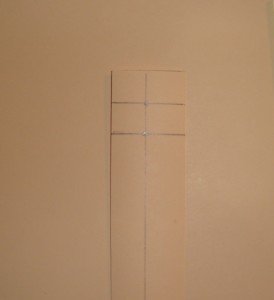
Step 3: On one strip, go down another 1/2 an inch. Set the second strip aside.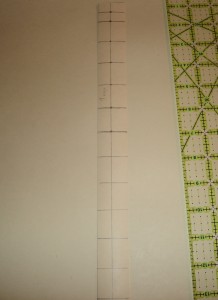
Step 4: Measure down 1 inch from the mark you just made and continue down.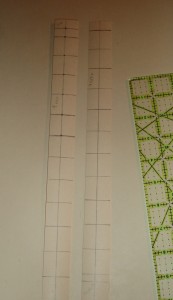
Step 5: Now take your second strip. Starting from your 1/2 inch mark measure down 1 inch and continue down. When you set the strips side by side the marks should be off set by 1/2 an inch.Notice here mine got offset by a bit more, most likely due to the thick pencil I was using.
Step 6: Double check your marks. I corrected them with a fine tip pen. When you get near the end of your second strip stop. Put the strips side by side again. On your second strip go down 1/2 an inch from your bottom mark and make a line. The bottom lines on both strips need to match or what you are lacing won’t align evenly.
Step: 7: Use an awl or something small a pointy make small holes in the cardstock where your lines cross. You want the hole just big enough that a pencil point will just be able to mark through it. A hole punch is too big and will lead to things getting wibbly again.
Now next time you have a bodice to mark for eyelets rather then fuss with a ruler just align the template along the edge and mark.
-

The Red Pisa Gown: Experiment with quilted interlining
After a year of putting the skirt together I have returned to making the “Pisa” Gown. This was not a planned execution back into the fray and fluff of velvet, but rather a unhinged returned after being driven half mad by Tudor skirts and lots of ironing. But more on that later.
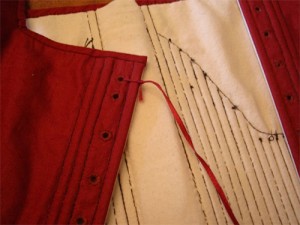
After my experiments with buckram and pad stitching I decided the first bodice I started on was a learning experience. I had yet to cut the final velvet layer so I didn’t feel too bad starting over. I used my tweaked block pattern and then got cold feet for a few days over the style of the bodice point.
Eleanora’s grave gown and the Pisa gown are both cut with a very steep dropped waist. I’m a bit smaller then Eleanora, based on the clothing measurements in the back of Pattern’s of fashion, and that steep of a point does not look good on me, so after some debate I cut the waist with a bit more curve at the waist to the point, rather then a straight line.
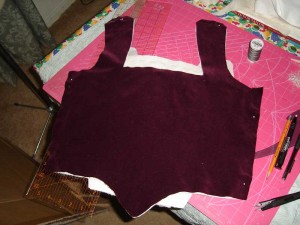
The final pattern shape. The bodice taken care of I had to decide how I was going to stiffen it. I’ve found that gown interlinings need to either be stiff enough to shape the body or soft enough to mold with the body, if it is between those two extremes you get creases and wrinkles.
Usually just a layer of twill or canvas works well for me, but Moda mentioned the use of felt interlinings which I’ve wanted to try since reading about it.
I did not have any felt on hand nor could I run out to the store at 3am, but I did have some cotton needle punched quilt batting and decided that was close enough.
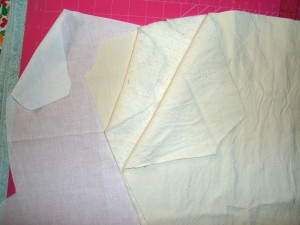
A layer of twill, batting and another layer of twill. What I used:
Washed cotton twill: 1 yard
Warm and natural cotton batting: 1/2 a yard
muslin (cut the pattern with straps and seam allowances): 1 yardI cut two layers of cotton twill, and a layer of the batting with seam allowances but without straps. Those were stacked in a twill, batting, twill sandwich, pinned and then the whole thing zig-zag stitched together.
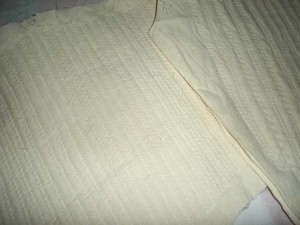
The padded interlining zig zag stitched together. I did the same thing for the back stopping each row before I got to the seam allowances, pivoting the interlining and then starting a new row. In the end the whole thing had almost a corded appearance. (Which might just be from some tension issues with the machine.)
With both pieces done I basted them by hand to a layer of muslin, sewing just the outer layer of twill to it. (The twill layer laying against the muslin).
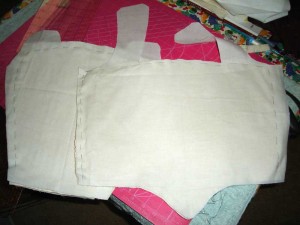
The padded interlining basted to muslin. 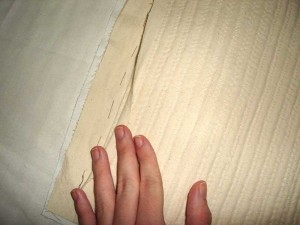
Cutting away the batting seam allowance, the twill soon to follow. I then cut away the seam allowances and in a little bit more, of the batting and the twill layer facing me. This reduces the bulk and means I will not be sewing eyelets through batting. The muslin is then basted to the velvet fabric all around save for the waist line which is left open.
-

Make and Mend: Repairing my Torn Smock
I hate making Tudor/Elizabethan smocks and shirts. They are boring, all the rectangles and squares don’t provide much of a technical challenge, save for a bit of fussing when setting in a gusset if you do it by machine.
Patterns of Fashion 4 has shown me the charm of a well made smock when bedecked with lace, embroidery and silk buttonhole twist. Enough that I have plans of making at least one by hand. That will take several weeks, and in the mean time I have other projects I want to work on and the one low cut smock I have (Yes only one.) has started to tear.
It is made out of plain cotton muslin rather then linen, but the fabric is still serviceable and I don’t mind wearing it.
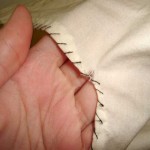
The tear happened right where there shoulder and chest area meet at a corner, when I made this I simply turned under the seam allowances and hemmed them down. I did sew over the corner area where the seam allowance was mitered to reinforcing things but that didn’t last.
So we are going to repair this tear and the small one that has started at the other corner, and then we are going to make sure it cannot tear again.
Note: I have not found any extant examples of this exact technique being used in the 16th century. Patterns of Fashion 4 mentions contemporary patches being but at the corner of one smock after embroidery was carried out. Other shirts have thread reinforcements at the end of seams. I wanted something smaller then a patch, due to the thin nature of the cotton and this is what I came up with.
First I fold the smock down, right sides together so the torn edges are flat against one another. Then I whip stitch over the edges, going just far enough in past the torn edges that the stitches do not pull out.
Do this as many times as needed until you have sewn up the tear, it will look almost like you have made a very small dart.
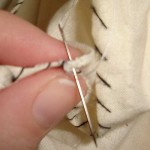
Whip stitching the tear together. 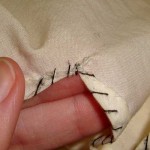
The stitched tear from the wrong side. 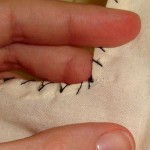
The stitched tear from the right side. The tear is no more, but that is still a weak area of the neckline.
So cut two lengths of selvage (the woven edge of the cloth that does not fray), you just need them to be a few inches.
Fold the cut edges of the selvage down with your fingers and then fold the selvage in half. With the folded cut edge facing the inside of the smock, pin the middle of the selvage to the corner of the neckline where the tear was.
Now whip stitch along the outside edge of the smock, catching the folded selvage edge and the neckline together with small stitches.
I’m sewing at about 30 stitches an inch which is finer then usual for me.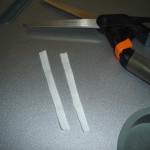
Two strips of selvage. 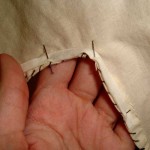
Pinning the selvage into place 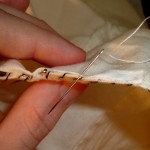
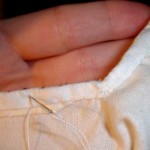
Sewing in the selvage with a whip stitch. Go along the edge of the smock till you reach the end of the selvage, turn the end under and stitch it down against the neckline hem.
Keep going along the inner edge until you get to the corner where the tear was, clip the selvage a tiny bit and then sew over the notch. You do not want to clip it to the neckline, that negates reinforcing the edge.
A small clip will ease the tension along the selvage without having to make a dart in it.
A tiny clip at the corner. 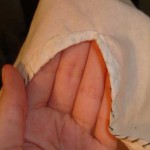
The finished inside. Finish sewing along the inner edge of the smock, tie off and clip your thread and you are done.


