
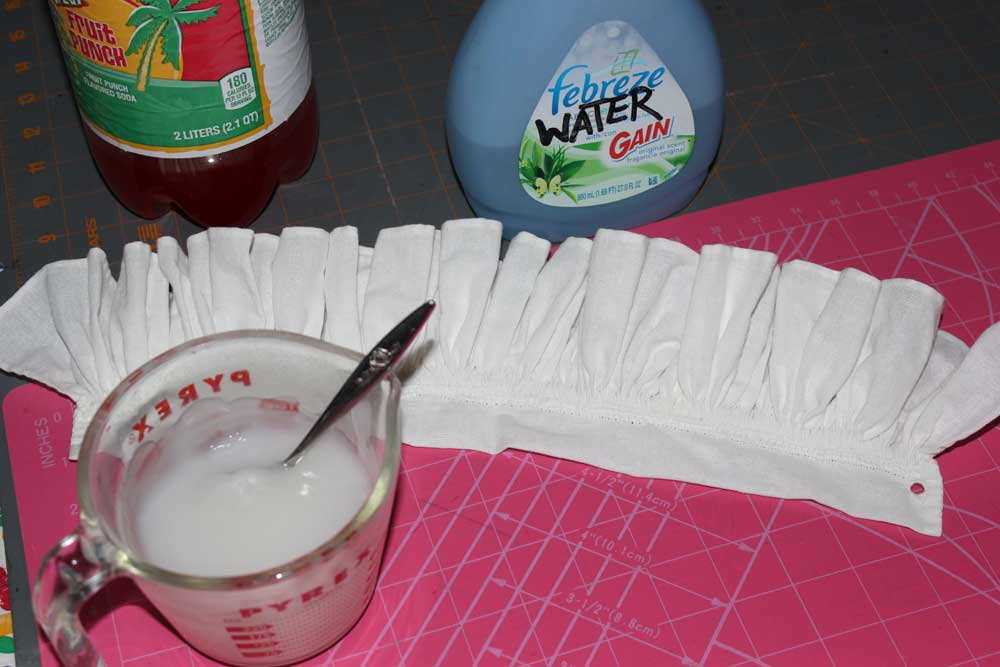
Finished my 95% hand sewn ruff, and ready to try starching for the first time.

Pattern Adjustments and Mock-ups
To me this is the annoying and tedious part of sewing, but once it is done we will have a bodice pattern that fits and we can use for various projects. If you already have a block pattern by all means use it. I’m starting from the beginning because this is stuff I wish I knew when I was starting out.
Materials:
Pencil
A small scrap of cardboard
Tape
Measuring tape
A long Ruler
Paper to trace your pattern on
Muslin or calico for Mock-up(s)
Scissors
Narrow Elastic or Ribbon
Tracing Wheel (optional)
A pin
Measurements:
To start we need a few measurements, so take a second to change into a fitted knit top and if you wear extra support under your garb put that on too. I’m wearing modern jeans to show where where your waist is not.


Natural waist: ________ Take string or narrow elastic and tie it snug around your waist, wiggle around from side to side till it settles. Make sure it isn’t twisted like mine is. This trick for finding the waist doesn’t always work, so a second way of finding it is to look at where your elbow falls, that will roughly tell you where your true waist is. (Thank you Elizabethan Costume facebook group for teaching me that proportional trick.)

I finally finished off the jacket project I started a few months ago. Well, I guess I really started it when I made the scaling up patterns video. I didn’t make any huge changes to the pattern I scaled up, the measurements were close to mine and I wanted to see what I would end up with. I had this green wool in my stash for a few years now and I knew that was what it wanted to be. It then fought me every step of the way. This was going to be a nice soothing hand sewing project that I could take my time on and enjoy. That lasted for a few weeks until I realized I needed to unpick both sleeves and sleeve lining. I decided it could either sit in the corner until it behaved or I could switch to the sewing machine and get it done.
Done is good, done is a wonderful thing.

So this is partly hand sewn, partly machine sewn with some hand finishing. In hindsight I should have done one more mock-up of the pattern to get everything super perfect but its a jacket and it works as a jacket.
The only changes I did to the pattern was to accommodate my ski slope shoulders and take the back seams in, and then take the back seams in even more, and raise the neckline to not quite doublet height.
Looking at it now I should let the back seams out a wee bit, I don’t have hooks and eyes in yet so there is some puckering where I pinned it shut. The only other change I might do is bring the armscye forward a little bit more.
The extra poof at the back of the sleeve lets me reach forward and up and back with no horrible pulling.
(more…)
I have a confession to make, I am not a huge fan of pink. It is a fine color and I can wear it without looking ill but in my day-to-day life it is rather absent.
Yet a great deal of my costumes and historical clothing however are pink. I didn’t really notice it at first, until someone suggested that I should make the pink gown in the Neufchatel painting.
Then I noticed, I did have at least 3 or 4 gowns that were pink. Be it by fate, or accident, of the by-product of digging through the clearance rack and looking for something useable.
I’ve found silk on sale, it was pink, I found a linen blend that was pink. I also managed to some how color match the linen to wool bought half a year later from a different store. I’ve tossed tables cloths and tan fabric into a scarlet and wine dye bath and they too all ended up some shade of pink.
Rose, Salmon, Cranberry, Azalea, Raspberry. Or more Elizabethan names, Maiden’s Blush, Carnation, Lusty Gallant.
The color is haunting me or hunting me with every project I make.
I resisted at first, maybe I could make it in a different color? Yet most of the fabric in my stash is already set aside for other projects, and I realized I picked up the perfect scrap of velvet for the gown trim a week ago.
I found a damaged silk blend sari for cheap, it should get here in a few weeks. Until then I have time to plan and plot. This is not my usual area of sewing, I usually stick to England and Spain. I’ve read a ton of dress diaries over the years so I know a few bits of terminology but I may get something things mixed up. I have a black velvet purse I could use for the bust band (brustfleck?) that has bullion embroidery on it, or I have a few other ideas on how to make something similar.
A few details from the painting:


So I posted about this on Facebook and on the Renn. costume forum but forgot to post about it here. Opps.
I’ve made a lot of kirtles, in various ways, with various materials and stiffening. I’ve also answered a lot of questions about kirtles, and while I will be the first to tell you I’m not the end all be all fount of kirtle information, I have learned a great deal about them.
I’ve decided to host a kirtle sew along, and go step by step on how I make a basic 16th century kirtle. This will help people just starting out, middle of the road sewers and maybe the experts will pick up a few tricks. I’m going to be posting in a mixture of photos, written instructions and if the weather cooperates, video.
I’m not going to hand sew this one, I tend to use the sewing machine where it will not show and hand finish the parts that will.

I’m giving a rough idea in the amounts listed if you are taller than average or plan to heavily preshrink your fabrics add more yardage.
4 to 5 yards of wool
4 to 5 yards linen for lining or just 2 yards of linen if only lining the bodice and sleeves
1 to 2 yards of twill/drill/canvas for interlining
2 to 4 yards muslin/calico for flatlining and mock ups
Matching embrodiery thread for eyelets
A roll of paper for patterning, or newspaper can work in a pinch..
Tracing wheel
Awl
Chalk
Hand sewing needles, pins and so forth.
Lacing strips for fitting.

After much debate, I decided to use a store bought pattern as a base. Not everyone has a fitted bodice block, nor does everyone have access to a printer to print one out, or a dress form for draping.
Simplicity 3723 and 2354 is a basic costume pattern in a good range of sizes, the “Pilgrim” dress has waist darts and bust darts but no other fancy shaping so it is ideal for adapting. And in the U.S. with Halloween coming up they usually put the patterns on sale.
I’ll cover rotating out the darts, adapting the pattern to a curved front bodice, trouble shoot any fitting issues as best I can and any other things that might come up.
I haven’t worked with commercial patterns for a long time so this will be a refresher course for me.
We will be ignoring the pattern instructions, if you have a similar pattern in your stash, feel free to use it instead.
I’ve started a small collection of images from Civitates Orbis Terrarum from the Historic Cities website. More to come when I have time to comb through all the different versions and crop and adjust the files.


Since getting The Queen’s Servant’s I’ve been coveting the pointed hood with a sort of fiendish glee, it also might be an under layer to the strange headdress in Holbein the Younger’s drawing.
A month ago I scaled up the pattern and made a mock-up. It was huge, it devoured my head. I have a normal size head, but the hat made it look like a peanut.

Thinking perhaps I scaled it up wrong I set about slashing the pattern and scaling it down to no avail. I took in the mock-up 3 or 4 times before toss it in the corner.
It was Franken-hood. I don’t have any photos of the monstrosity.
Tonight I decided to try it again, I took 3 or 4 measurements and scaled the pattern up to my head depth and jaw level.

It wasn’t bad, but I wasn’t happy with the shape in the back, it didn’t look cute, it looked like I had a copernican attached to my bun.

Much cuter. But something niggled at the back of my mind. Why was the scaled up pattern from the book so big? I went back and looked at the scale ratio and reread the instructions, then I noticed the little line drawing on the side. The round hood had the front folded back. This wasn’t mentioned anywhere in the book, and it is hard to see from the photos when everything is black velvet on black velvet.
So I scaled up the original pattern again.

Another round of pinning and I have this when I fold back the front edge and let it form the frontlet.

Much much better. The simple version in the book doesn’t look like it is worn with a separate frontlet, so I am going to use the frontlet pattern as a facing for the turn back portion of the hood.

Write up and photos are here