Centuries-Sewing

Category: Elizabethan

  • 16th Century Shoe Hack: Painting Shoes

    16th Century Shoe Hack: Painting Shoes

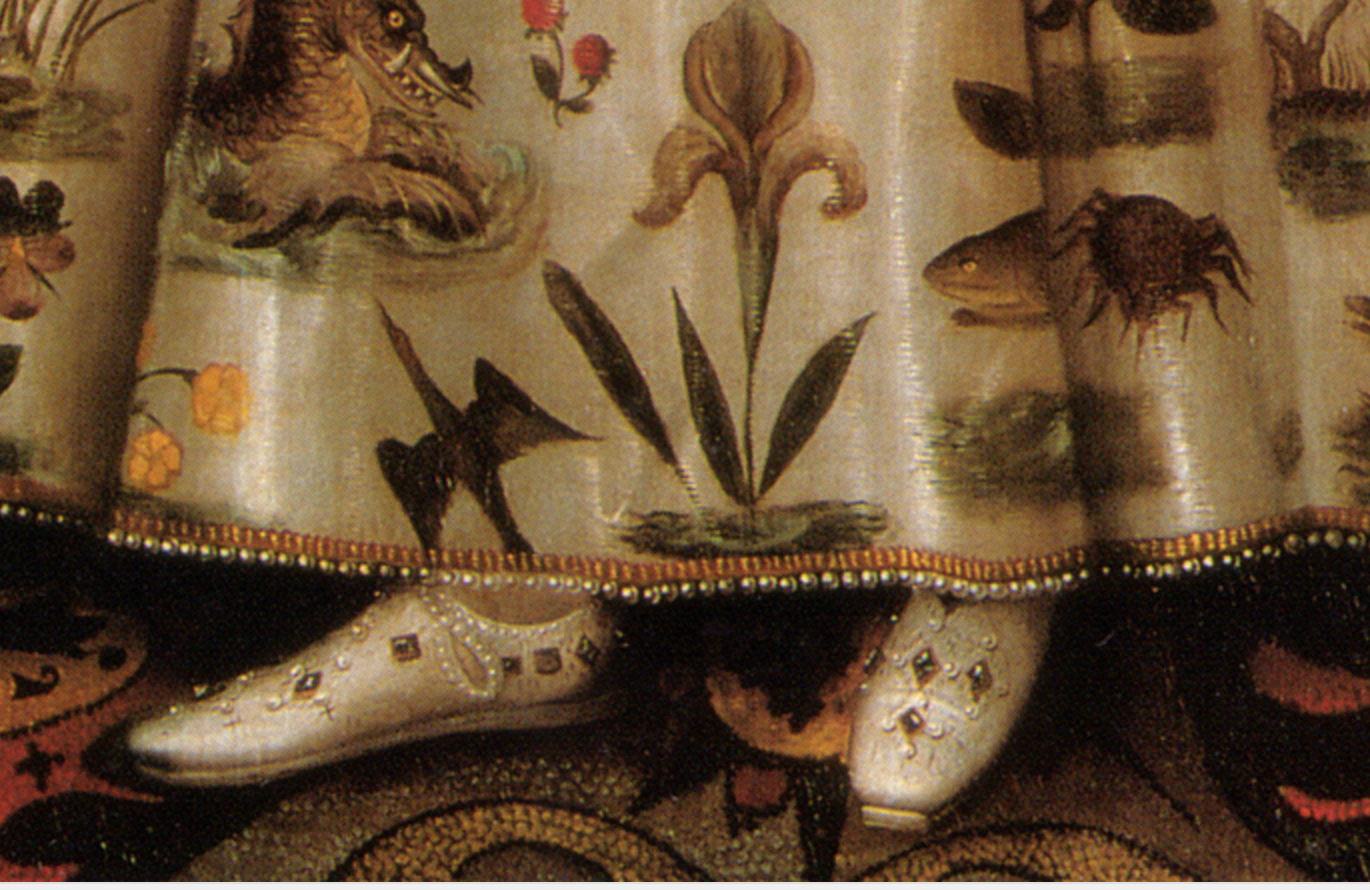
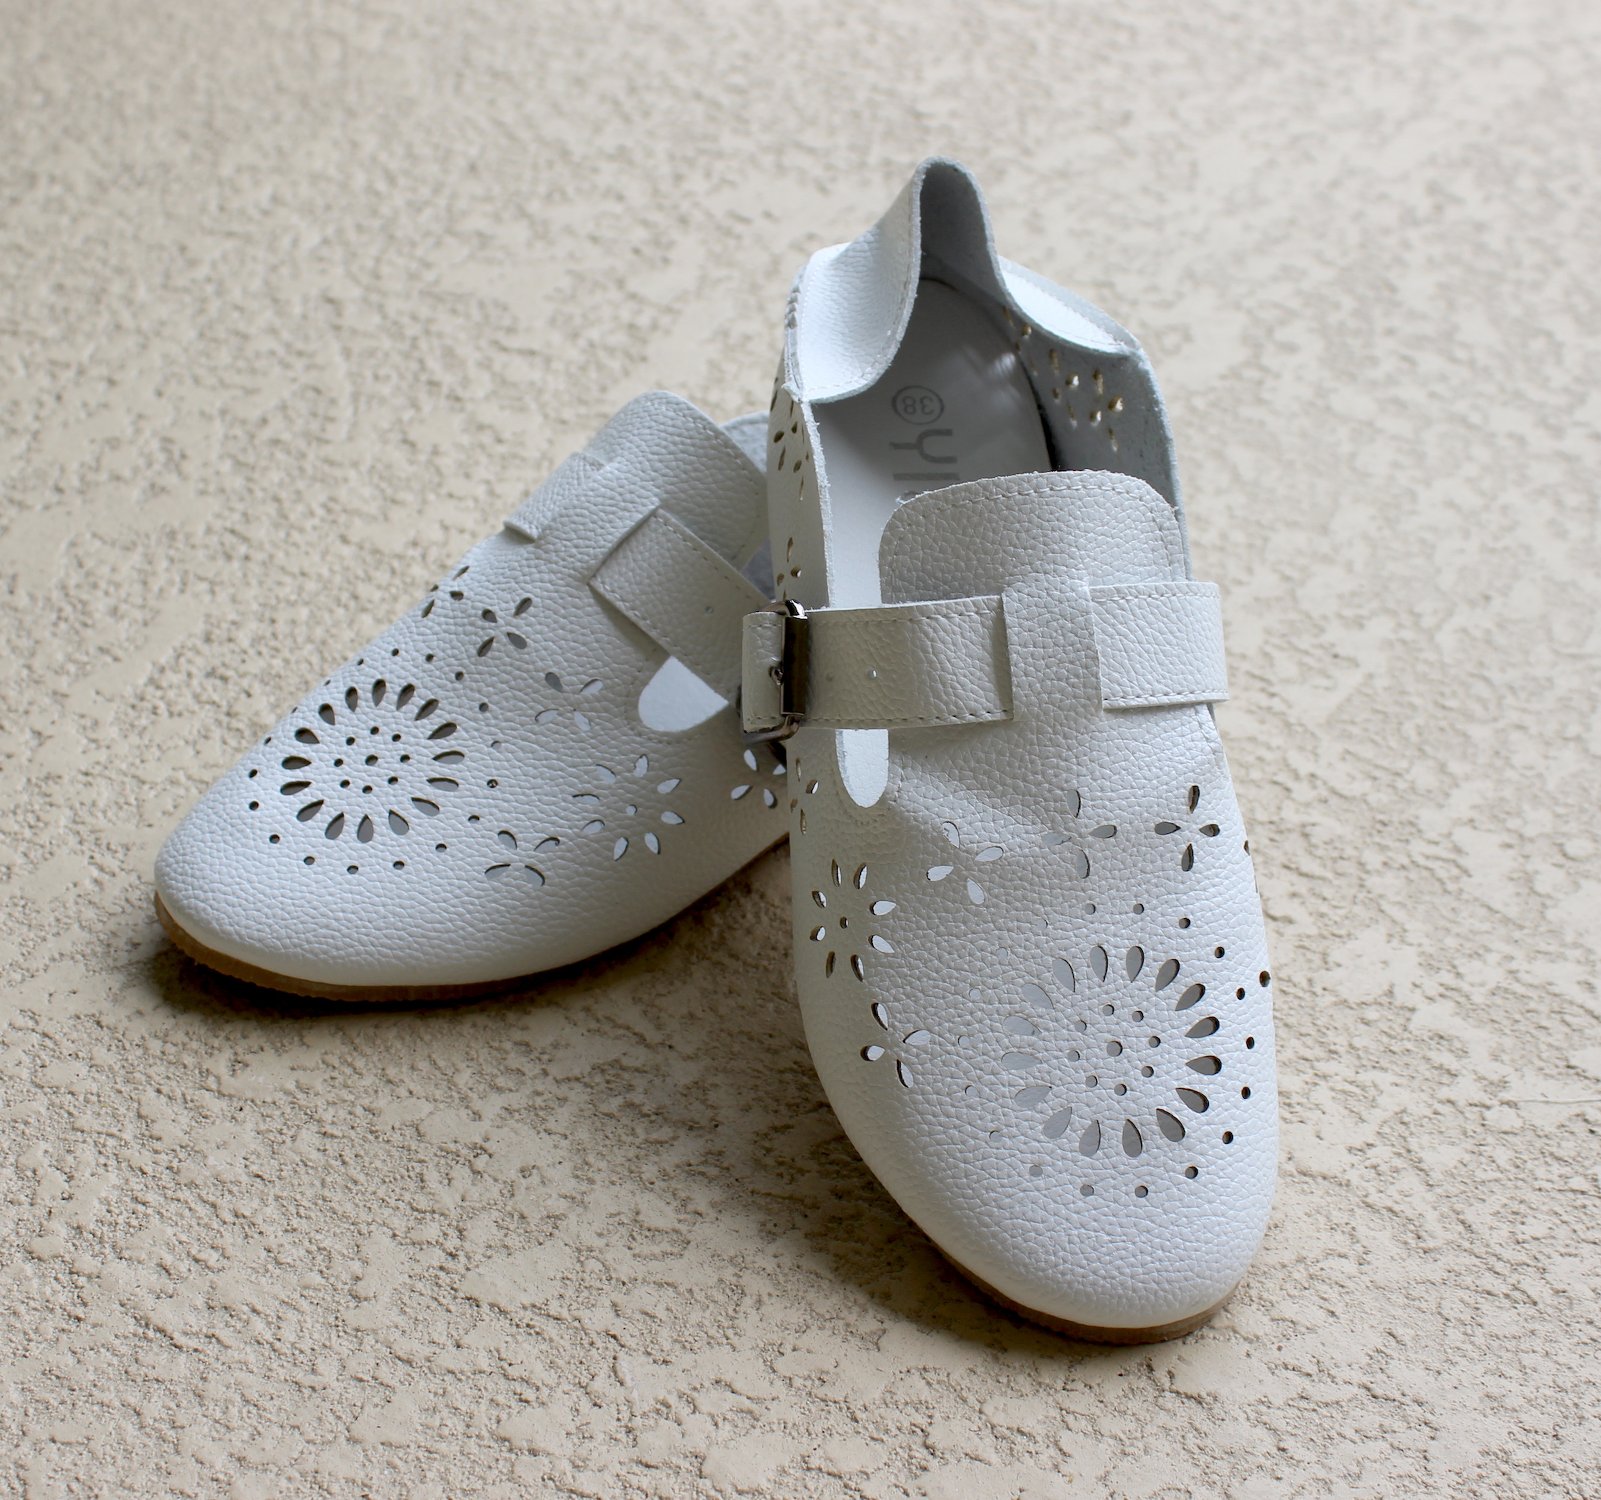
    A month ago a Facebook post on Elizabethan Costume showed me some inexpensive* shoes (non-affiliated link)  that looked very similar to cutwork shoes found in period.

    The price was right, but they came in only one color: white.

    White cutwork style shoes before painting

    I ordered 2 pairs, not seeing the FB thread till much later about sizing up (and again if you are a half size). It took about 2 weeks for them to get to me but they were true to size for me with a few exceptions.

    I have wide feet, high arches, and a rectangular toe box shape. This makes shopping for shoes online hit or miss. Often the toe box is not wide enough and there is not enough width across the ball of my foot.

    When I tried the shoes on they highlighted these issues, but since they are faux leather I knew I could you a hair dryer to stretch them out. I put on thick socks, wrapped my foot in a face cloth, and then managed to get the shoes on.

    Then I took the hairdryer and slowly heated the areas that were too tight or rubbing. While doing this I wiggled my toes and shifted my feet around in the shoe to speed things along while being very careful not to burn myself.

    Once the material was warmed and my toe wiggling done, I switched the temperature to cool to help set it.

    Painting the Shoes

    Before I broke out the paintbrushes I prepped the shoes for painting. I used rubbing alcohol all over the surface of the shoe to remove any factory finishing or random grease or oils.

    While they dried I got all my supplies and materials together:

    Acrylic paint and textile medium

    Materials

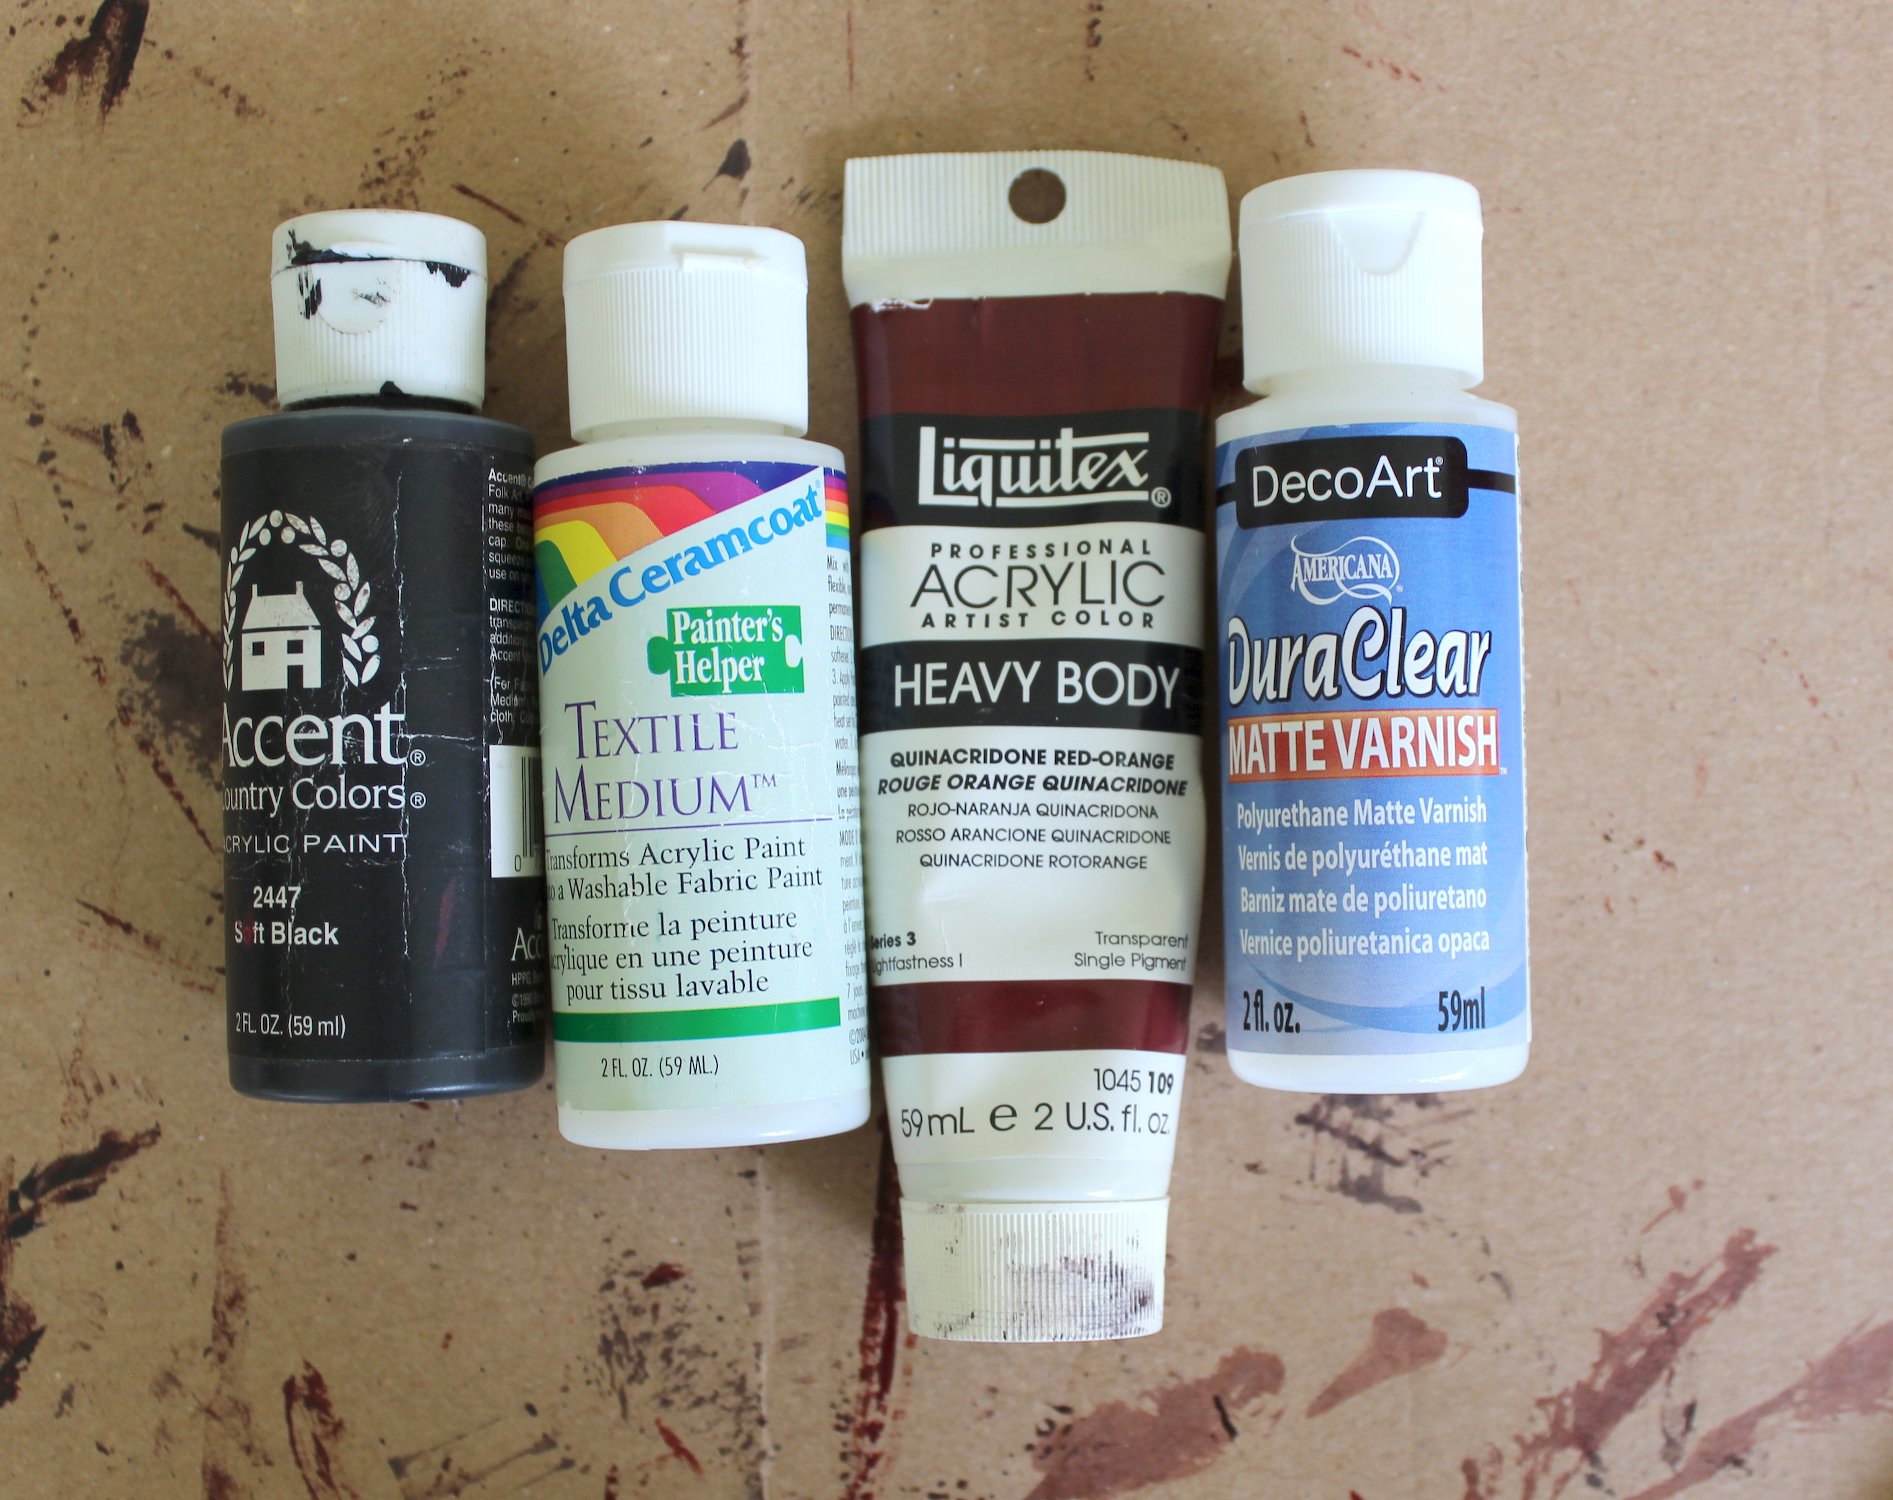
    • Acrylic paints, textile medium, and matte varnish
    • Soft paint brushes
    • Disposable gloves
    • Paper towels
    • Cardboard to paint the shoes on
    • Plastic bags
    • Paper plate to use as a pallet and something to use as a mixing tool

    I stuffed the shoes with the plastic bags so they would keep their shape while painting and to keep the paint off the inside.

    The textile medium calls for 2 parts paint to one part medium. I kept to this ratio, adding a small amount of water to thin the paint out.

    For an oxblood color I added only a few drops of black to the Quinacridone red-orange to deepen the shade. I had to remake the color several times as I painted and learned it is easy to go overboard on the black.

    I started painting the shoes in with thin layers to start with, wanting to “stain” the material to keep the white from showing through later. After the first three layers of paint (which unfortunately I don’t have photos of) I thinned the paint out less and concentrated on coverage.

    This is where the soft brush is very useful it will help keep brush strokes to a minimum, but be sure to watch out for brush hairs getting stuck in the paint. There are a few in mine that I wasn’t able to remove in time.

    The last two layers of paint I thinned out again, working on shifting each shoe to a similar color. As I remixed the paint color several times there were some subtle variations in tone.

    My last pass on the shoes was around the edges and along the back of the strap. This was to keep any of the white material from being glaringly obvious.

    Painted shoes in an oxblood color

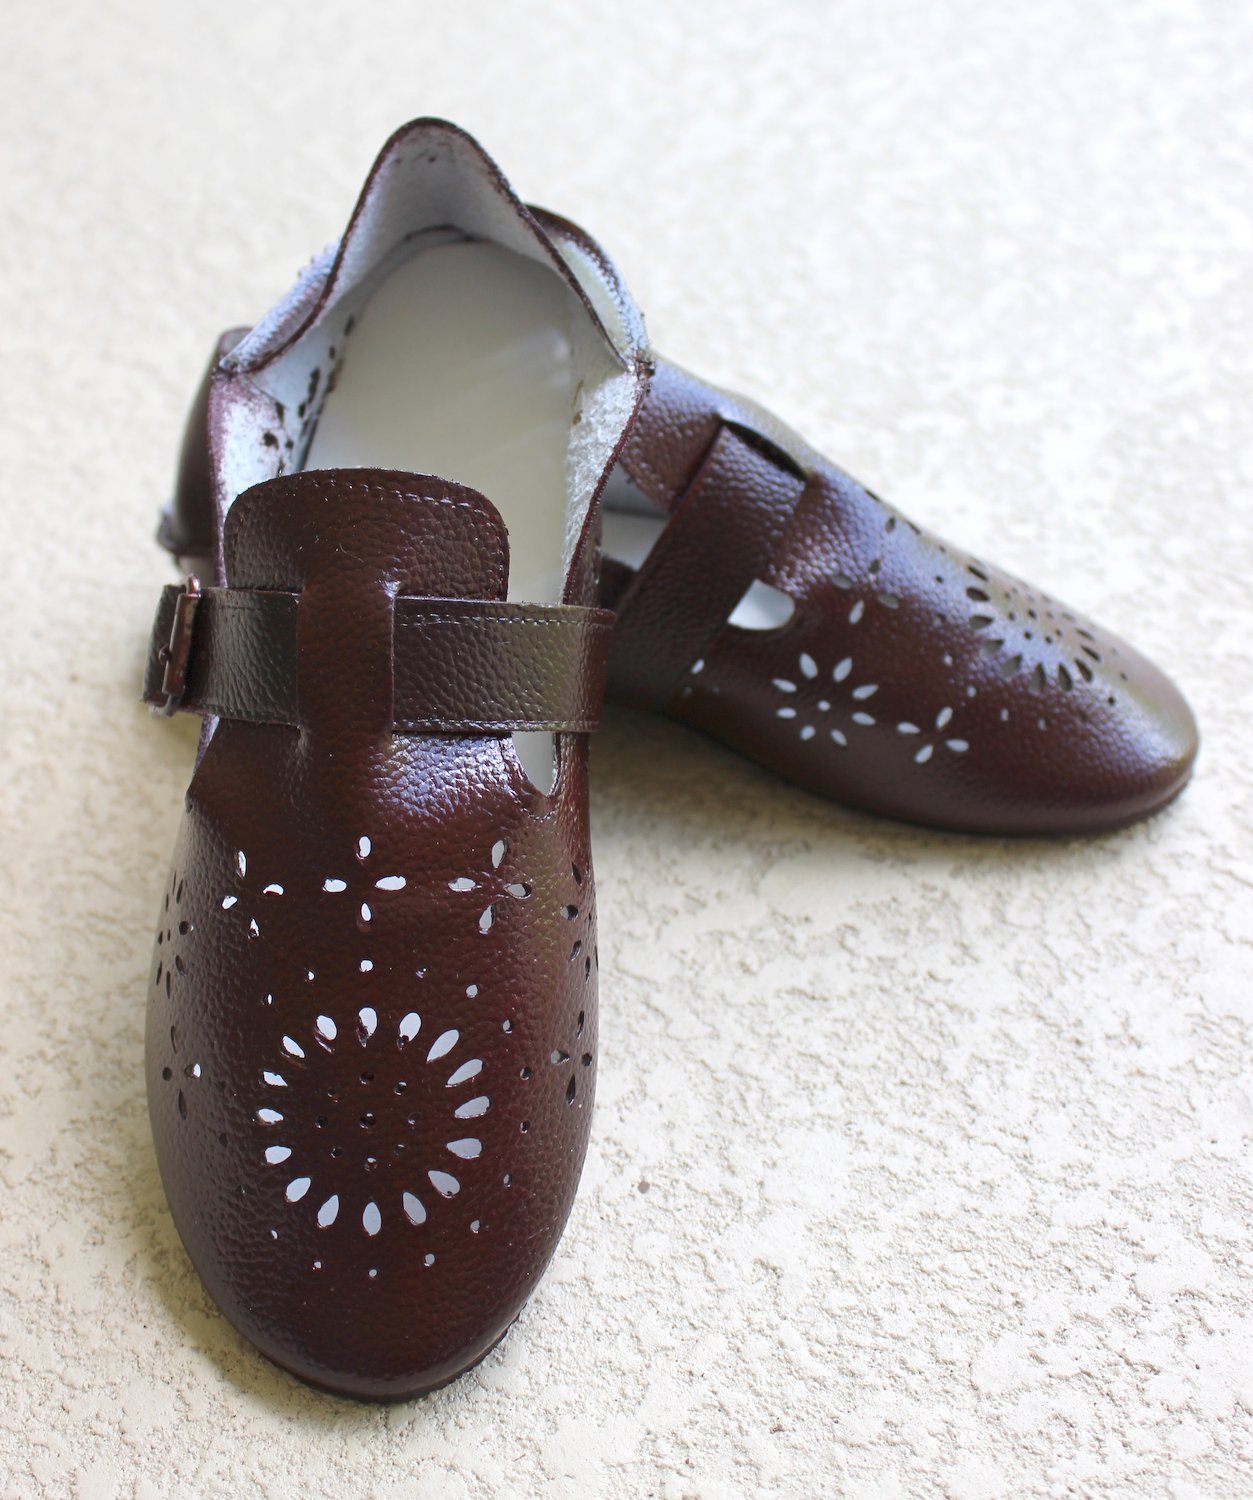
    I let the shoes dry for a few days just to make sure the paint was set. The acrylic and the textile medium dried to a glossy shine and also left the shoes slightly tacky (enough that they tried to stick to each other). As I was not able to heat set the shoes as the textile medium suggested I decided to seal them instead with a matte varnish.

    I gave them several thin coats which worked well to seal them (no more tackyness yay!) but done very little to knock back the gloss. Once I wear them the gloss may on longer be an issue, but it is something to keep in mind when working with textile medium.

    All I have left is some final clean up. I need to clean out the cutwork sections that filled up with paint and take some steel wool to the buckles.

    Other Painting Options

    For anyone who wants to paint their shoes with less fuss I have heard very good things about Angelus Leather Paints for shoes but have not tried them.

    *These shoes were very inexpensive, there was some loose thread that needed to be clipped and a few specks of glue to remove. They are not perfectly period shoes but would pass the 10-foot rule. For indoor events a few times a year I think they will hold up fine. For outdoor use, I would add insoles and change out the buckles.


  • WiR: Hand Sewn Silk Sleeves Done!

    WiR: Hand Sewn Silk Sleeves Done!

    Gold and blue silk sleeves

    16th-Century Handsewn Silk Sleeves

    This week I finished the silk sleeves, yay! The last few steps ended up being very fiddly, as I needed to change the curve of the underarm section of the armscye and take it in by an inch.

    The last few steps ended up being very fiddly. I needed to change the curve of the underarm section of the armscye and take it in by an inch. One sleeve was finished when I decided this, so I spent some quality time with the seam ripper unpicking the main handsewn seams and the prick stitching I put in to control the fraying.

    Once I adjusted the armscye all I had left was the sleeve hem. Match seams, finger press the linen down by 1/2 an inch, pin and fold silk down to match.

    Done.

    gold and blue silk sleeves with eyelets

    Everything else on my worktable has been eyelets this week.

    The Eyelet Countdown

    • 4 eyelets left on the early 16th-century olive wool kirtle
    • 12 on my 14th-century cotehardie
    • 18 on the black silk taffeta kirtle
    • 6 on the silk sleeves
  • WiR: A Pair of 16th Century Silk Damask Sleeves

    WiR: A Pair of 16th Century Silk Damask Sleeves

    The main project this week was revising my 16th-century sleeve pattern and making up a pair of test sleeves. I was not happy with how my sleeves turned out in the caramel wool petticoat bodies. Some of that was from how thin and lightweight the fabric was, and some of it was from the pattern I used.

    I plan on revisiting those linen sleeves to fix some of the issues, but knew I needed a new base pattern that didn’t cause so many headaches.

    A New Sleeve Pattern

    Over the years I’ve drafted a lot of sleeve patterns. I’ve drafted them using modern drafting methods, using diagrams in costumes books and at least one-time using aluminum foil. Sometimes they have been successful, other times they have been a hot mess.

    This time around I turned to Juan de Alcega’s Tailors Pattern Book but instead of breaking out the bara strips, I opened up Inkscape and traced the sleeve shape.

    Alcega Sleeve Pattern Tracing

    From there I adjust the pattern shape to have less of a dramatic curve and match my arm measurements with some ease included.

    Sleeve Pattern Adjusted

    I printed out my digital pattern, cropping it to fit on two sheets of paper and taped it together. Then I made a mock-up out of some rough linen, giving myself some extra wide seam allowances for adjustment. It took some back and forth in front the mirror with pins until I was happy with how the pattern was shaping up.

    Measure 400 Times Cut Once

    Gold and blue silk sleeves with clapper press

    A few weeks ago I ran across a very good deal on some scrumptious silk damask, it was dirt cheap due to a flaw in the weave. Into my shopping cart it went along with some linen to use for various projects. I figured I could cut around the flaws.

    When the fabric arrived I found the weave flaw ran all the way down the yardage. The thought crossed my mind to try and reweave the damage, but I decided I was not *quite* that dedicated.

    I cut out my linen lining first and then jigsaw puzzled my way down the silk trying to pattern match where I could. Not having the missing thread run through the main part of the sleeve was a challenge as I wanted to use as little of the fabric as possible.

    To make everything fit I ended up piecing the upper back of the left-hand sleeve.

    Blue and Gold Silk Damask Sleeve Pieced

    It took me at least an hour to cut out the sleeve, due to not wanting to mess up a very nice fabric. I also cut it flat so each pattern piece needed to be flipped over while I triple checked that I did not somehow cut two left sleeves (which has happened before).

    Once everything was cut out I sewed the linen lining together using the running stitch with a small section of backstitching at the elbow points to reinforce that area. Next, I sewed the silk together using cream silk thread with the back stitch.

    Blue and Gold Silk Damask Sleeve Back Stitched Seam

    As I handled the fabric it started to fray. Usually, I would overlock or zig zag the raw edges to prevent it. But I was worried about the extra bulk of the threads shadowing through the silk.

    Instead, I prick stitched the seam allowance down, taking tiny stitches through the outer fabric, this also meant I did not need to worry about ironing the seam flat.

    Blue and Gold Silk Damask Sleeve Seam Allowance Sewn Down

    Once all the sleeves were together I put the linings in and basted along the top of the sleeve cap. Then I tried them on with a kirtle, pinning the top of the sleeve to the shoulder strap and looking at where the wrinkles formed. They needed some adjustment.

    That is where I am now. There is a pin stuck in where the underarm curve needs to dip down a little more. I have some narrow bias tape cut from scrap linen to bind the edges and some braid should be arriving in a week or two to trim the seams.

  • Hand Sewn Red Linen Hose

    Hand Sewn Red Linen Hose

    manuscript-man-putting-on-stockings
    Queen Mary Psalter (British Library Royal 2 B VII, fol. 72v), c. 1310-1320

    This week I unearthed some unfinished projects while “Cleaning” aka where did I put my photo box? How could it have vanished? I’ve looked in that box three times now and I’m running out of places it could be.

    That is the problem when I clean, I put things in a safe place and never find them again.

    But, nestled happily in a plastic bag was a half finished pair of linen/rayon hose in screaming red. I think I started these two years ago when I wanted a small project I could work on while watching Netflix. I know I draped a pattern for hose at least 4 years before out of some thin cotton but never got around to the actual making till now.

    Socks have never been high on my priorities list, most of the time I wear O Rayons from Sock Dreams under my skirts.

    My memory is a little fuzzy but I think I draped my original pattern from this tutorial: http://www.faucet.net/costume/research/hose.html

    Bright Red Hand Sewn 16th Century Linen Stocking Bright Red Hand Sewn 16th Century Linen Stocking Close up of Gusset


    I sewed the right foot up with dark red Londonderry linen thread using the backstitch. Then referencing Patterns of Fashion 4 I trimmed down the seam allowances along the foot, sewed down the seam allowance along the gusset with the running stitch and whip stitched over the top of the gusset point to reinforce that area.

    The fit is good if a little loose. By the way that’s my sleeve form and some quilt batting, not my leg.

    I still need to sew up the left foot and may make some adjustments to my pattern.


  • 16th Century Pocket Prototype

    16th Century Pocket Prototype


    Based on a few different museum pieces I did a mock-up/prototype for a 16th-century pocket. These were worn under skirts, much like their 18th-century descendants. This is version 1, which I made a little roomier for our modern day needs. It will fit a phone, money and other often necessary items.

    It is all machine sewn but the only stitching that shows is at the top where the pocket is sewn down to the silk taffeta waist tie.

    I hope to offer a few of these in my Etsy shop soon.


  • Petticoat Bodies Done!

    Petticoat Bodies Done!

    I’ve had the petticoat bodies done for a few weeks now and completely forgot to post the finished photos here.

    Opps.

    In my defense I haven’t been able to get photos of me in them yet, part of me wants to go out and rent a chicken (can one rent a sweet-tempered chicken for photos?) and get a semi-period looking backdrop going on, but right now that doesn’t look like it is going to happen.

    Where we last left off I had things to fix in the bodice, and after pinning sections, unpinning them, and squinting in the mirror I realized the shoulder straps had stretched out despite my efforts at steaming the bias stretch out of them. I took them up at the back shoulder seam and everything fell into place.

    Petticoat bodies and green apron Petticoat bodies front with no apron close up Petticoat bodies front with no apron full shot Petticoat bodies front with apron full shot Petticoat bodies back

  • Finishing up the Petticoat Bodies

    Finishing up the Petticoat Bodies

    The holidays are over, I’ve eaten my own weight in cookies and it is time to finish up the petticoat bodies.

    Last time I posted I finished the bodice and put in the lining. Over the holidays I cut out the skirt, hand sewed it together, and bound the hem.

    Red wool fabric for the petticoat bodies skirt

    My camera did not like this shade of red most of the time.

    Petticoat skirt pattern laid out on the red wool fabric

    Still not the correct shade of red.

    The skirt only took 2 yards and 7 inches of fabric and I was able to use the off cuts and scraps for hem binding.

    Scraps used to bind the petticoat skirt hem

    My handful of scraps before making the binding.

    Running stitch used on the petticoat skirt hem with linen thread

    I used the running stitch for skirt construction with the occasional backstitching where gores met for extra strength. The fabric is a lightweight flannel and doesn’t fray so I don’t need to worry about finishing the edges.

    Flattening the petticoat skirt seams with a wooden clapper

    Clapping the seams!


    Whipstitching the petticoat skirt edges down with linen thread

    I left the skirt side seams open at the top so I’d have access to pockets. To finish the edge I just whip stitched the fabric down.

    Petticoat bodies and sleeve on the dress form

    How it currently looks with at least one sleeve pinned on and the basting threads still in.

    Up next, troubleshooting the armscye problem area! My experiment in using wool binding has made that area stiff + the seam allowances from where I pieced the strap. Pinning the sleeve on also caused some pulling. I may need to adjust the angle of the strap by unpicking the binding and adjusting where the strap and bodice meet. What do you guys think?